
This article provides guidelines on installing Klarna in your WooCommerce store.
Before you begin, please ensure the following:
- Your store is accessible via HTTPS (SSL certificate is required).
- You have an active agreement with Klarna.
- To check Klarna’s country availability, visit: Klarna for WooCommerce
Begin by downloading the Klarna for WooCommerce extension from the official source

Ensure your environment meets the following version requirements:
- PHP: Check your PHP version here.
- WordPress: Confirm your WordPress version is compatible here.
- Klarna Plugin: Verify the extension version here.
- WooCommerce: Check your WooCommerce version here.
After downloading, install the plugin in your WordPress admin panel. Navigate to Plugins > Installed Plugins > Klarna for WooCommerce > Activate to enable the extension.

Log in to the Klarna Merchant Portal and navigate to the Settings section to generate your Klarna API credentials (API username and password).
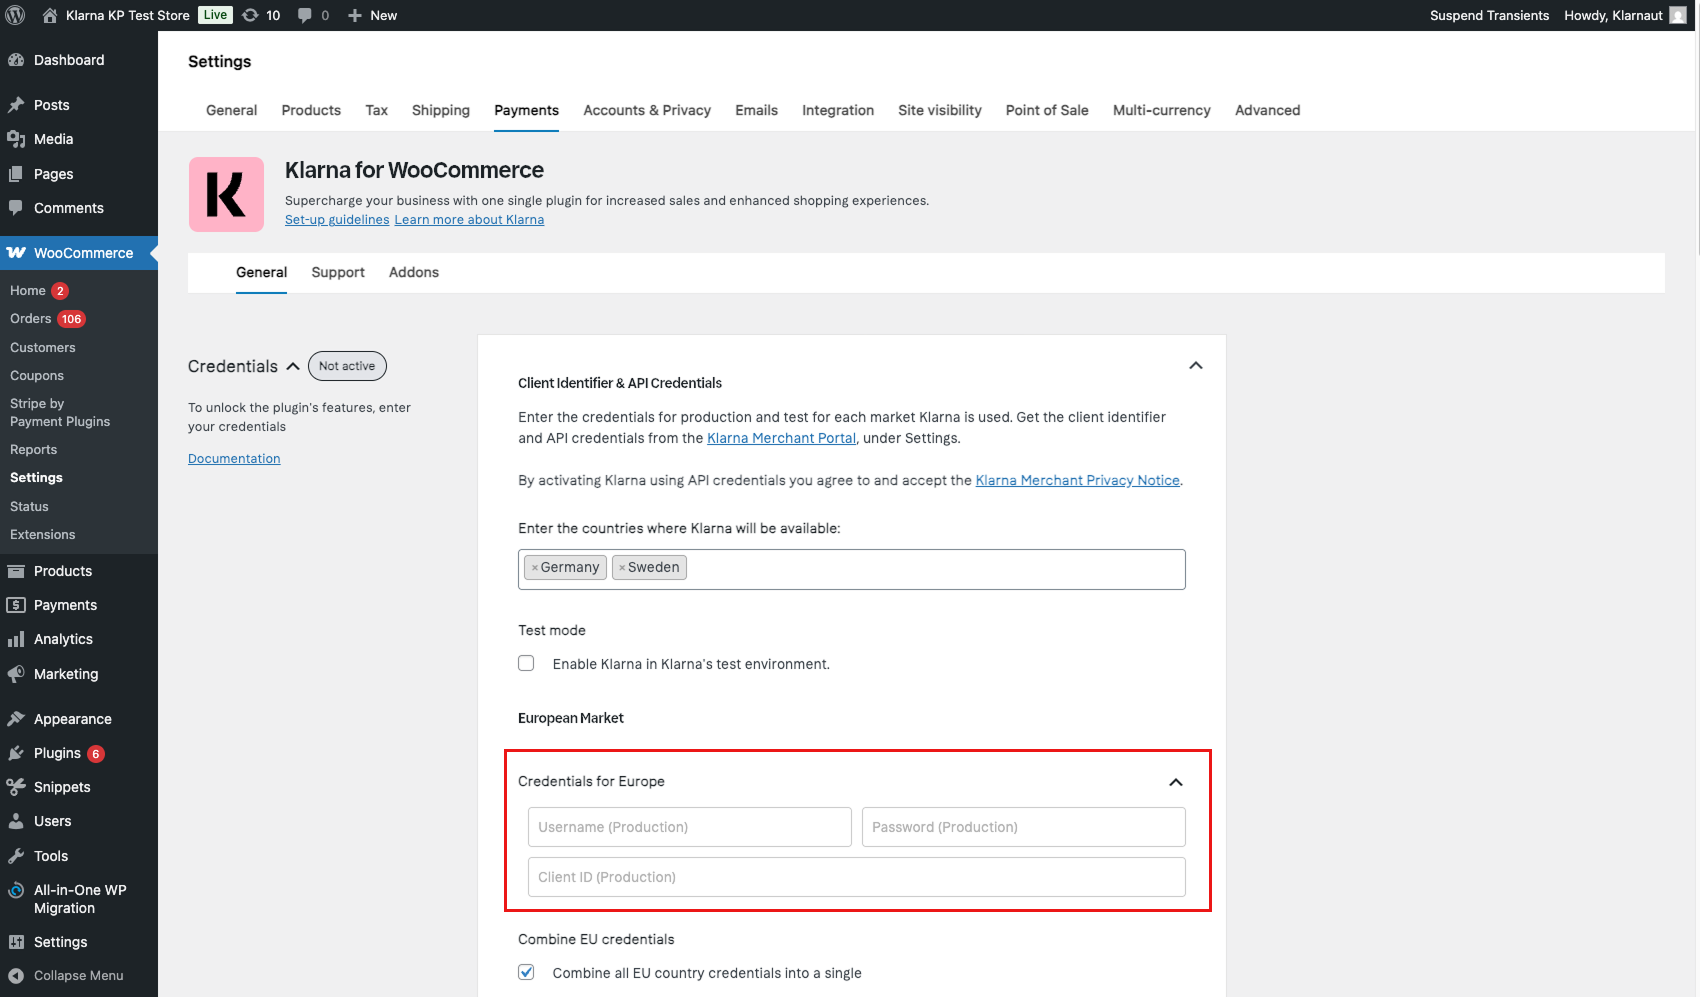
Enter the generated API credentials in the appropriate section for the region(s) where you intend to offer Klarna.
Klarna API credentials are specific to either Production or Test environments—they cannot be used in both. In the picture for step 4, you can find an option to enable or disable Test Mode as needed.
Before accepting live payments, we recommend that you use Test Mode to ensure your integration works as expected. Please follow these steps to set up the test mode for your WooCommerce store:
- Enter this page to sign up for an European test account. If you're merchant is on another market, please enter the page and select the accurate market for your store.
- Type your email address and click SIGN-UP. You'll get a confirmation email to this address.
- Open the confirmation email and click Activate account.
- Finish setting up your account by
- Accepting the Terms & Conditions
- Choose a new password
- Enter your name
- Log in to the Merchant Portal
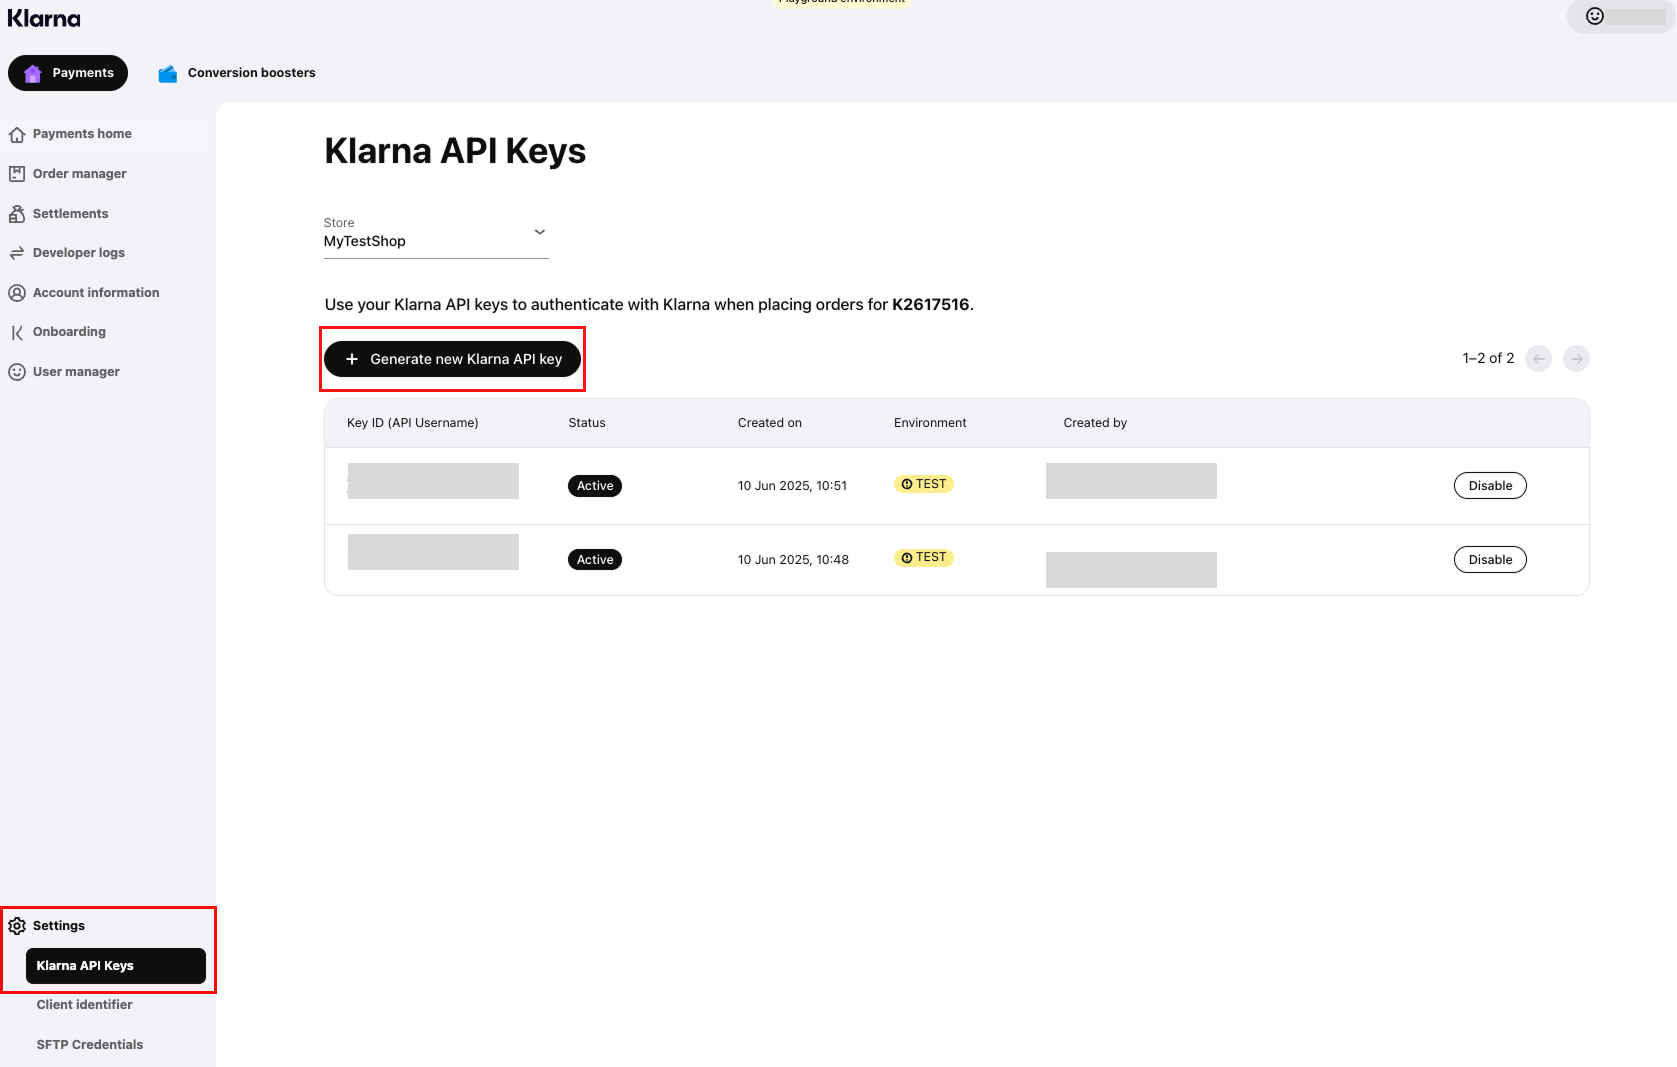
- Once you have accessed the Merchant Portal, go to Setting > Klarna API Keys and click the Generate Klarna API key button.
- Download the .txt file and close the dialog box.
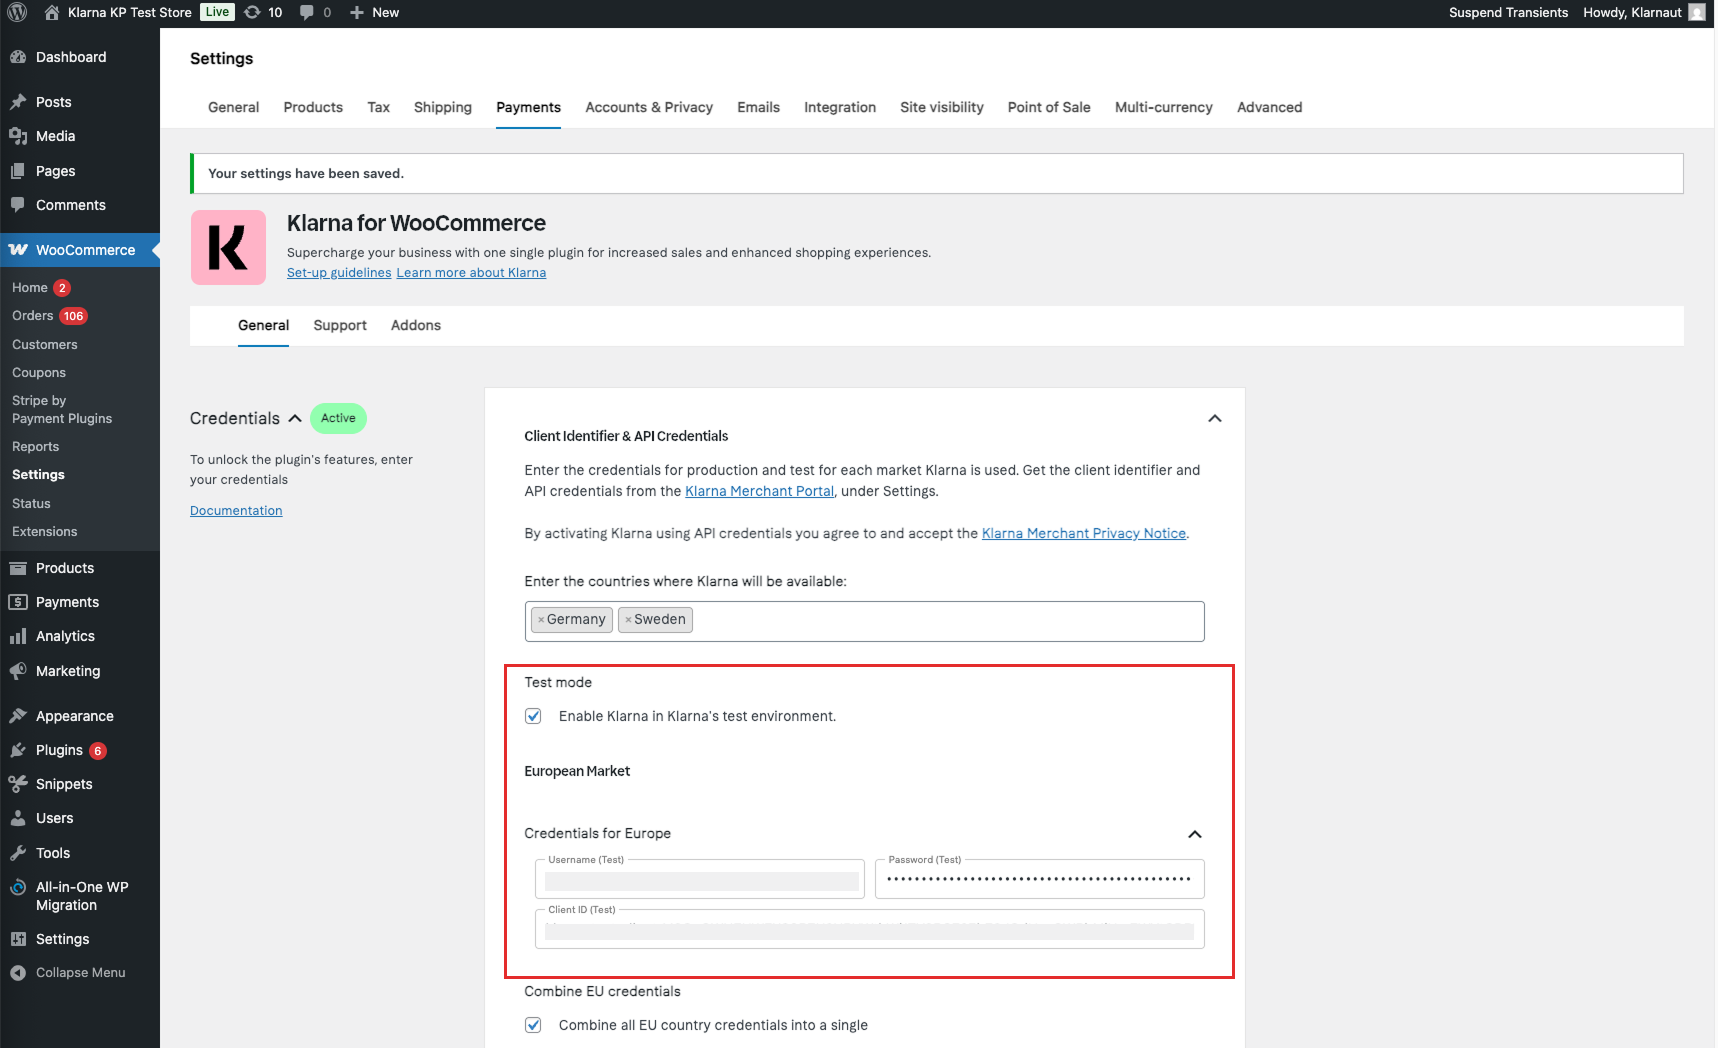
- Back in your store admin panel for Woo, mark the box "Enable Klarna in Klarnas's test environment". Enter your new Klarna API credentials that you received for the playground environment and click "Save Changes".<br />
For detailed documentation on Klarna for WooCommerce, see here. If you experience any issues first check this Troubleshooting Guide step by step. If still not resolved, contact merchant@klarna.com for support.