

Overview
With On-site messaging, banners inform your customers which payment and financing options are available before they reach the checkout page.
The Klarna extension includes the logic that makes the following adjustments possible:
- Placement position: Placements can be shown on the cart page or product detail page. It can also be shown in the footer along with other available payment methods.
- Placement design: You can modify the look and feel of the banner
You can configure the position and design of the placements in the Admin panel with this path: Stores > Configuration > Sales > Payment Methods > Klarna > On-site Messaging
Retrieve the identifier for On-site messaging from the Klarna Merchant Portal, where you also can **Allowlist **your shop domain in the Klarna Merchant Portal, as documented here.
.png)
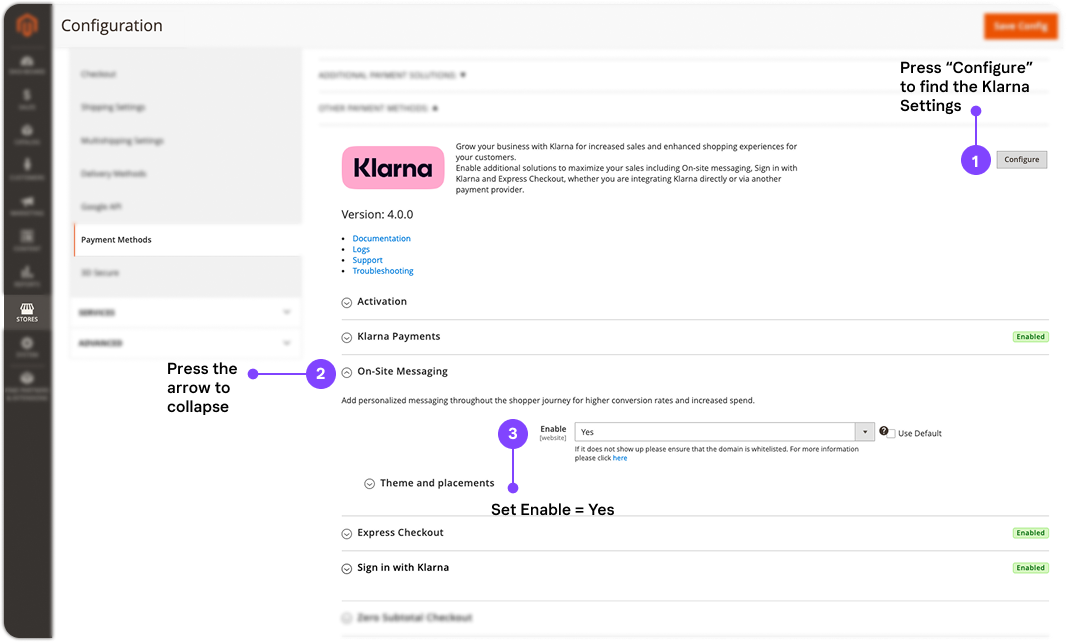
Enable On-site messaging in your Adobe Commerce Admin.
Placement position
You decide where to display messaging in your store. It can be shown on the cart page, on the product detail page, or in the footer of the page.
Tip: If there’s an error, for example, with the API, on-site messaging won’t appear until the error is fixed.
Placement design
Each store can look different and you can choose a design that best matches your store. For example, you can change the width and height of the messaging banner.
The design is predefined on Klarna’s side and the information about it is returned through the API. No manual work is needed except choosing the design.
Configuration
To enable the display of Klarna's On-site messaging in your storefront, perform these steps:
- 1.In the Adobe Commerce Admin, expand the Klarna On-Site Messaging section and set Enable to Yes.
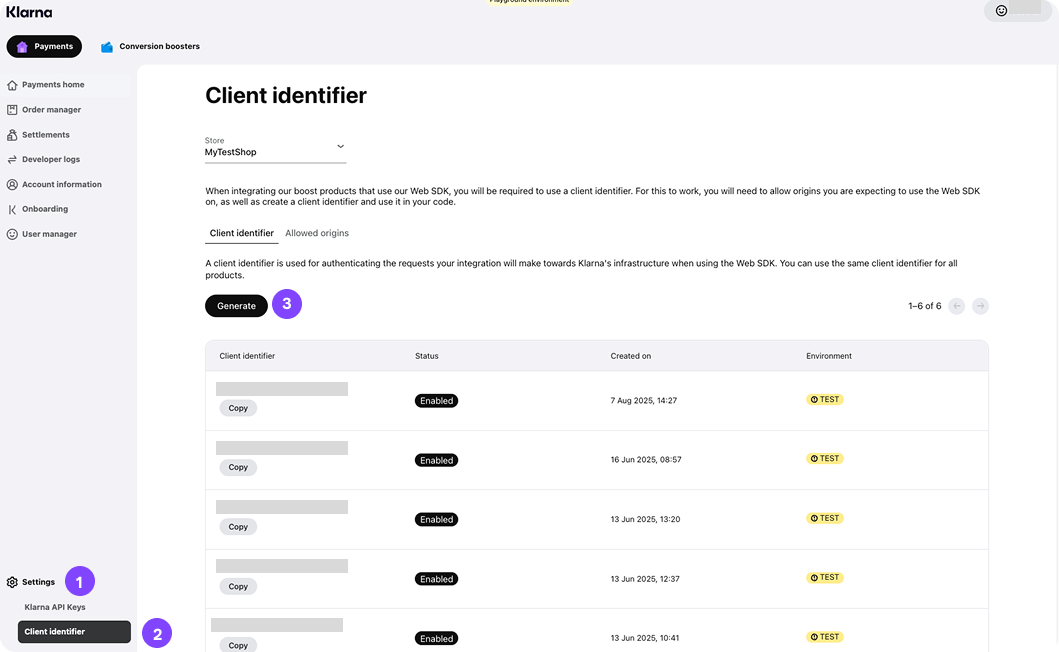
2a. In the Klarna merchant portal, navigate to Settings > Client identifier > Generate. Copy and save the Client Identifier.
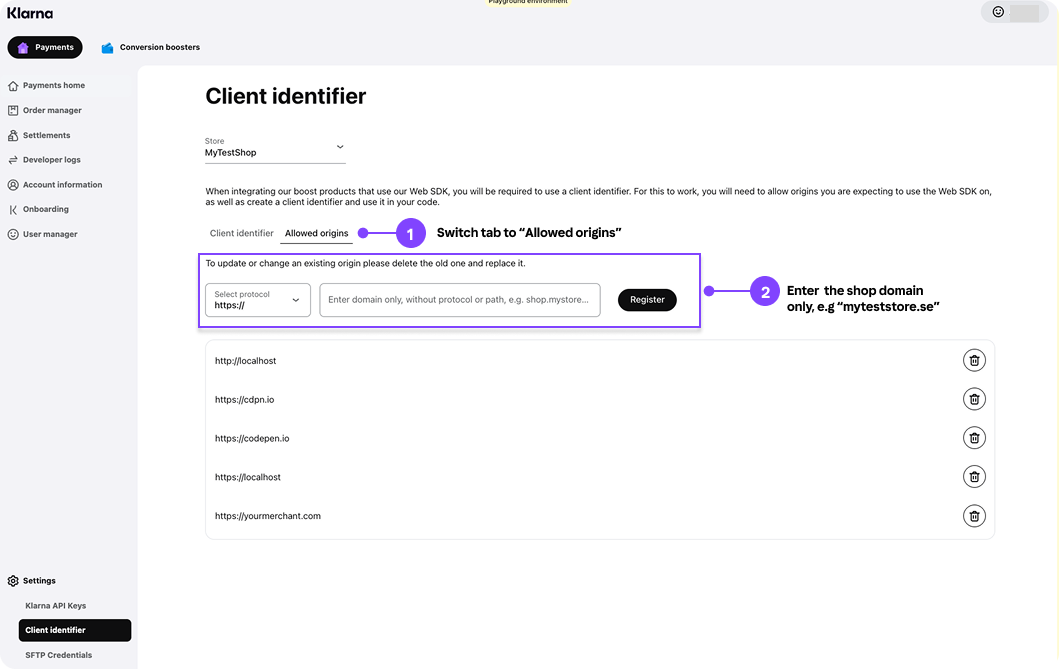
2b. In the very same page, switch the tab from "Client Identifier" to "Allow origins". Enter the store domain only (exclude https://) and press "Register"
- 1.Back in Adobe Commerce Admin in the Activation section, collapse "API credentials" and enter the client identifier value that was being retrieved from the Klarna merchant portal in step 2a.
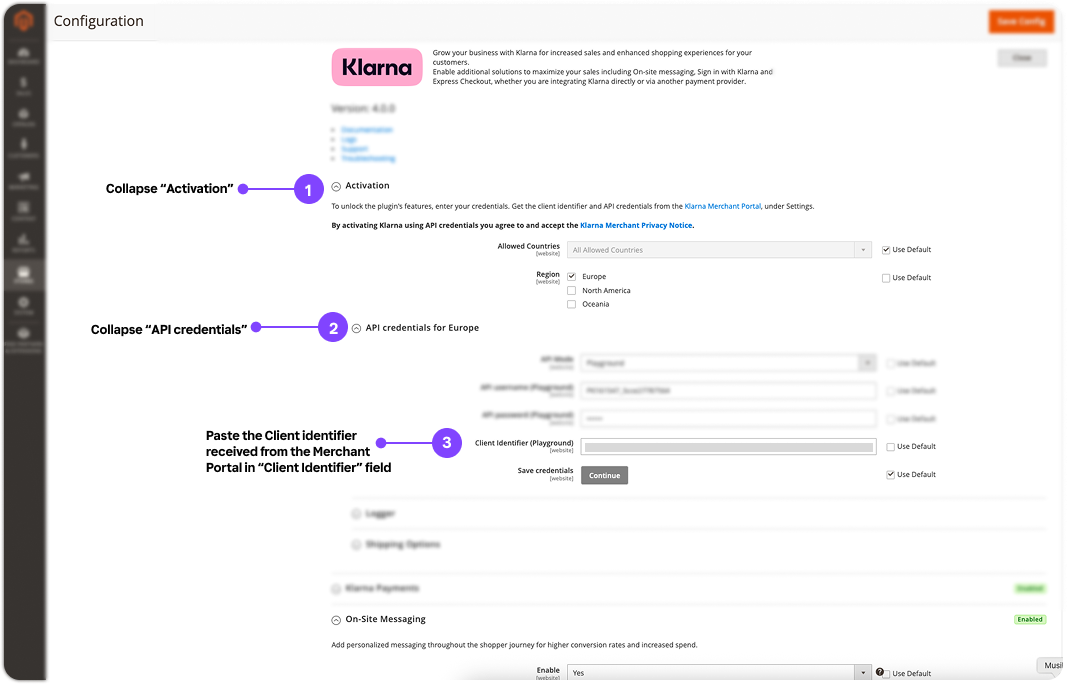
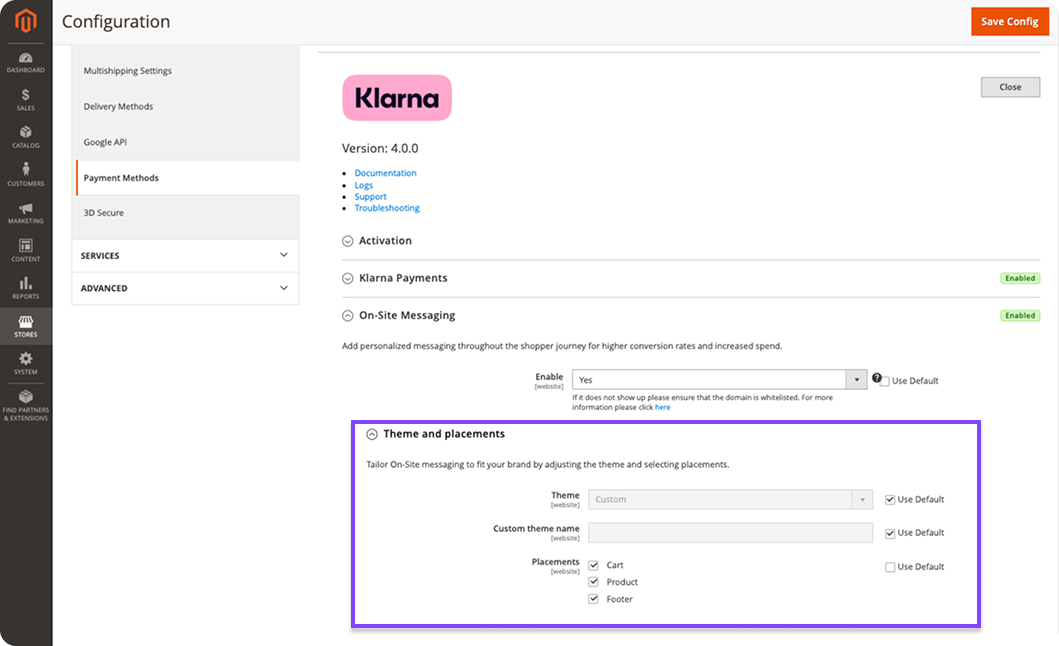
- 1.In the On-Site Messaging section, choose the Theme that you want to apply to Klarnas On-site messages by collapsing "Theme and placements" and select a theme in the drop down menu. Select where you would like the messages to be displayed by using the checkboxes for Placements.
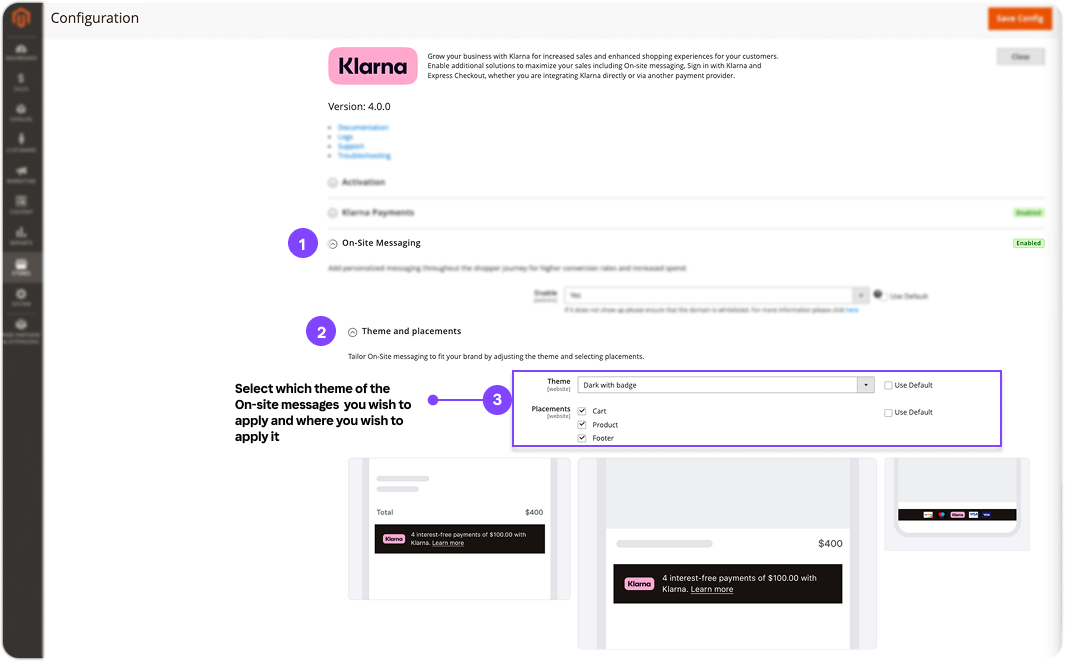
- 1.When complete, press Save Config in the top right corner.
Customization
.png)
- 1.In the Merchant Portal, navigate to Conversion Boosters > On-site Messaging. Click Get started to access additional On-site Messaging options in the left-hand menu.
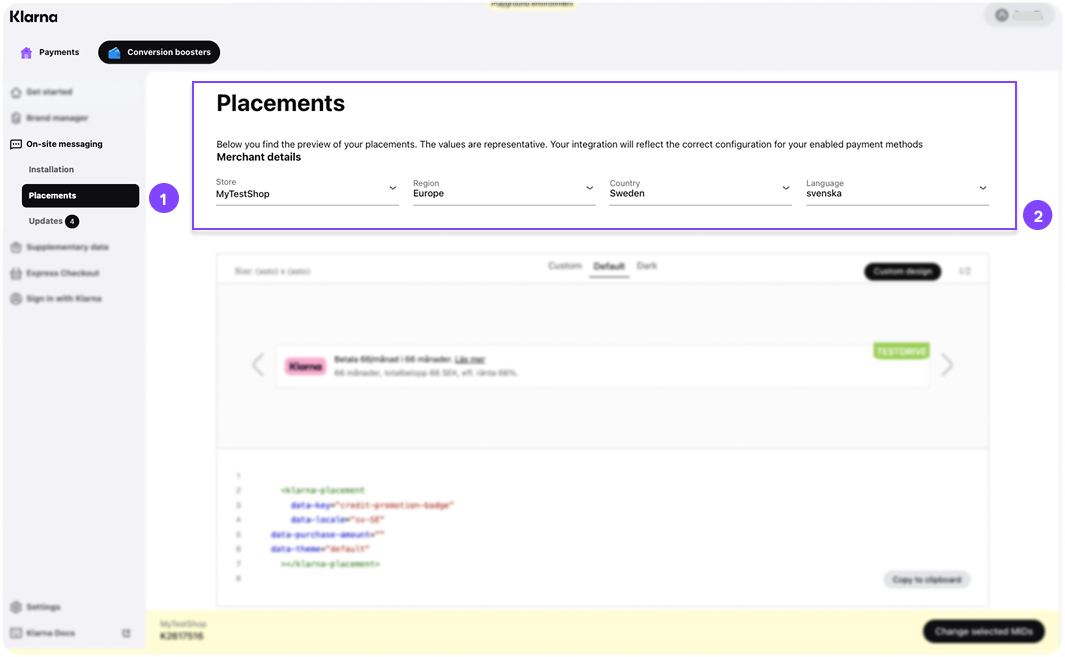
- 1.After clicking Get started, a new option called Placement will appear under On-site Messaging in the left-hand menu. Go to Placement and fill in the requested merchant details at the top of the page.
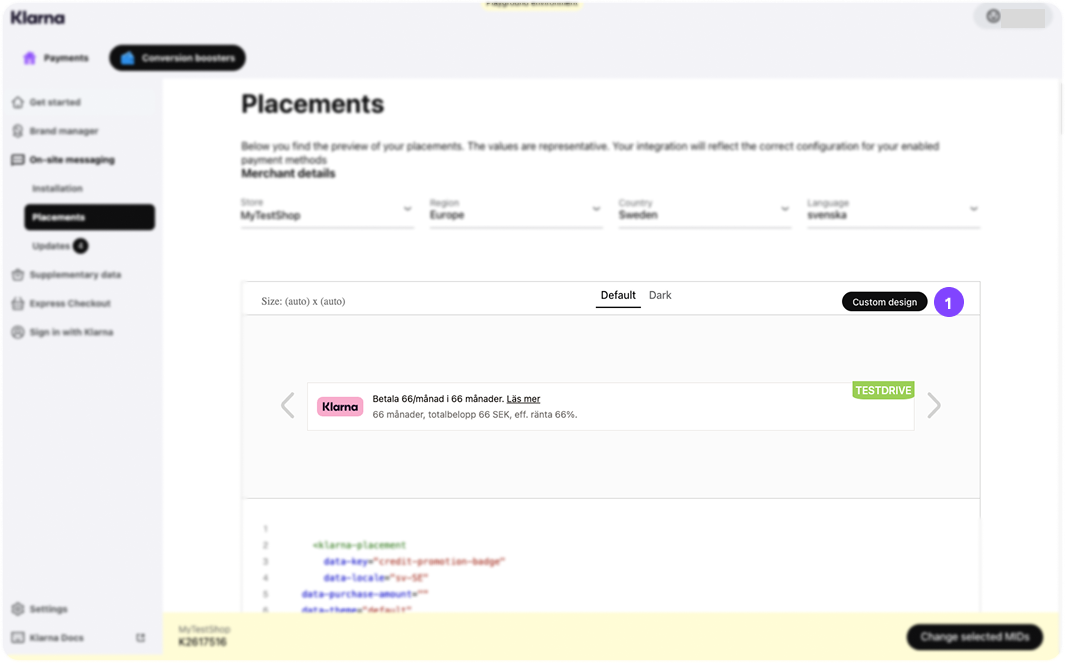
- 1.Scroll down the list of available placements for On-site Messaging and select the placement you want to design. Then, click Custom design.

- 1.On the Custom Design page, use the tabs on the right to customize the message while previewing your changes on the left. When you are satisfied with the design, click Publish and confirm.
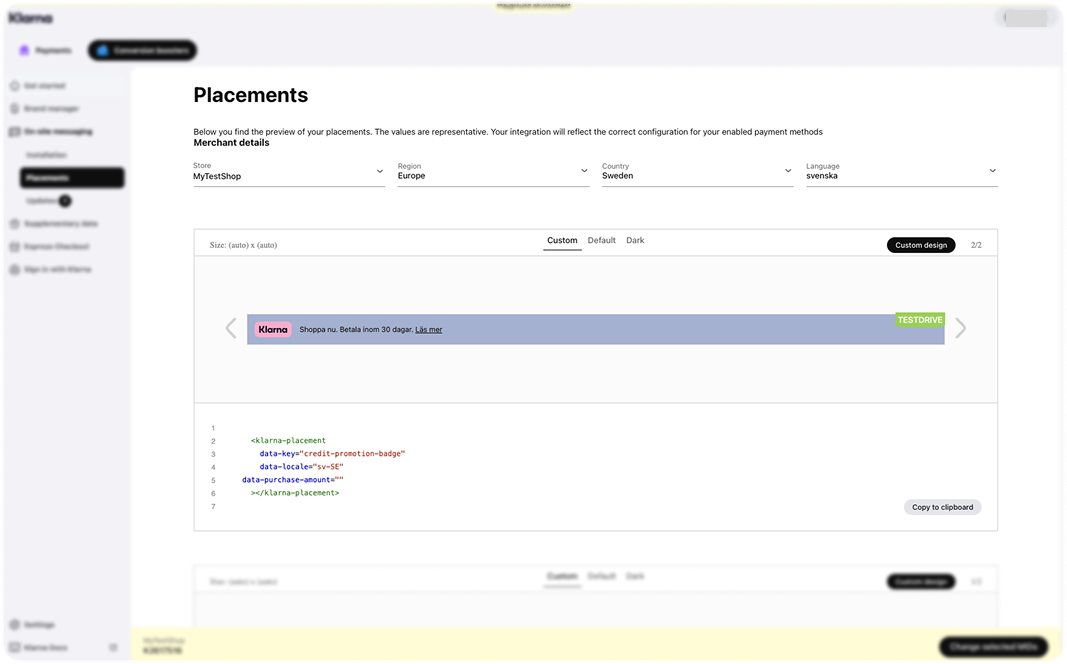
The design should now be visible back in the Placements page.
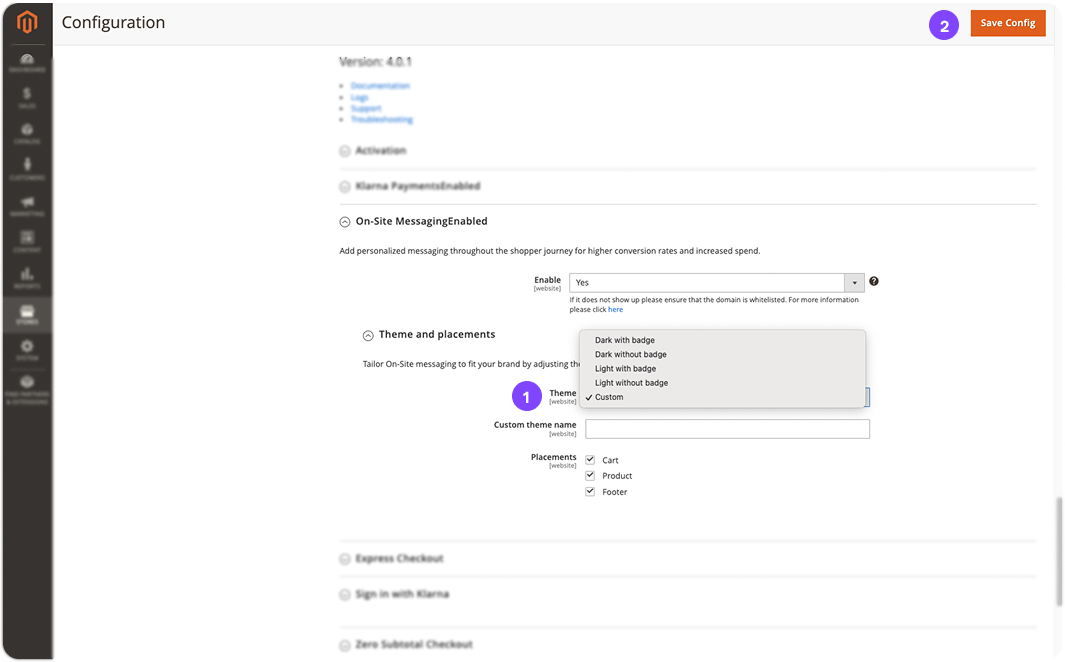
- 1.To make the placement visible in your Adobe Commerce store, go to the configuration settings for On-site Messaging under Theme and placements, set Theme to Custom, and click Save Config in the top right corner.

Your customized placement should now appear in your e-commerce store. If it does not show up immediately, clear the cache and refresh the page.
Related articles