

Sign in with Klarna on SAP Commerce Cloud
The ''Sign in with Klarna'' feature is included in the '''Klarna Add-on''', so no separate installation is necessary. However, a clean build of the package and an update of the database schema are required to generate new data models and data transfer objects (DTOs).
Prerequisites
Before proceeding, ensure the following:
- You have access to SAP Commerce Backoffice for configuration.
- You have administrative rights to perform system updates and resets.
Mandatory code changes
Update the master.tag file
- 1.Open the file located at
<HYBRIS_HOME>\bin\modules\baseaccelerator\deprecated\yacceleratorstorefront\web\webroot\WEB-INF\tags\responsive\template\master.tag - 2.Paste the following code snippet directly below
<jsp:doBody/>:
JSP
1
2
3
4
5
6
7
8
9
10
<c:if test="${isKlarnaSignInEnabled}">
    <input type="hidden" id="currentLocale" name="currentLocale" value="${currentLocale}"/>
    <input type="hidden" id="clientId" name="clientId" value="${klarnaConfigData.credential.clientId}"/>
    <input type="hidden" id="environment" name="environment" value="${klarnaConfigData.environment}"/>
    <input type="hidden" id="country" name="country" value="${klarnaConfigData.credential.marketCountry}"/>
    <input type="hidden" id="scopeData" name="scopeData" value="${klarnaConfigData.siwkConfig.scopeData}"/>
    <input type="hidden" id="redirectUri" name="redirectUri" value="${klarnaConfigData.siwkConfig.redirectUri}"/>
    <input type="hidden" id="buttonTheme" name="buttonTheme" value="${klarnaConfigData.siwkConfig.buttonTheme}"/>
    <input type="hidden" id="buttonShape" name="buttonShape" value="${klarnaConfigData.siwkConfig.buttonShape}"/>
<input type="hidden" id="buttonLogoAlignment" name="buttonLogoAlignment" value="${klarnaConfigData.siwkConfig.buttonLogoAlignment}"/>Update the login.tag file
- 1.Open the file located at
<HYBRIS_HOME>\bin\modules\base-accelerator\deprecated\yacceleratorstorefront\web\webroot\WEB-INF\tags\responsive\user\login.tag - 2.Insert the following code inside the
<form:form action="${action}" method="post" modelAttribute="loginForm">segment, directly below the<ycommerce:testId code="loginAndCheckoutButton">segment:
JSP
1
2
3
4
5
6
7
8
9
10
<c:if test="${isKlarnaSignInEnabled}">


    <div id="klarna-signin-container" style="overflow:auto"><sec:csrfInput/>
</div>

    <c:set var="signinErr"><spring:message code="klarna.signin.error"/></c:set>
    <input id="signinErrHidden" type="hidden" value="${signinErr}"/>
    <div id="klarna-signin-err" title="Klarna Error Message"><span></span>
</div>Building and updating the database
- 1.Navigate to the
HYBRIS_HOME/bin/platformdirectory. - 2.Perform a clean build by running the following command:
ant clean all - 3.Once the build completes successfully, start the server:
hybrisserver.bat - 4.Update the system via HAC:
- 4.1.Go to hac > platform > update.
- 4.2.Check the Update running system and Localize types options.
- 4.3.And select the following extensions:
- 4.3.1.Klarnapayment
- 4.3.2.Klarnapaymentaddon
- 4.3.3.Klarnapaymentbackoffice
Backoffice reset
- 1.Log in to SAP Commerce Backoffice.
- 2.Press
F4to open the advanced mode menu. - 3.In the top-right dropdown menu, select Reset All.
- 4.After the reset completes, press
F4again to return to normal Backoffice mode.
Activation and configuration
Create Sign in with Klarna configuration:
- 1.Search for Sign in with Klarna in Backoffice.
- 2.Click Sign in with Klarna config.
- 3.Select Create New Item (+ icon).
- 4.Fill in the following fields:
- 4.1.Unique Identifier/Code (Klarna client identifier from Klarna's merchant portal)
- 4.2.Scope:
openid,offline_access,profile_name,profile_email,profile_phone,profile_billing_address - 4.3.Redirect URL
- 4.4.Placements
- 4.5.Theme
- 4.6.Button Shape
- 4.7.Button Alignment
Map Sign in with Klarna to common configuration:
- 1.Navigate to Klarna → Klarna Common Configuration in Backoffice.
- 2.Under the General tab, scroll to Sign in with Klarna Configuration.
- 3.Select the previously created configuration and click Save.
Configuration fields
| Attribute | Mandatory | Description |
| Code | Yes | Input any name/code. This will be the internal reference used to recognize and manage Sign in with Klarna configuration within SAP Commerce. |
| Scope | openid, offline_access, profile_name, profile_email, profile_phone, profile_billing_address, profile_country, payments_create_session, profile_national_id | Select Scope to get the information of the user. Mandatory to select (openid , offline_access, profile_name, profile_email, profile_phone) |
| Active | Yes | Check to activate Sign in with Klarna configuration; leave unchecked for it to remain inactive. |
| Redirect URL | Yes | This is for redirection in case the storefront is accessed from mobile devices. |
| Placements | Yes | Multi select option to show the button in Login Page and Checkout Login Page. |
| Theme | No | Color theme of the Sign in with Klarna button: default/light/dark |
| Button Shape | No | Shape of the Sign in with Klarna button: Default, Rect, pill |
| Button Alignment | No | Button Logo Alignment: Left, Right, Center |
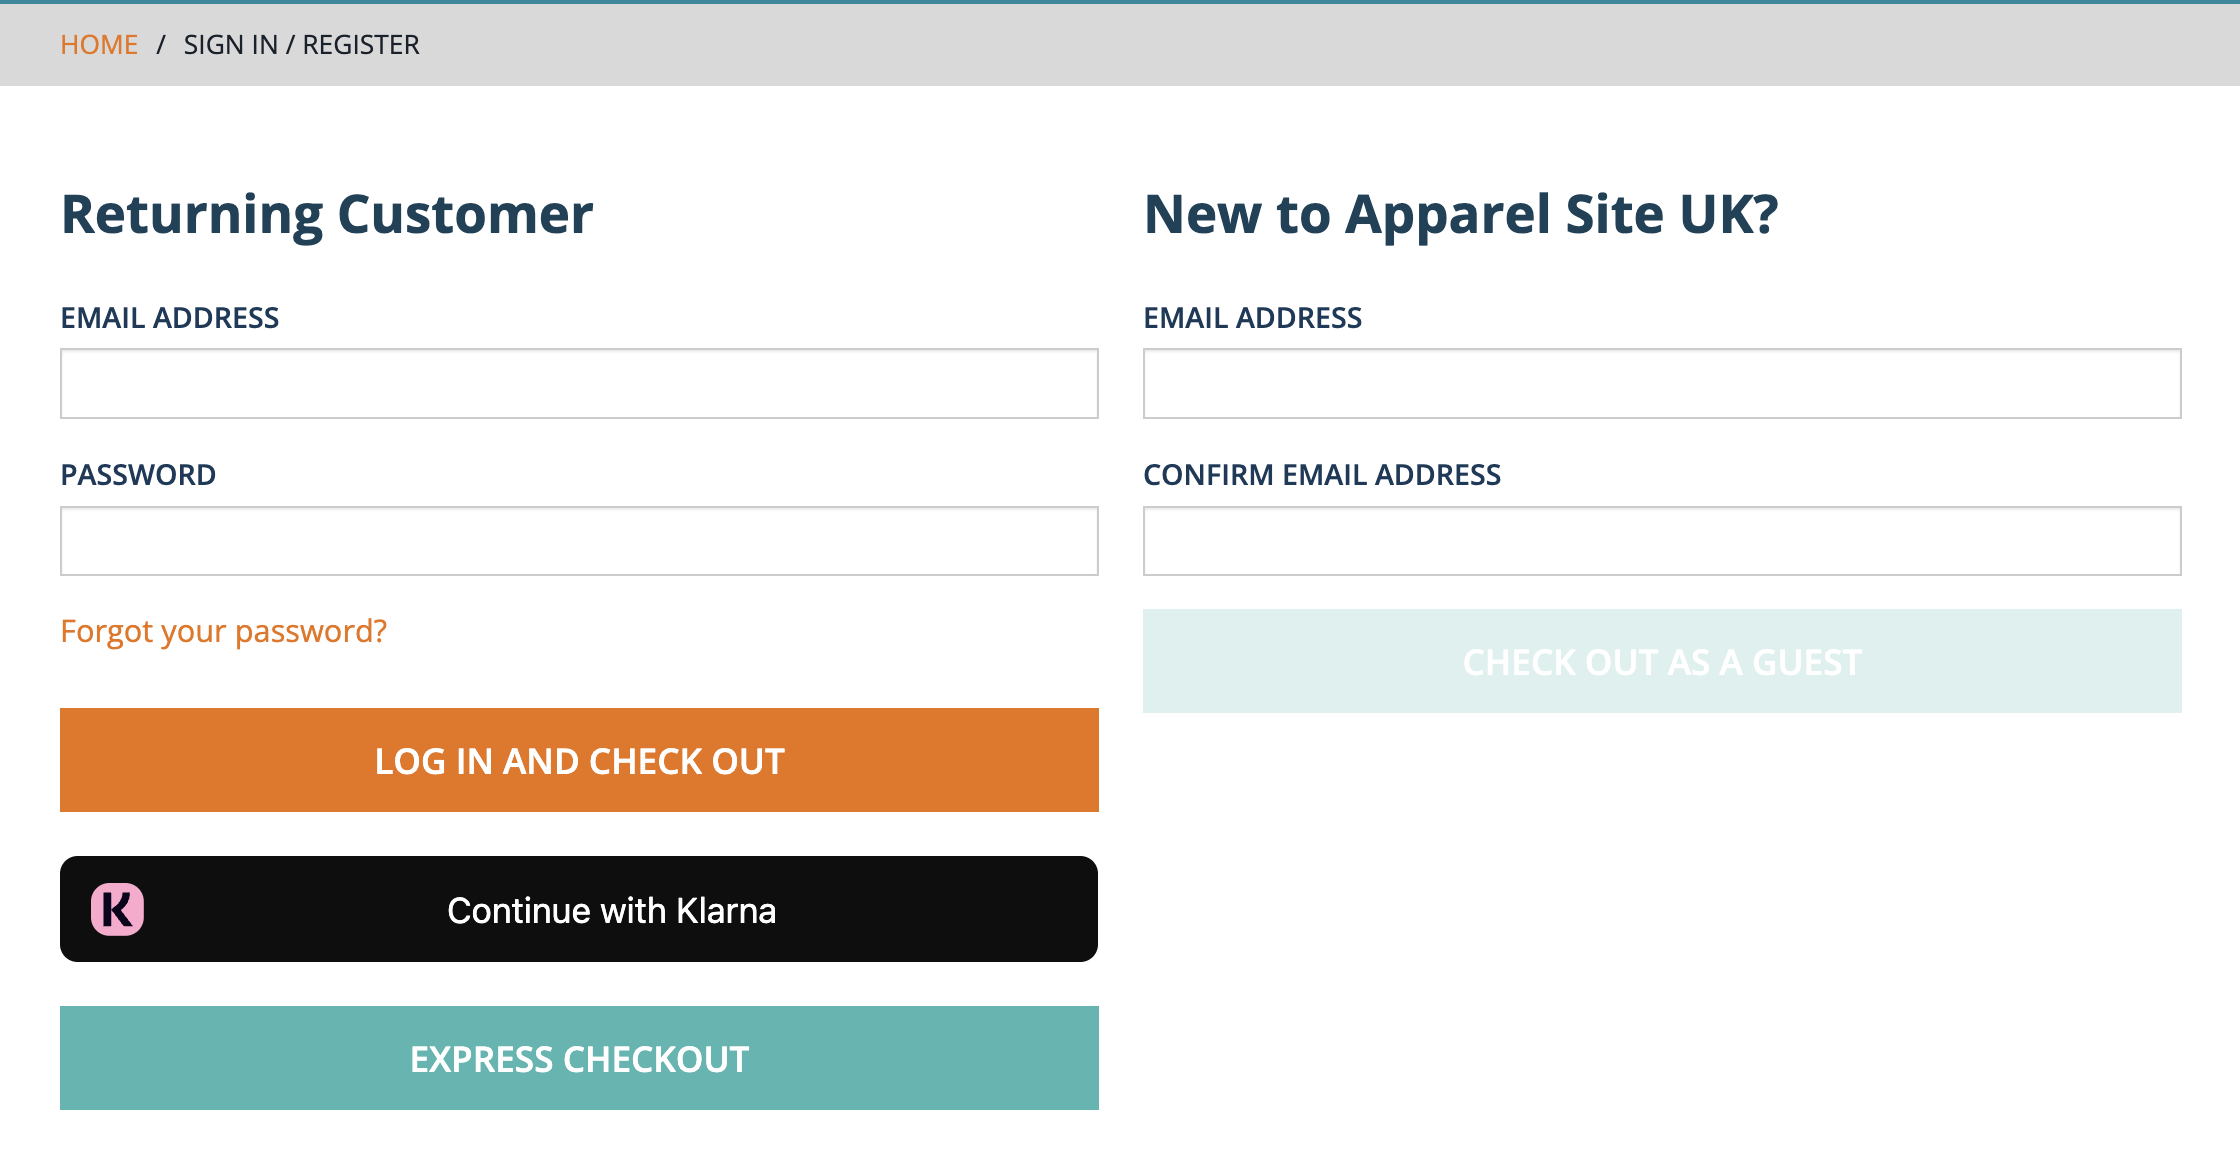
How to test Sign in with Klarna
- 1.Open a new incognito browser window.
- 2.Navigate to the login page of a storefront.
- 3.Click Continue with Klarna.
- 4.Use the email and phone number provided in the sample data.
Expected outcomes
- If the account exists in Klarna and SAP Storefront, the user is logged in, and the accounts are merged automatically.
- If the account exists in Klarna but not in SAP Storefront, a consent page appears. Upon consent, the account is created in the storefront.
- If the account does not exist in Klarna, login fails, and the user can proceed with the normal login flow.
Related articles