
This page explains how to set up and configure the Klarna Payments module in your PrestaShop store.
Link copied!
The Klarna Payments module connects your PrestaShop store to Klarna and gives you full control over setup, styling, payment capture, and order management. It supports sandbox and live environments, automatic status sync, multilingual checkout, and partial captures or refunds, all handled directly from your PrestaShop admin.
Link copied!
There are two ways to install Klarna Payments in PrestaShop:
Link copied!
- Go to Modules > Module Manager
- Click Upload a module
- Select or drag the file
klarnapayments.zip - After upload, click Configure
Link copied!
- Extract
klarnapayments.zip - Upload the klarnapayments/ folder to your server’s /modules/ directory
- Log into the Back Office
- Go to Modules > Module Catalog
- Search for Klarna Payments and click Install
Link copied!
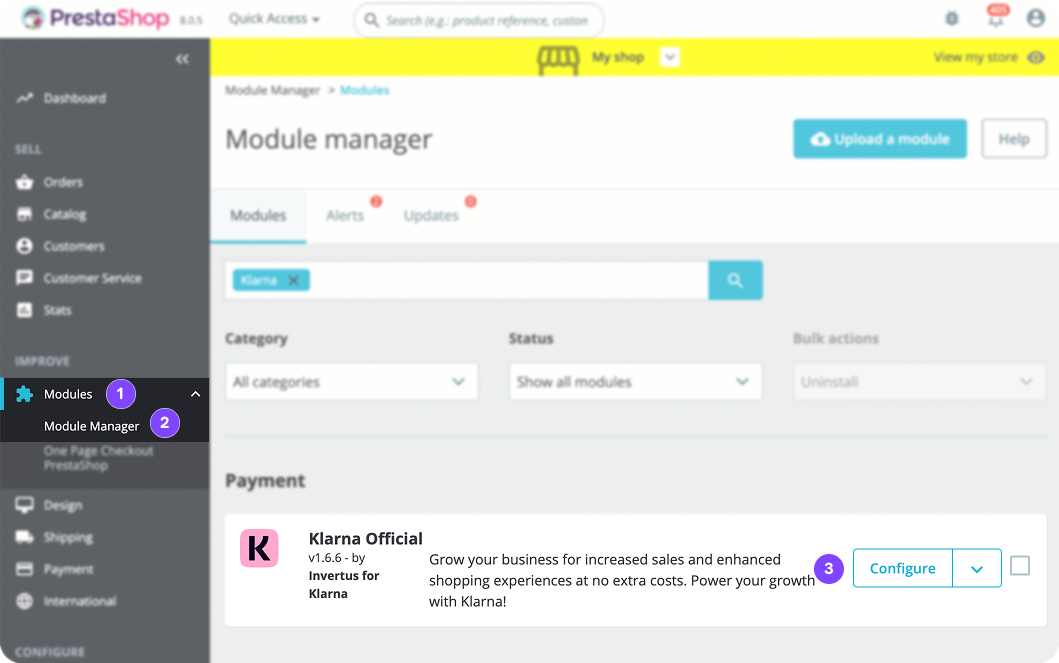
After installation, go to Modules > Module Manager, search for Klarna Official, and click Configure.
Klarna module on PrestaShop back office
Link copied!
1. Select the environment
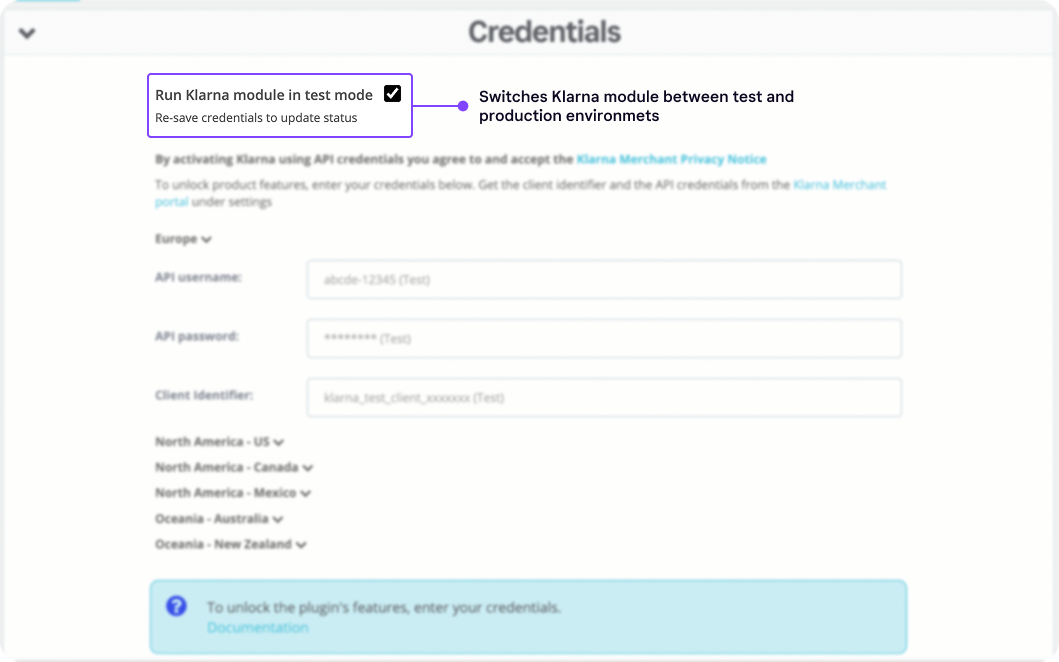
Klarna module environment
Mark the option Run Klarna module in test mode to choose whether the module uses the Klarna test or production environment. Enable this option for test orders, or disable it for real transactions (production).
By default, this option is unmarked. Always confirm you’re using the correct environment when testing or going live.
2. Add Klarna API credentials
Adding API credentials on Klarna module
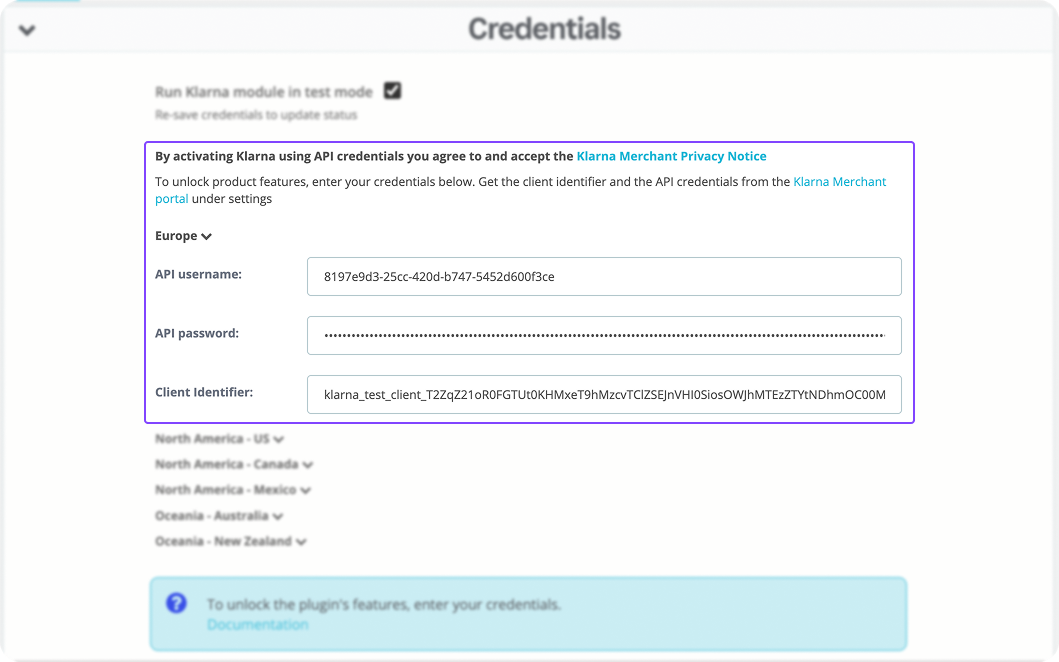
Paste the API username and password you generated in the Klarna Playground or Merchant Portal.
Also select the correct API endpoint (region) that matches your Klarna merchant account.
3. Save credentials and verify connection
After saving your credentials, a green checkmark confirms the connection succeeded.
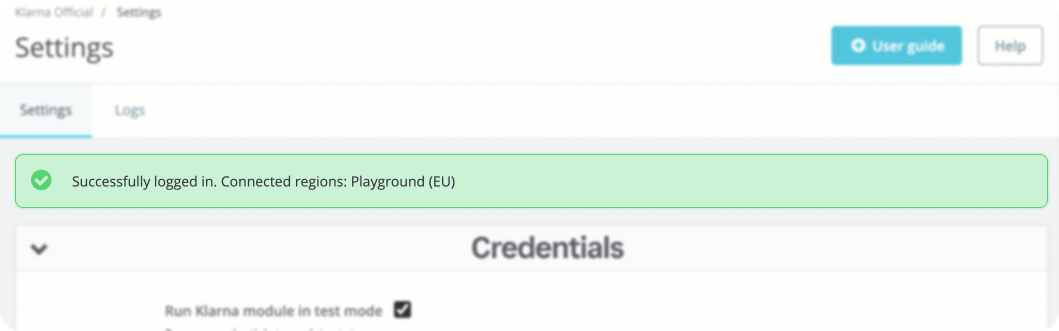
Successfully saving credentials
If credentials are incorrect or the environment is wrong, you’ll see a red notification.
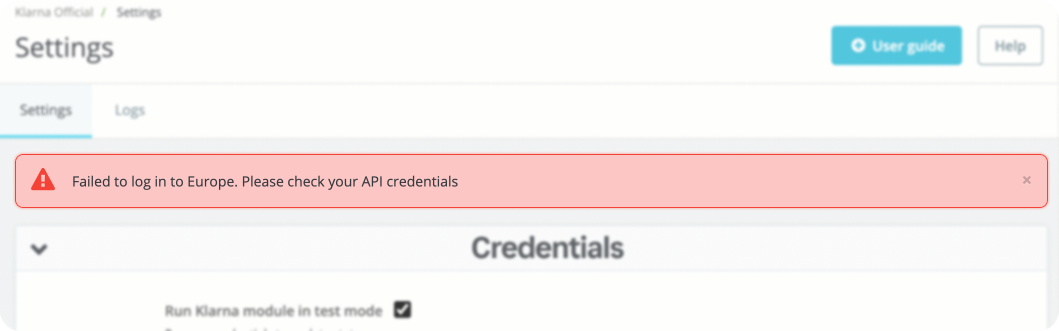
Error saving API credentials
Link copied!
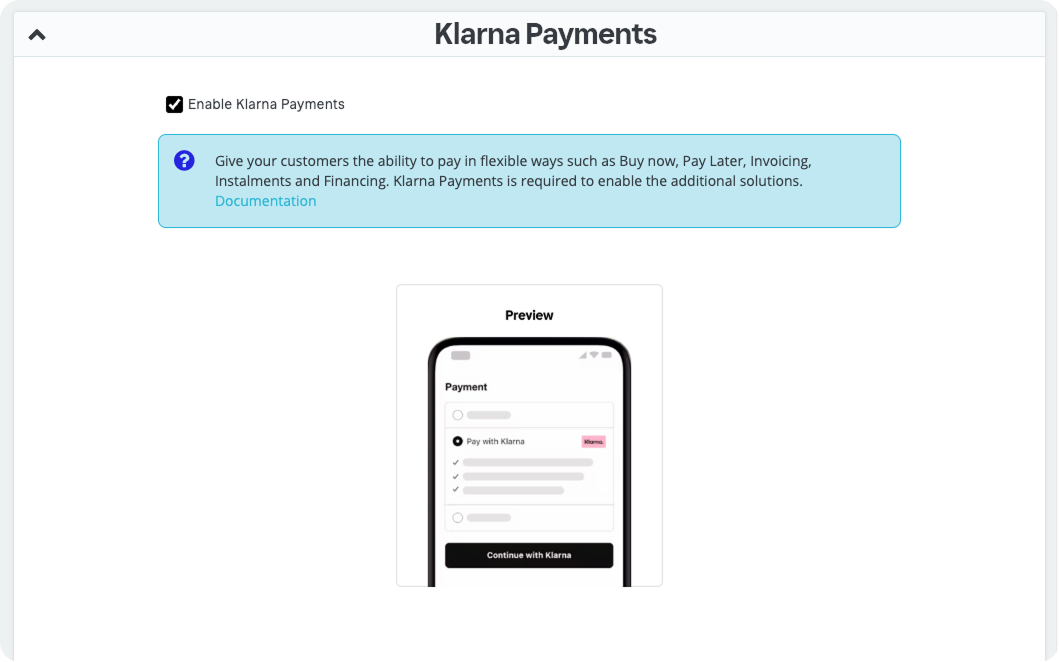
Enable Klarna Payments
In the Klarna Payments section, enable Klarna Payments if you have a direct merchant account with Klarna and want to add Klarna as a payment method in your checkout. This option uses Klarna API credentials created in the Klarna Merchant Portal.
Important
If you’re using Klarna through a payment service provider (Stripe, Adyen, Mollie, etc.), don’t enable Klarna Payments through this module. Instead, activate Klarna directly with the PSP.
Link copied!
Go to the PrestaShop order settings and map the Klarna order statuses to the corresponding statuses in your PrestaShop store.
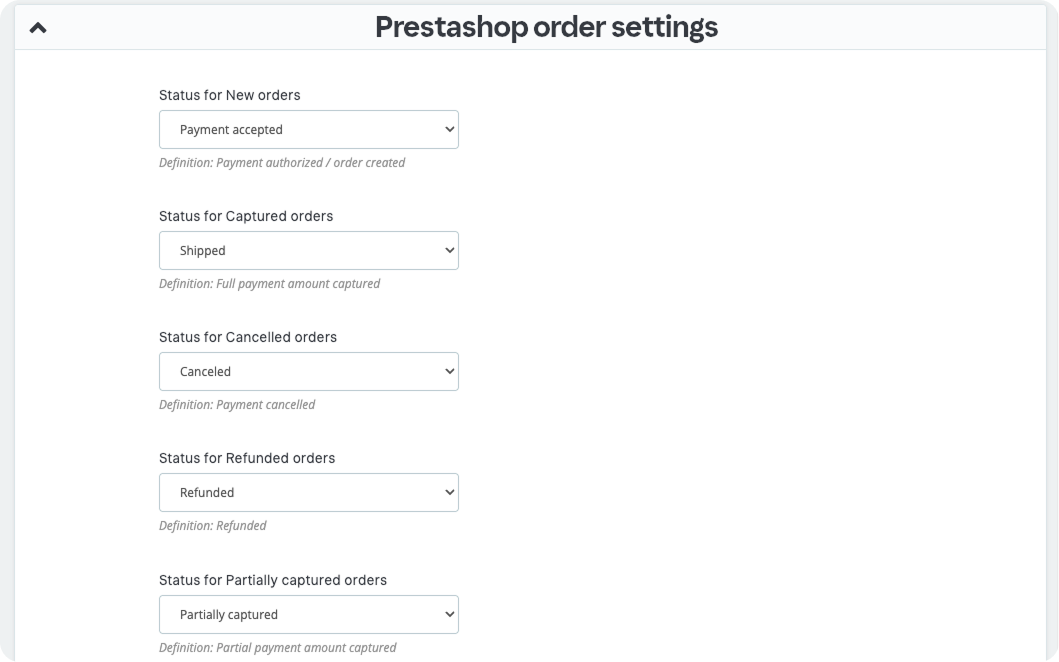
Mapping order statuses
| Status for: | Suggested status on PrestaShop | Definition |
|---|---|---|
| New orders |
| Payment authorized / order created |
| Captured orders |
| Full payment amount captured |
| Canceled orders |
| Payment cancelled |
| Refunded orders |
| Refunded |
| Partially captured orders |
| Partial payment amount captured |
Note
You can adjust these based on your store’s fulfillment process.
Capture upon fulfillment
This section shows how to automate Klarna capture when a PrestaShop order reaches a certain status, like Shipped.
To enable:
- Check the Capture upon fulfillment option
- Select the status(es) that should trigger the capture (e.g. shipped, partially captured, etc.)
- Save the configuration
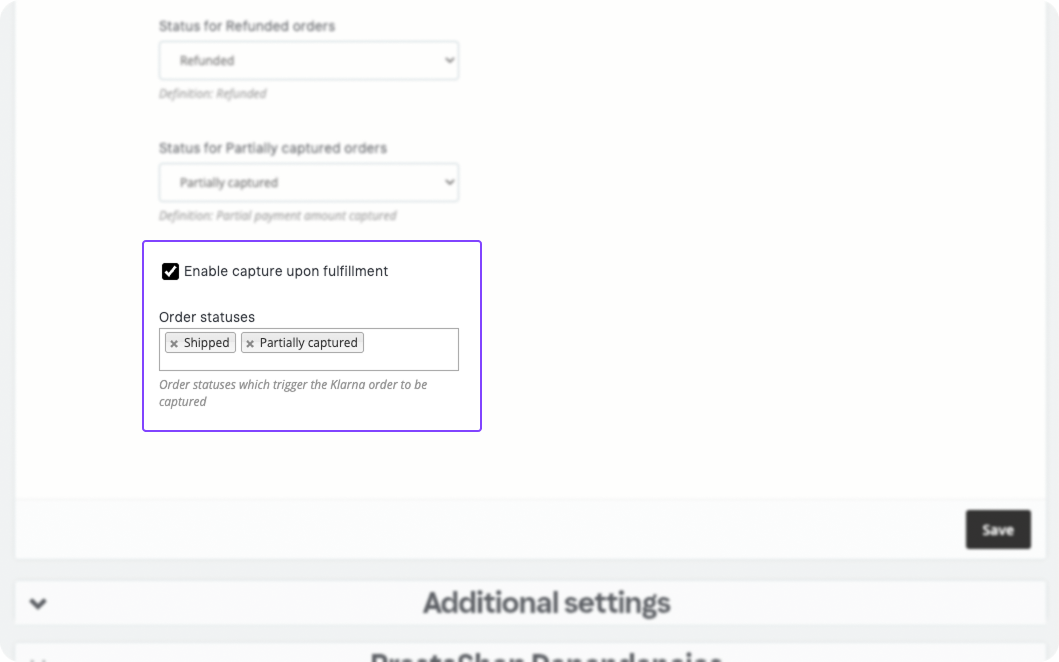
Capture upon fulfillment
Once active, Klarna captures the order when the status changes.
Link copied!
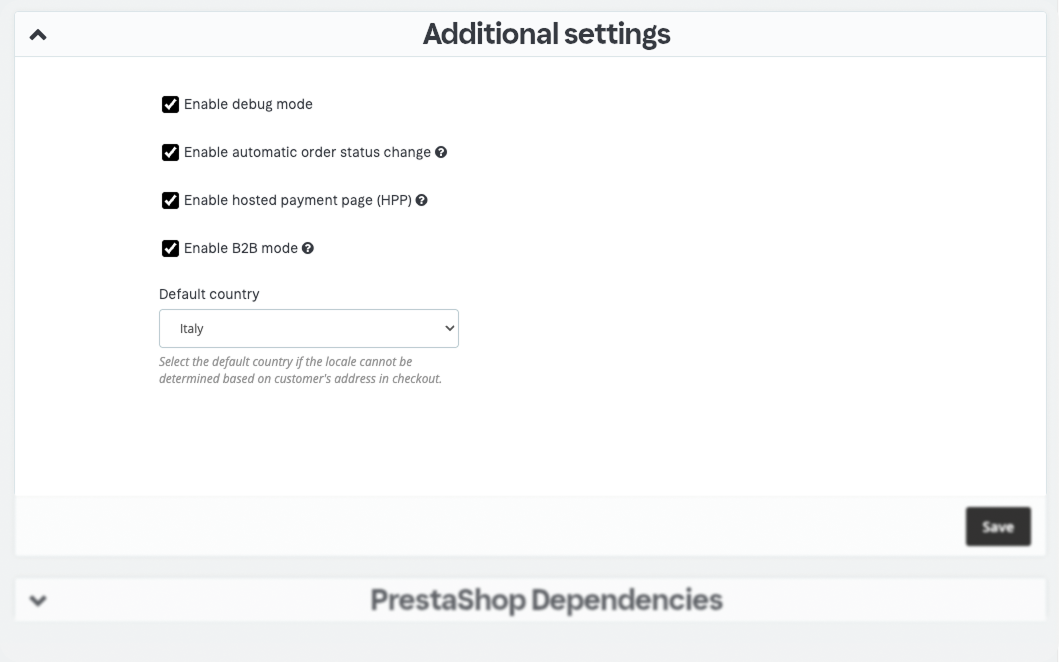
Additional settings
Debug mode
Enable debug mode if you want to log full API requests and responses during testing. You can view logs in the Logs tab.
Important
Turn this off in production environments to avoid unnecessary data capture.
Automatic order status change
You can choose if Klarna should auto-update PrestaShop order statuses.
- If enabled: Klarna updates PrestaShop status once per order
- If disabled: Klarna creates the order, but status changes are manual
Hosted payments page (HPP)
Redirects customers to a Klarna hosted page to complete their payment. This option improves compatibility with third-party or one-page checkout modules and is enabled automatically when an OPC module is detected.
B2B mode
Enable B2B mode to send customer’s company details to Klarna.
Default country
Select the fallback country for Klarna to use if the customer’s locale can’t be detected from their checkout address.
Link copied!