

On-Site Messaging on SAP Commerce Cloud
This guide provides step-by-step instructions to install and configure the Klarna On-Site Messaging (KOSM) add-on for SAP Commerce.
Installation Steps
Step 1: Unpack the add-on
Extract the archive and place the
klarnaosmaddon and klarnaosmbackoffice folders into the custom folder of the SAP Commerce Suite:JAVASCRIPT
1
2
<HYBRIS_HOME>/bin/custom
Step 2: Update localextensions.xml
- Verify Add-on Support: Ensure the following extension is present:
XML
1
2
<extension name="addonsupport" />
- Add Klarna Extensions: Add the following entries to
localextensions.xml
XML
1
2
3
<extension name="klarnaosmaddon" />
<extension name="klarnaosmbackoffice" />
- Check Target Storefront Extension: Confirm that the correct storefront extension is referenced.
Step 3.: Stop the SAP Commerce server
Stop the server by using one of the following methods based on your setup:
- Embedded Mode: Press
Ctrl+C. - Service Mode:
- Windows: Run
hybrisserver.bat stop. - Unix: Run
./hybrisserver.sh stop.
Step 4: Set up the environment
Run the environment setup script; navigate to
<HYBRIS_HOME>/bin/platform and execute:- Windows:
setantenv.bat - Unix:
./setantenv.sh
Step 5: Install the add-on
Run the installation command:
BASH
1
2
ant addoninstall -Daddonnames="klarnaosmaddon" -DaddonStorefront.yacceleratorstorefront="yacceleratorstorefront"
Note: Replace
yacceleratorstorefront with your project-specific storefront name.Step 6: Configure Klarna URLs and tags
Set up script URLs and tags. In the SAP Commerce Backoffice, configure the following for both playground and production environments:
- Script (Library) URL: URL for Klarna's JavaScript library.
- UCI (Unique Client ID): Merchant identifier provided by Klarna (
data-client-id), you can find this in Merchant portal. - Country: The target country for Klarna On-Site Messaging.
- Placement Tag IDs: Unique identifiers for each placement location (e.g., product page, cart page).
Step 7: Modify code for KOSM integration
Update the Master Tag: Modify the master tag to include:
JSP
1
2
3
4
<c:if test="${osmConfigData.active == true}">
    <script async src="${scriptUrlKOSM}" data-client-id="${uci}"></script>
</c:if>
Update the PDP Page: Modify
productPricePanel.tag .- Add the tag library.
JSP
1
2
<%@ taglib prefix="osm" tagdir="/WEB-INF/tags/addons/klarnaosmaddon/responsive/osm/" %>
- Add
osmproducttag.
JSP
1
2
<osm:osmproduct price="${product.price.value}"/>
- Make sure to include the osm tag at the end.
JSP
1
2
<osm:osm/>
Modify the cart page: For the cart page, update c
artTotals.tag as follows:- Set the final price based on the tax setting
JSP
1
2
3
4
5
6
7
8
9
10
<div class="col-xs-6 cart-totals-right text-right grand-total">

    <ycommerce:testId code="cart_totalPrice_label">
        <c:choose>
            <c:when test="${showTax}">
                <c:set var="finalPrice" value="${cartData.totalPriceWithTax}" />
                <format:price priceData="${cartData.totalPriceWithTax}" />
            </c:when>
            <c:otherwise>
<c:set var="finalPrice" value="${cartData.totalPrice}" />- Include the cart tag:
JSP
1
2
<osm:osmcart price="${finalPrice.value}" />
Step 8: Rebuild the system
Rebuild the system by running the following command:
ant clean allStep 9: Update the system
- 1.Perform a full initialization (if this is the first installation): Use the Hybris Administration Console (HAC).
- 2.Update the system:
- 2.1.Open a browser and go to HAC → Platform → Update.
- 2.2.Under General Settings, select:
- 2.2.1.Update running system
- 2.2.2.Localize types
- 2.3.Under Project Data Settings, check:
- 2.3.1.
klarnaosmaddon - 2.3.2.
klarnaosmbackoffice
- 2.4.Click Update.
Configuration
Create a Klarna OSM configuration
Log in to Backoffice
- 1.Open a web browser and navigate to the SAP Commerce Backoffice login page.
- 2.Log in with your administrator account credentials.
Navigate to Klarna On-Site Messaging
In Backoffice, go to Klarna > Klarna On-Site Messaging.
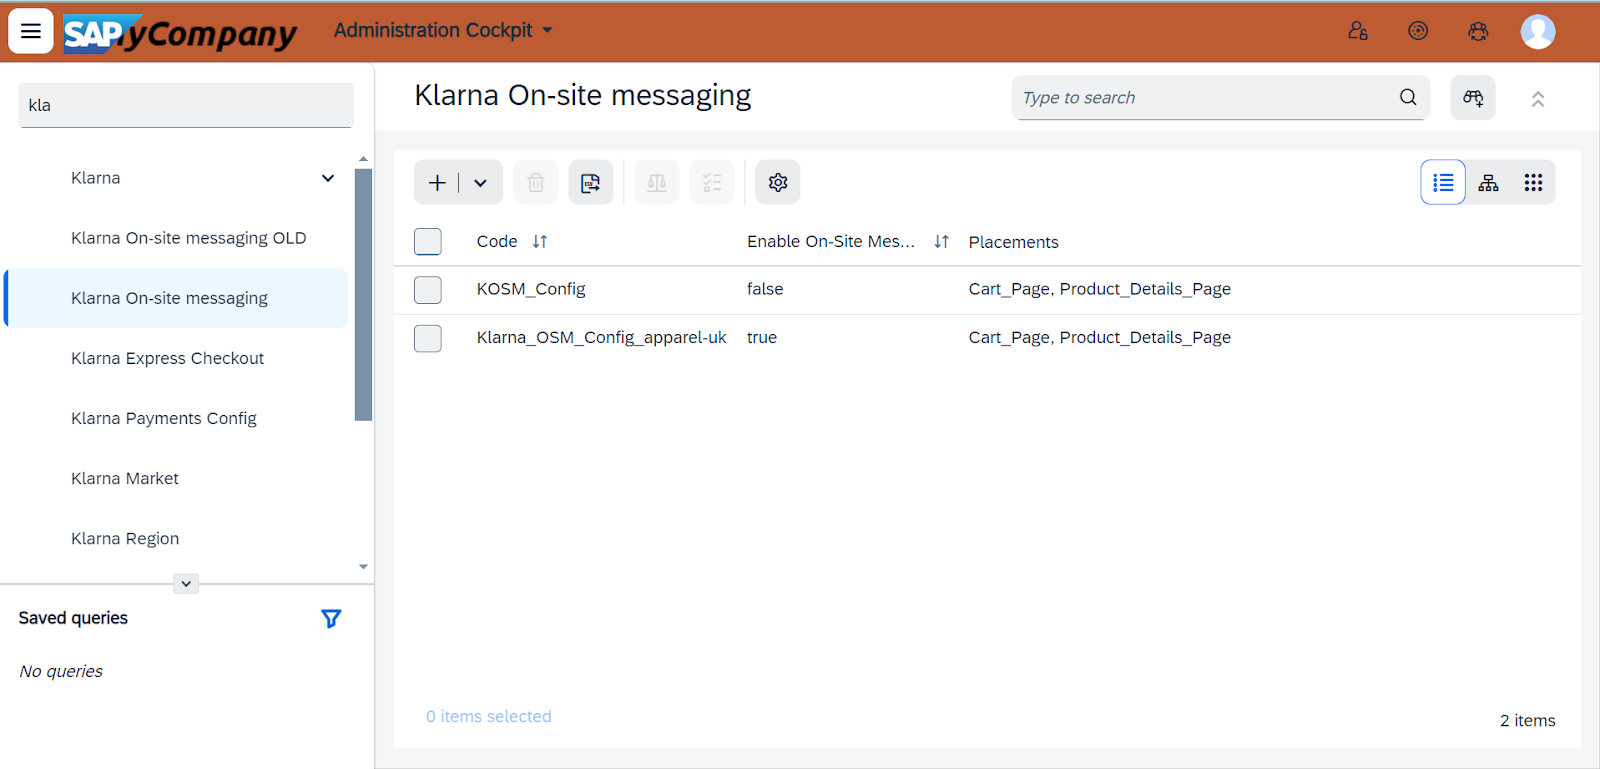
Backoffice navigation to OSM in SAP
Create a new configuration
Click Create to add a new Klarna On-Site Messaging configuration.
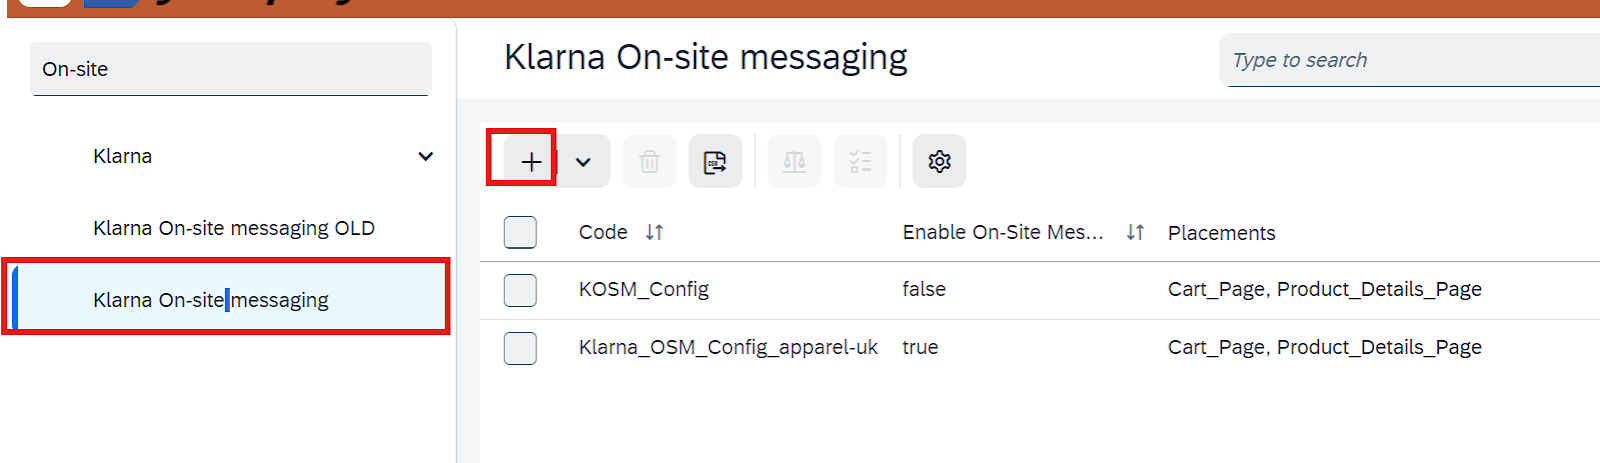
Creating a new OSM configuration in SAP
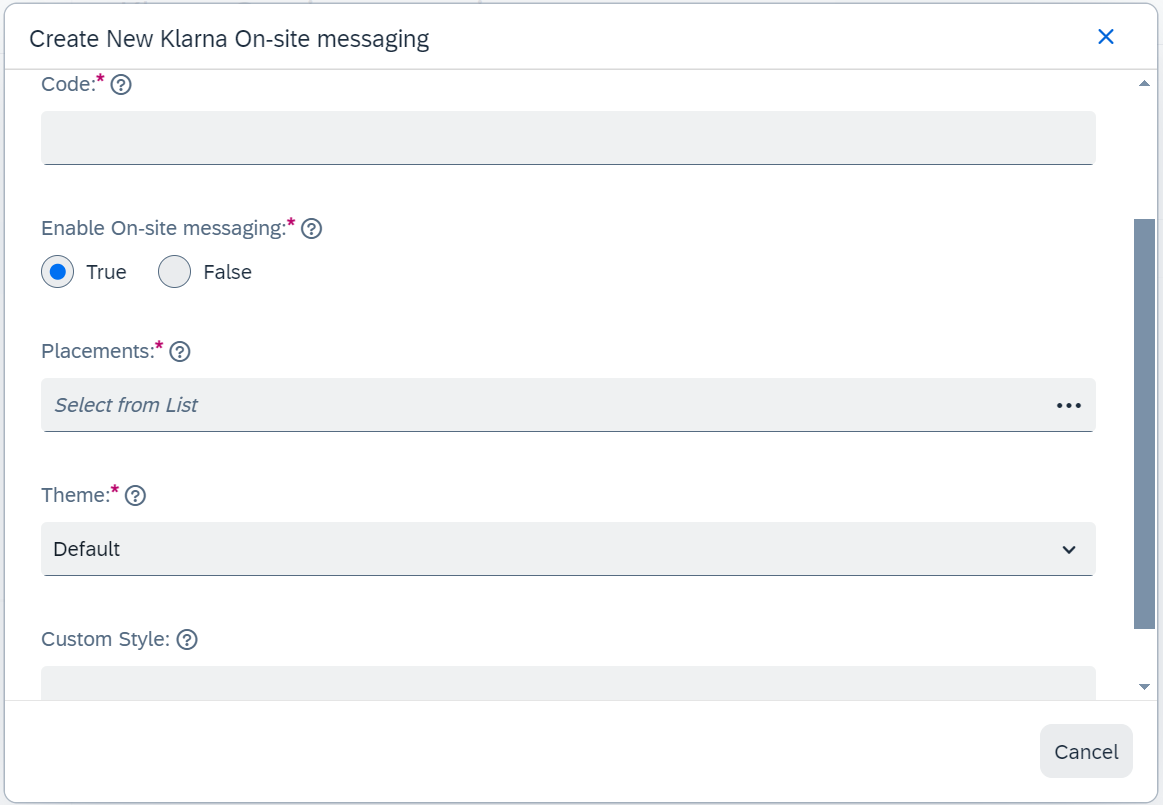
Fill in configuration details
Enter the required values for configuring On-Site Messaging.
Save the configuration
Click Done to save your configuration.
Map KOSM to common configuration, credentials, and base store
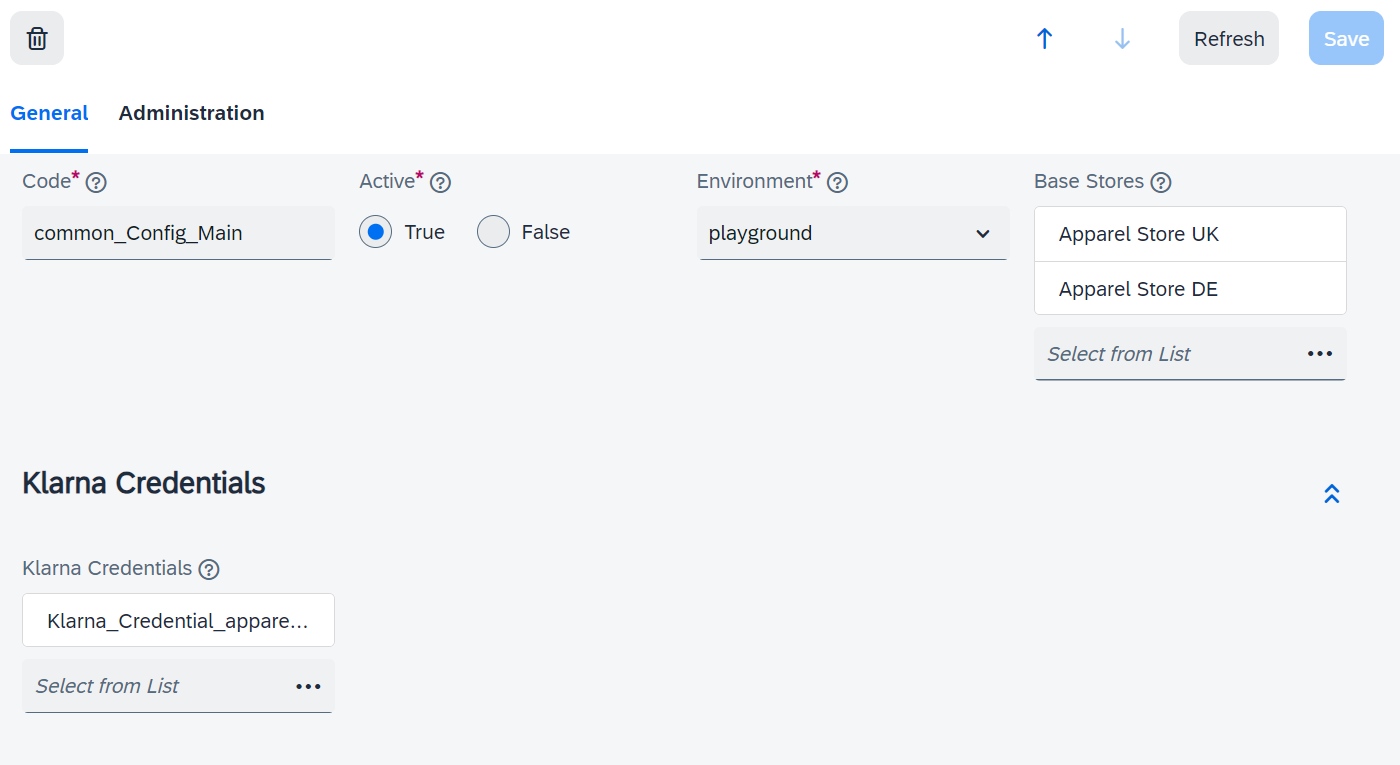
Navigate to Klarna Common Configuration
- 1.In Backoffice, go to Klarna > Klarna Common Configuration.
- 2.Double-click the Klarna Common Configuration entry to open it for editing.
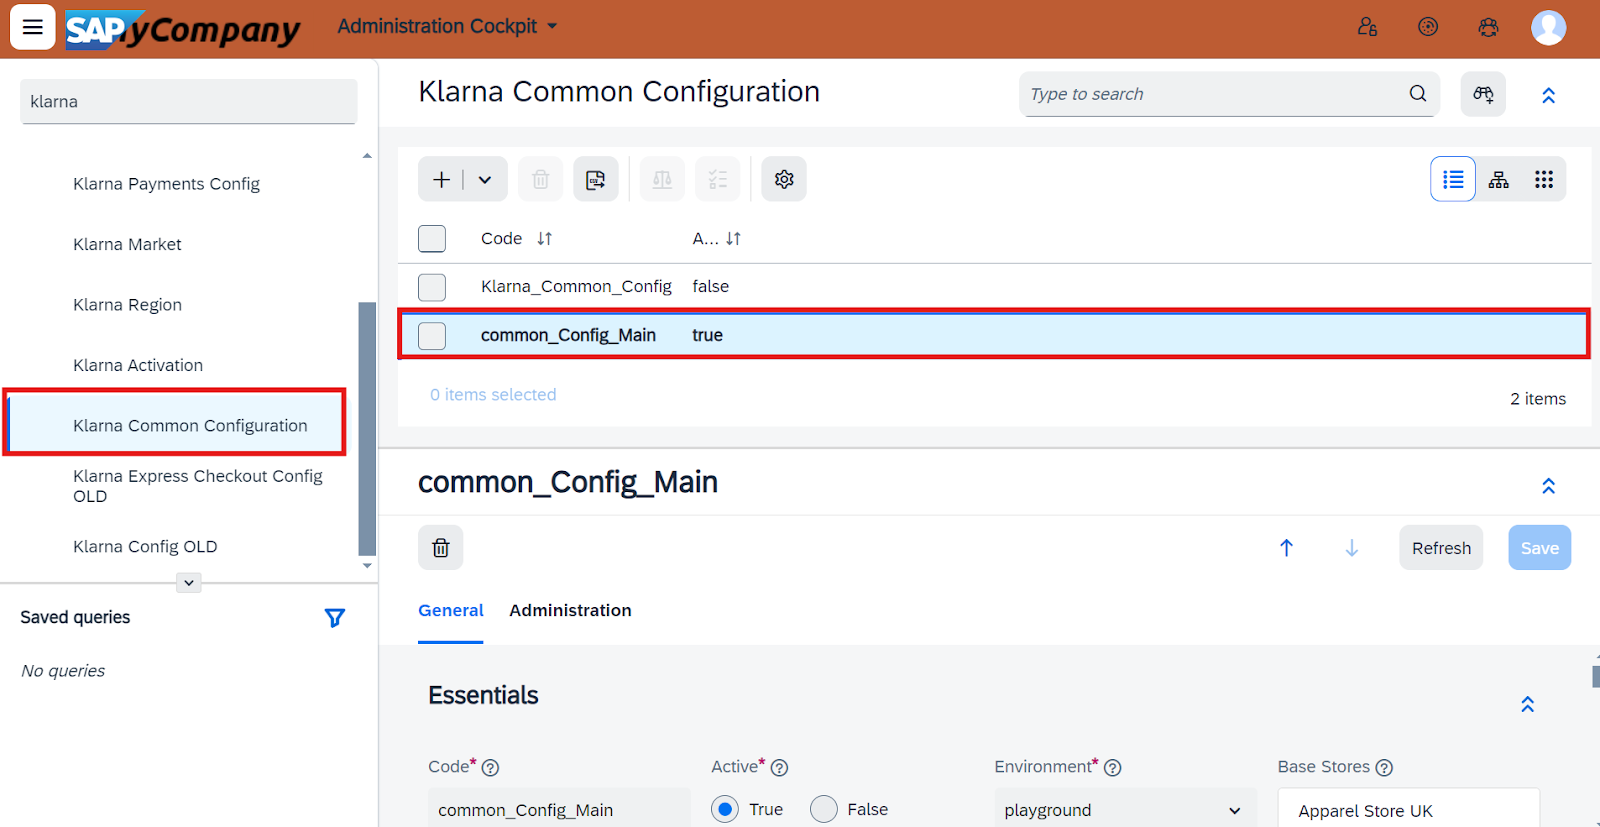
Assign base store
- 1.Go to the General tab.
- 2.In the Essentials section, select the relevant base stores where the Klarna On-Site Messaging should appear.
Credentials settings in SAP
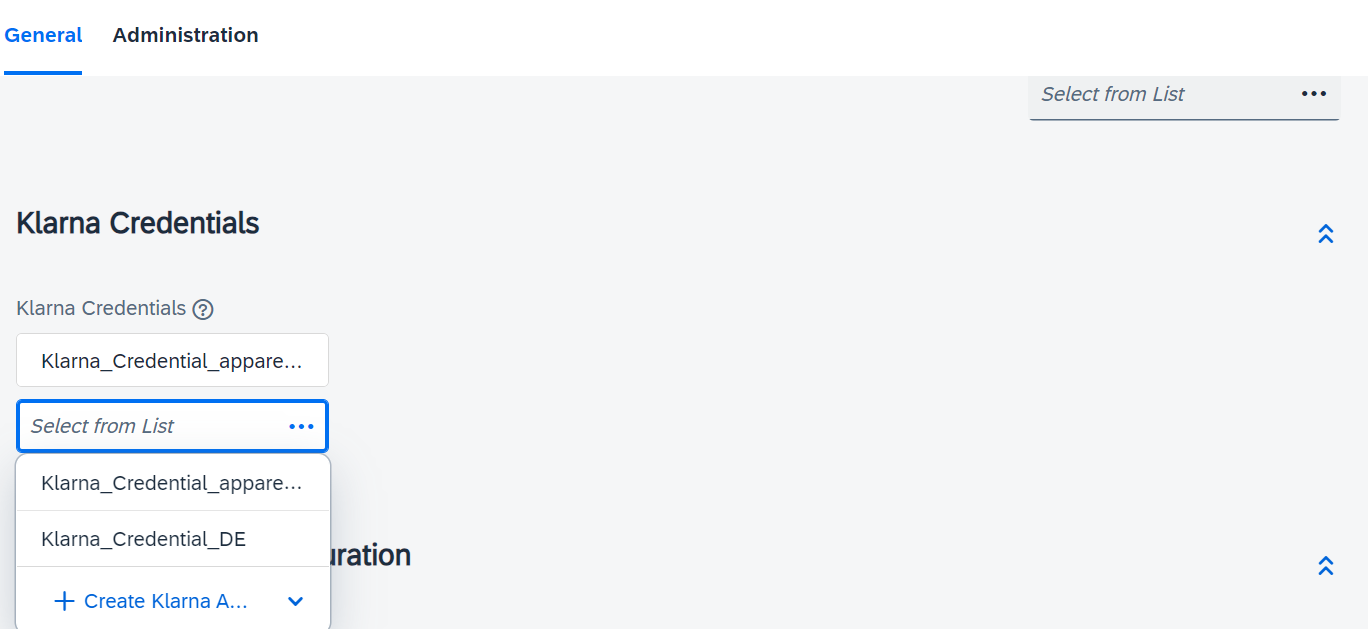
Assign credentials
- 1.In the Klarna Credentials section, select the appropriate credentials to use with the Klarna On-Site Messaging configuration.
- 2.If needed, click + Create Klarna Activation to create new credentials.
Klarna Activation in SAP
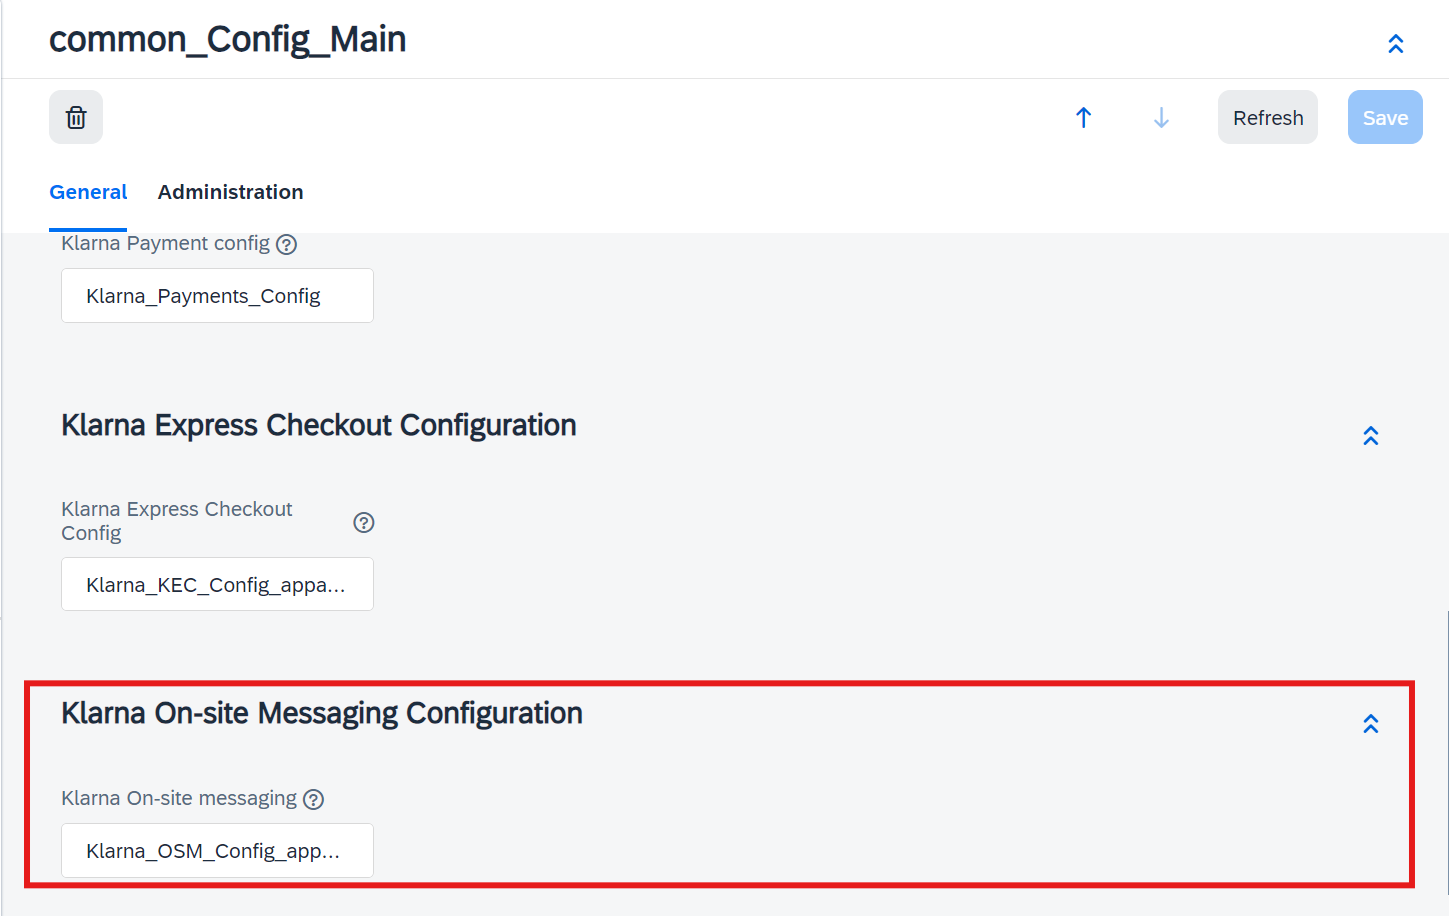
Assign the Klarna On-Site Messaging configuration
In the Klarna On-Site Messaging Configuration section, select the newly created OSM configuration.
Klarna OSM configuration in SAP
Save changes
Click Save to apply your changes to the Klarna Common Configuration.
Configuration Fields
| Attribute | Mandatory | Description |
|---|---|---|
| Code | Yes | Provide a unique name or code to identify this Klarna OSM configuration internally within SAP Commerce. |
| Active | Yes | Check this option to activate the configuration. Leave unchecked to keep it inactive. |
| Client Id | Yes | Enter the UCI value retrieved from the Klarna Merchant Portal (data-client-id). This can be configured under Klarna > Klarna Activation. |
| Placements | Yes | Choose multiple placement options (e.g., Cart or PDP) where the Klarna On-Site Messaging should appear. |
| Theme | Yes | Select a theme from the dropdown for the Cart Page or PDP. If custom styling is configured in the Klarna Merchant Portal, choose the custom option. |
| Custom Style | No | Add custom styles to OSM elements using the ::part API. Use a <style> tag to define the custom style. Example: <style type='text/css'> #osm-product-strip::part(osm-container) { background-color: #d9b259; } #osm-product-strip::part(osm-cta) { font-size: 14px; } #osm-cart-strip::part(osm-container) { background-color: #d4d122; } </style> |