

Express Checkout on SAP Commerce Cloud
This guide provides step-by-step instructions to install and configure the Klarna On-Site Messaging (KOSM) add-on for SAP Commerce.
{{Integration Guidelines Infobox|Related Feature=}}
Use Cases
Express checkout from Cart and Mini Cart
- The Klarna Express Checkout button is available on the Cart page and Mini Cart popup.
- Clicking the button sends Klarna an authorization request with cart details.
- After validation:
- A popup prompts customers to input their phone number and verification code.
- Klarna responds with an authorization token, which redirects customers to the merchant’s site.
Express checkout from PDP
- The Klarna Express Checkout button on PDP creates a new session cart regardless of any existing cart.
- Upon clicking:
- The selected product is added to the new cart.
- Cart details are sent to Klarna in the payload for further processing.
Multistep checkout
- Suitable for merchants with an Order Review page.
- Requires two steps:
- Authorize call: Sends cart details and receives a client token.
- Finalize call: Converts the client token into an authorization token.
- Customers can modify their details (e.g., address) on the review page. Acknowledgeable popups are displayed if significant cart value changes occur.
- Use the
autoFinalize: falseparameter during the authorize call to enable multistep checkout.
Note:
- Delivery mode is not part of Klarna's profile. Merchants must programmatically assign a delivery mode based on the selected shipping address.
- Redirect customers to the Order Review page before order placement.
Key functionalities
Finalize and create order
Multistep checkout flow:
- Customer clicks Place Order, initiating the finalize call using the client token from the authorize call.
- Klarna provides an authorization token in the response, completing the payment flow.
- Updated order details are submitted during the finalize call, ensuring accuracy in payment.
Collect shipping address
The collectShippingAddress parameter governs whether Klarna collects and shares the shipping address:
true:- Klarna provides a shipping address, which is applied as both billing and delivery addresses in the cart.
- Guest users are created using the email provided.
false:- Customers must add their address on the merchant’s site.
- Logged-in customers skip re-entering payment details, as Klarna Express Checkout remains preselected.
- Guest users without Klarna-provided email addresses are redirected to the login page.
Note:
Set collectShippingAddress to true for a seamless express checkout experience.
Installation and activation
Add-on installation
KEC does not require a separate installation if Klarna is already integrated. However, ensure:
- Perform a clean build and system update in the SAP Commerce Backoffice.
- Validate the inclusion of the
KlarnaExpCheckoutConfigtable in the database schema.
Mandatory code changes
Update the storefront extension files to enable Klarna Express Checkout functionality.
1. Update master.tag
Add the following snippet to load Klarna's script and configure Klarna Express Checkout buttons:
<c:if test="${isKlarnaExpCheckoutEnabled}">
    <input type="hidden" name="kecButtonTheme" value="${kecButtonTheme}">
    <script src="${fn:escapeXml(scriptUrlKEC)}" async></script>
</c:if>
2. Update productDetailsPanel.tag
Add code to display the Klarna Express Checkout button on the PDP:
<c:if test="${isKlarnaExpCheckoutEnabled}">
    <div id="klarna_exp_checkout_container_default">

</div>

</c:if>
3. Update cartDisplay.jsp and cartPopup.jsp
Embed code for button visibility on the Cart page and Mini Cart:
<c:if test="${isKlarnaExpCheckoutEnabled}">
    <div id="klarna_exp_checkout_container_in_cartpopup">

</div>

</c:if>
4. Update acc.checkout.js
Prevent duplicate form submissions by commenting out:
// $('#placeOrderForm1').submit();
Configuration
Configure Klarna Express Checkout in Backoffice
1. Navigate to SAP Commerce Backoffice > Klarna > Klarna Express Checkout.

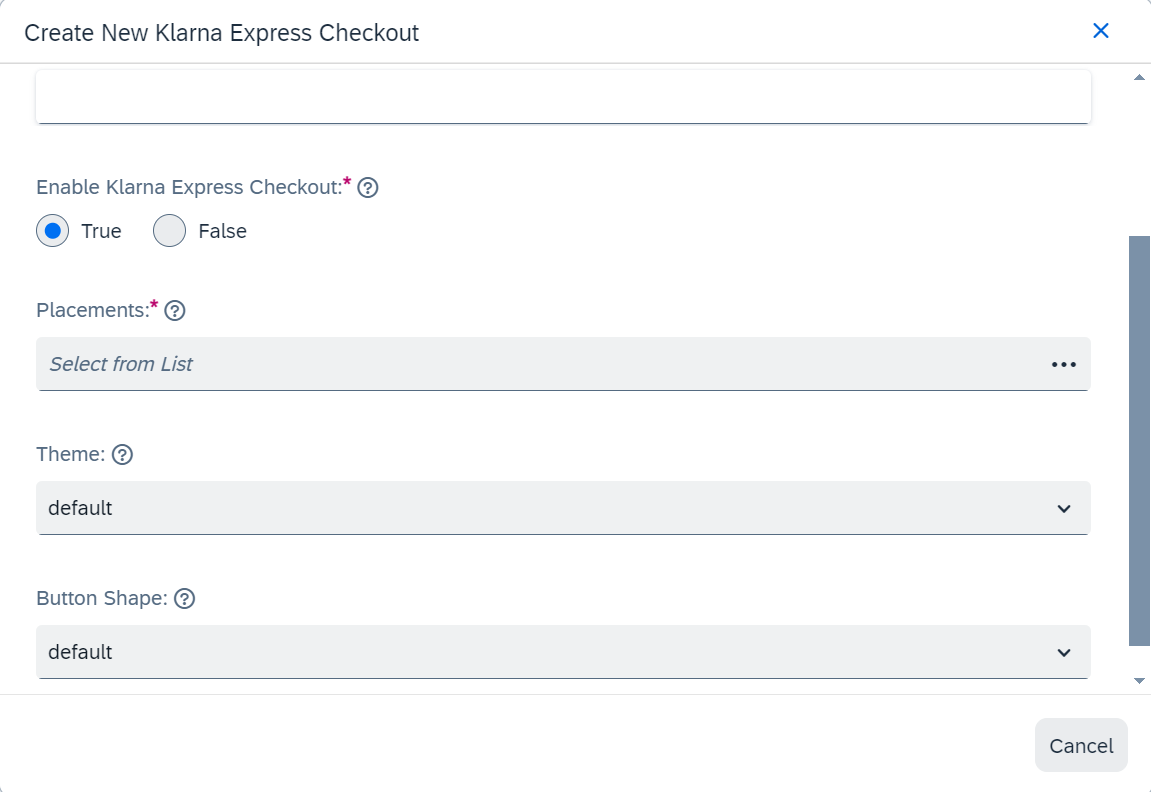
2. Create a new Klarna Express Checkout configuration:
- Fill in fields like Code, Placements, Theme, and Button Shape.
- Save the configuration.
Map KEC to common configurations
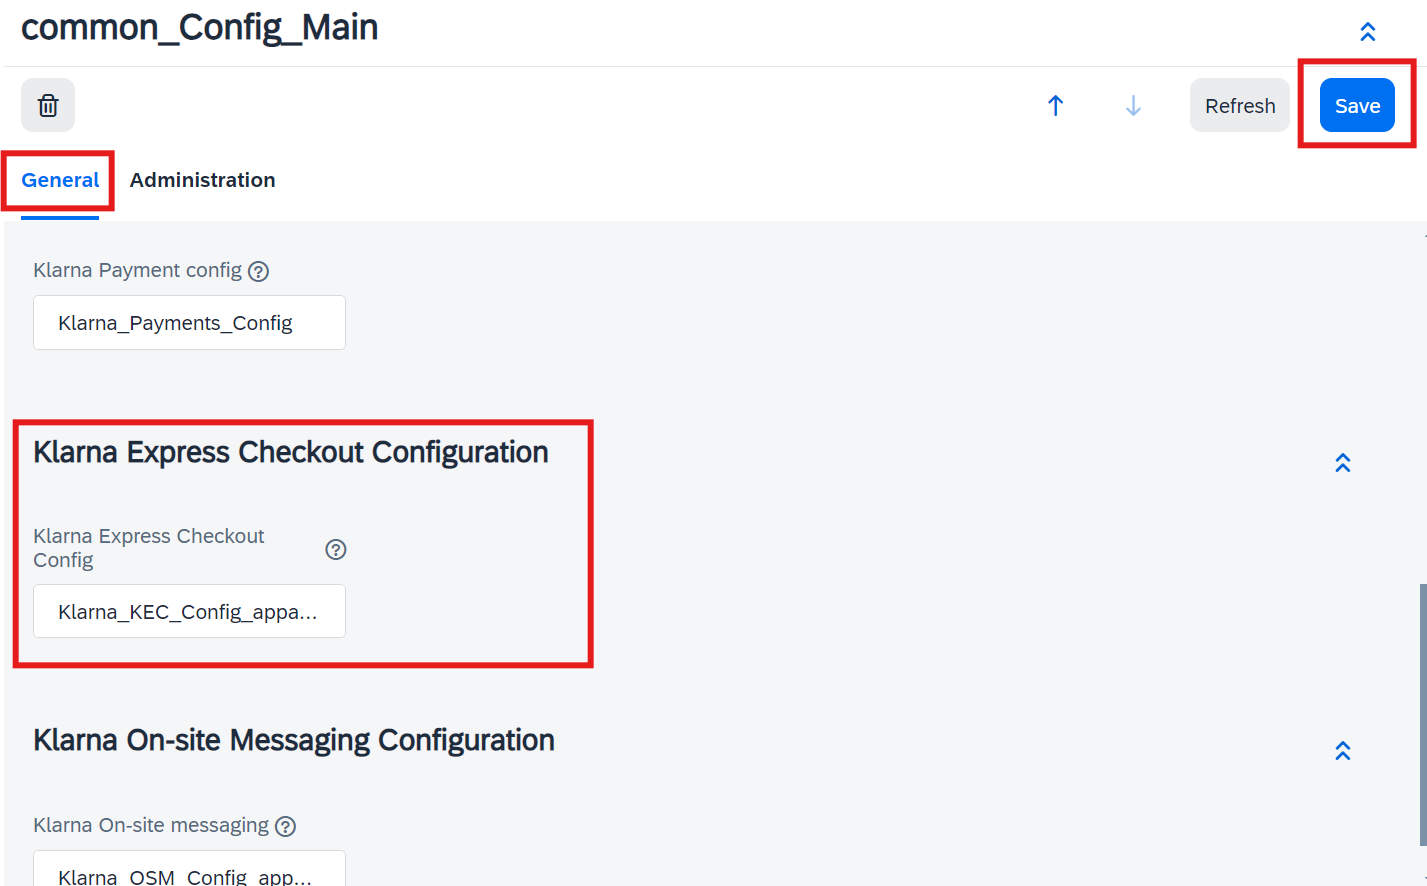
- Go to Klarna > Common Configuration.
- Assign the newly created Klarna Express Checkout configuration under Klarna Express Checkout Configuration.
- Save the changes.
Note:
Ensure active Klarna Payments (KP) configuration exists for the same base store, as Klarna Express Checkout relies on Klarna Payments settings for order creation.
Klarna Express Checkout configuration fields
| Attribute | Mandatory | Description |
|---|---|---|
| Code | Yes | Input any name/code. This will be the internal reference used to recognise and manage KEC configuration within SAP Commerce. |
| Active | Yes | Check to activate KEC configuration; leave unchecked for it to remain inactive. |
| Button Theme | No | Colour theme of the KEC button: default/light/dark |
| Button Shape | No | Shape of the KEC button: default/rect/pill |