

What is Sign in with Klarna?
This guide explains how to add Sign in with Klarna to your Adobe Commerce store.
Sign in with Klarna (SIWK) speeds up your sign-in, sign-up, and checkout processes by leveraging existing Klarna accounts. Pre-saved shopper and payment data is automatically populated for a low-friction shopping experience that minimizes drop-off and results in higher conversion and sales.
To learn more about Sign in with Klarna, refer to the product documentation.
Prerequisites
Complete the required configuration details for Sign in with Klarna in the Klarna Merchant Portal, such as privacy and terms URLs.
Configuration in Adobe
Redirect URL
The Redirect URL is built for your shop and is available when Sign in with Klarna for Adobe Commerce is enabled. The Redirect URL pattern for the m2-klarna integration for Adobe Commerce is https://{url-of-your-shop}/siwk/klarna/callback ; note that this callback URL must be publicly accessible via your shop server.
Scopes
Some scopes are required for the Adobe Commerce integration, including: Email Address, Phone number, Full name, and Billing address. These scopes are not configurable in the Klarna settings in your shop admin and must match the enabled scopes as set in the Klarna Merchant Portal; other scopes are optional and configurable, including Date of birth, Country, Locale.
Styling
There are multiple styling options that can be configured, including Theme, Shape, and Alignment. You can read more about the button styling configurations here.
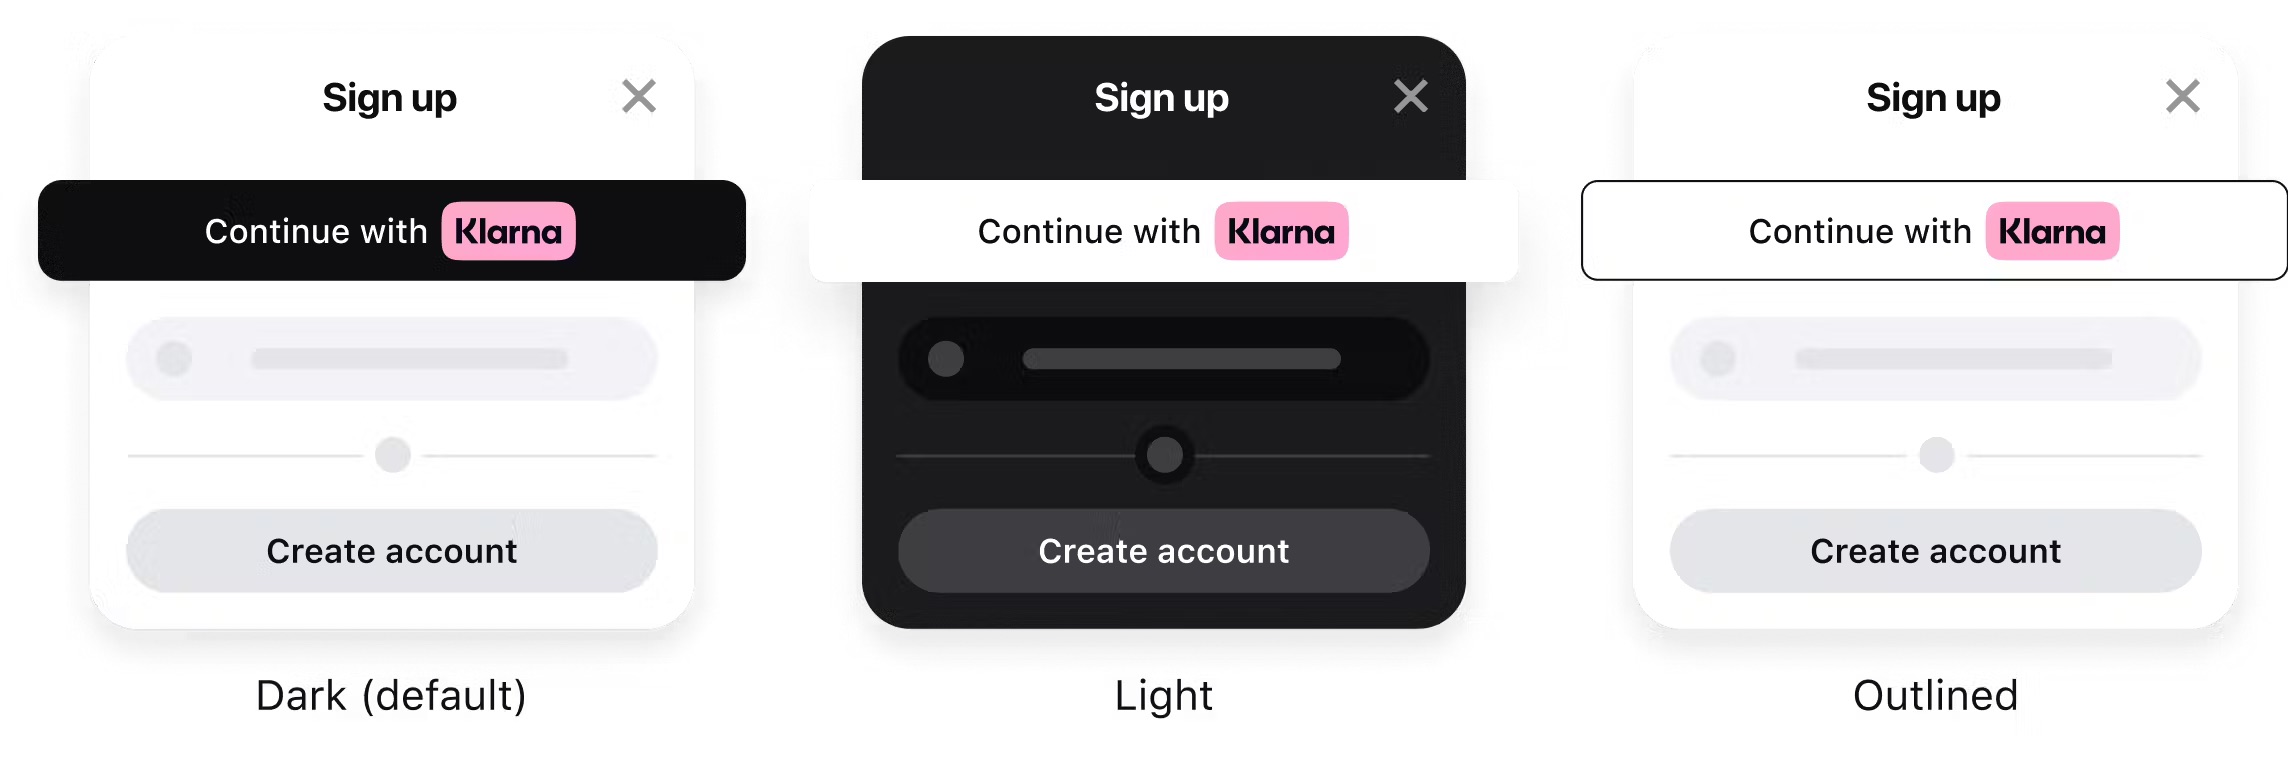
Note: The preview image shown in the shop's Adobe Commerce admin shows how the chosen styles can look, but the preview image is a static image example, and always displays English text. The actual text for Sign in with Klarna on a storefront page will display based on the passed locale.
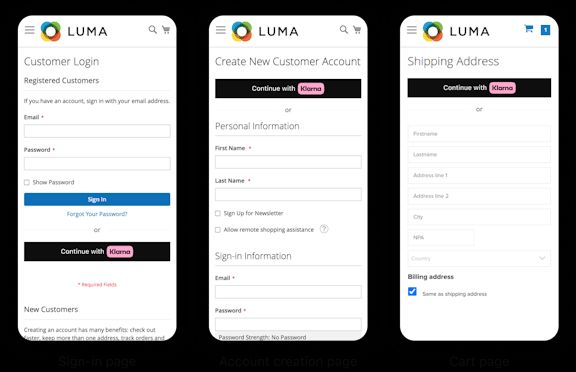
Placements
Sign in with Klarna will only display on your shop once some placements are enabled. There are three page types where Sign in with Klarna are available for the integration: Cart, Sign-in, and Account creation page.
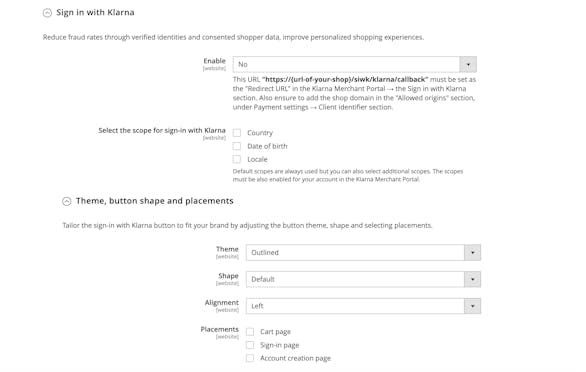
Sign in with Klarna configuration options within the Klarna extension.
Where to place the Sign in with Klarna button:
- Always place the button wherever the user can sign in or create an account, such as the Sign-in page and the Account creation page.
- Place the button where users are asked to provide profile information, such as the Cart page.
Best Practices
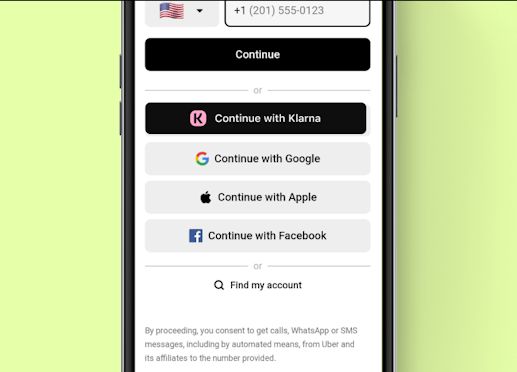
Position the button in the section of the page before the manual alternative and include 'or' and a divider between the Klarna button and the manual alternative, to clearly indicate that 'Continue with Klarna' is an alternative option.
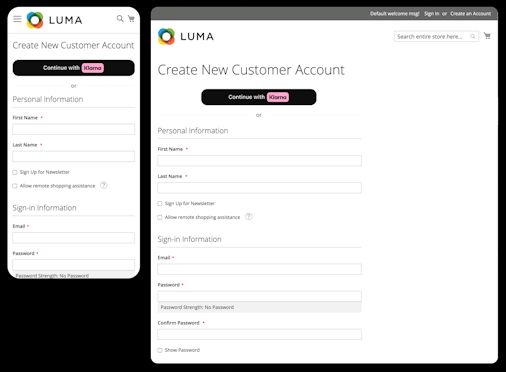
Preview of the Sign in with Klarna button placed above the manual account creation form
Once the customer creates their account and is redirected back to your site, they should be taken back to your site in a logged in state to continue their journey, either exploring your site, or checking out.
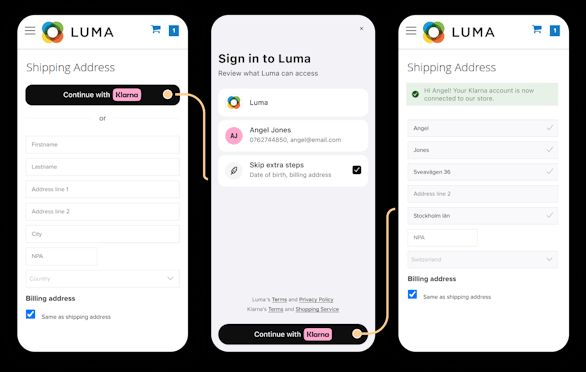
Example user journey with Sign in with Klarna
There shouldn’t be any additional steps after the customer creates their account, especially not asking for the same information that was provided during account creation, or asking to verify already verified details. More best practices can be found here.
Related articles