

What is Sign in with Klarna?
This guide explains how to add Sign in with Klarna to your WooCommerce store.
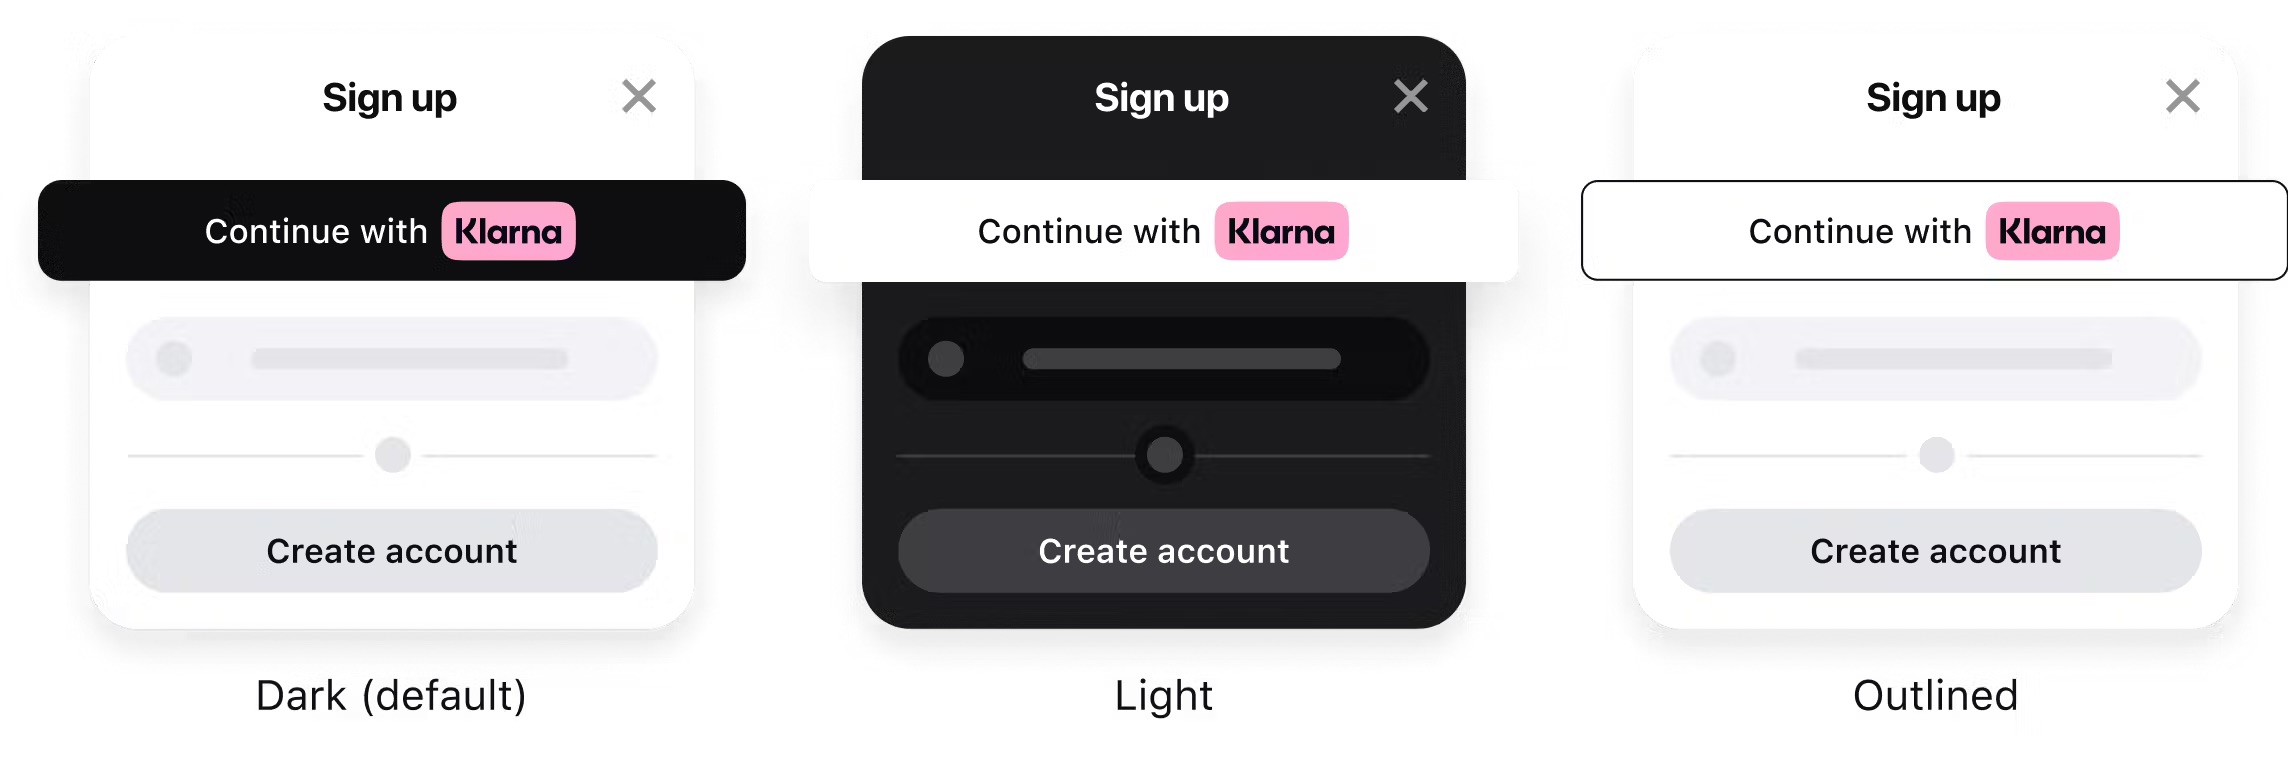
Sign in with Klarna (Sign in with Klarna) speeds up your sign-in, sign-up, and checkout processes by leveraging existing Klarna accounts. Pre-saved customer and payment data is automatically populated for a low-friction shopping experience that minimizes drop-off and results in higher conversion and sales.
To learn more about Sign in with Klarna, refer to the product documentation.
Plugin setup is documented by Krokedil in Sign in with Klarna.
Prerequisites
Install and activate the Klarna for WooCommerce plugin first.
After that, you will need to complete the required configuration details for Sign in with Klarna in the Klarna Partner Portal, such as privacy, terms, redirect URLs, and scopes.
Configuration in WooCommerce
Open WooCommerce → Settings → Payments → Klarna for WooCommerce, enter the client identifier under Credentials, and scroll to Sign in with Klarna.
Redirect URL
The Redirect URL is built for your shop, available when Sign in with Klarna for WooCommerce is enabled. The Redirect URL pattern is https://{url-of-your-shop}/siwk/klarna/callback ; note that this callback URL must be publicly accessible via your shop server.
Required customer data and additional customer data
Some scopes are required for the WooCommerce integration, including: Email Address, Phone number, and Full name. These scopes are not configurable in the Klarna settings in your shop admin and must match the enabled scopes as set in the Klarna Partner Portal; other scopes are optional and configurable.
Styling
On the same settings page, set the button theme to Dark, Light, or Outlined, the shape to Rounded, Rectangular, or Pill, and the badge alignment to Badge, Left, or Centered. Button styling for a placement you build yourself is covered in button styling.
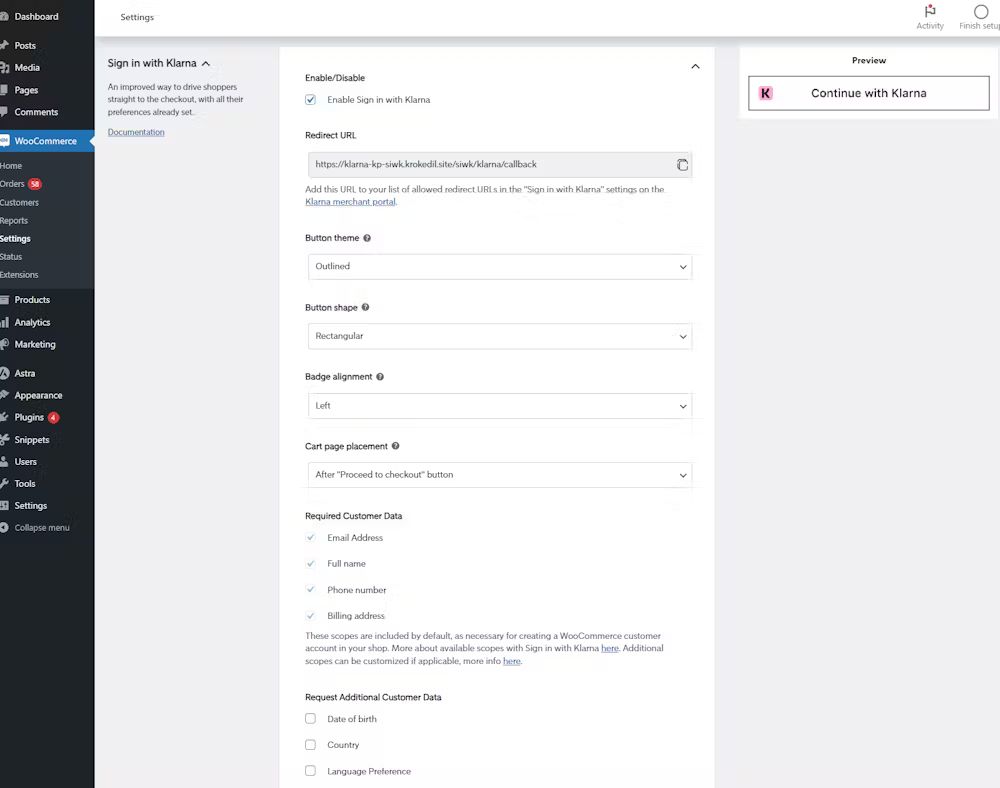
Settings for Sign in with Klarna in WooCommerce.
Placements
The button is shown after you check Enable Sign in with Klarna. Klarna for WooCommerce places it in two locations: the cart, and My Account before the customer is logged in.
On the cart, set Cart page placement to Before "Proceed to checkout" button or After "Proceed to checkout" button.
Best practices
Position the button in the section of the page before the manual alternative and include 'or' and a divider between the Klarna button and the manual alternative, to clearly indicate that 'Continue with Klarna' is an alternative option.
Once the customer creates their account and is redirected back to your site, they should be taken back to your site in a logged in state to continue their journey, either exploring your site, or checking out.
There shouldn't be any additional steps after the customer creates their account, especially not asking for the same information that was provided during account creation, or asking to verify already verified details. More best practices can be found here.
Related articles
Jump to section...