Get started
Integrate Klarna Checkout into your website
The purpose of this guide is to walk you trough a direct Klarna Checkout integration, the estimated time of completion is 20 minutes. If you are using a website platform such as Magento, Woocommerce, Shopify or any other e-commerce platform, you could use our plugins or contact your platform provider.
To see a live example, please visit our demostore.
To make things smooother we also made a video tutorial.

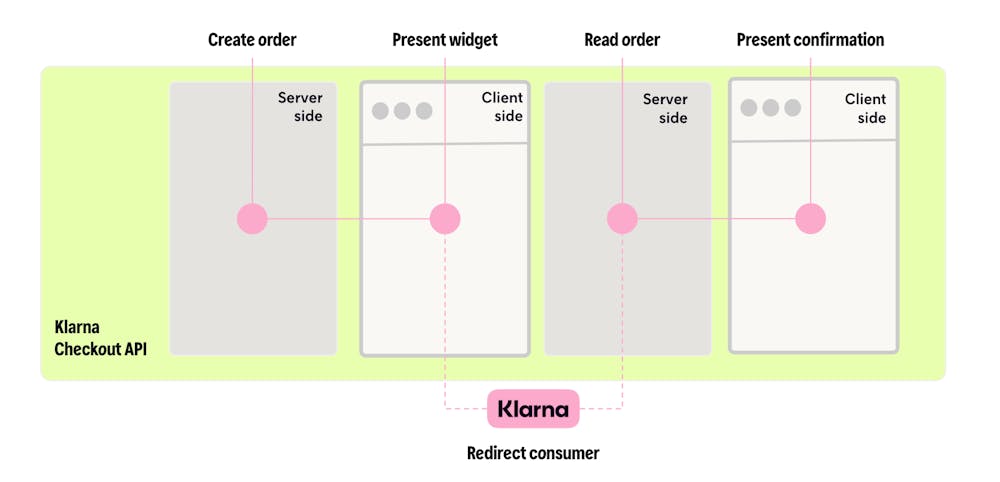
The integration of Klarna Checkout involves four main steps. It starts with a ”create order” API call, to which Klarna responds with an HTML snippet that allows the merchant to render the Checkout iframe.
Once the user fills in their details and presses the “buy button”, the user gets redirected to the merchant’s confirmation page where the merchant renders the Checkout confirmation snippet. In order to do that, the merchant needs to perform a ”read order” API call to which Klarna responds with the confirmation HTML snippet.
If you want a server side integration only, see our Hosted Checkout Page. If you're developing a mobile app see In-App SDK.
To be able to complete this guide you need a website where you can embed the Checkout snippet as well as a sever backend of your choice to make HTTP request towards Klarna.
Test credentials
To perform any API calls, you’ll need user credentials. In Klarna terms, we call these Merchant ID and shared secret. You can create these by following the steps described on the test environment page. You can also follow a step-by-step guide by watching the movie clip above.
For technical and integration support please see our support page