How to install Klarna payments in your Shopify store
This article provides a step-by-step guide on installing Klarna payments in your Shopify store.
In order to go live with Klarna payments on Shopify, you need to log in into the Klarna Merchant portal. If you don’t yet have a Klarna merchant account, you can sign up at http://klarna.com/business.
We recommend that you first log into both your Shopify admin as the full account owner and the Klarna Merchant portal.
Make sure to select the correct store to be associated with the desired Klarna merchant ID. Once the store is associated in Klarna's database, you’ll have to wait 48 hours for the association to be removed after uninstalling the Klarna app, or after a manual update by Klarna.
Once a store is associated with a merchant ID, that merchant ID will be blocked from use for another store. Each Shopify store must have its own unique Klarna merchant ID. Merchant IDs can’t be shared across stores.
Once the below steps are started, we recommend that you complete at the minimum steps 1 through 4 to avoid a partial entry in Klarna's database, which results in an incomplete integration.
Step 5 (activate, or deactivate the payment method) can be done multiple times, whenever desired, without breaking the integration.
If you‘re not contracted directly with Klarna, for example, contracted instead via Shopify Payments, Mollie, and so on, follow your integrator's steps for activating Klarna, not the steps in this guide.
Step 1
Click the Integration guides link in the Klarna Merchant portal and click the Shopify option. If you don't have the Integration guides option displayed for your account when logged into Klarna Merchant portal, contact Merchant support and we can enable this option if you’re contracted directly with Klarna.
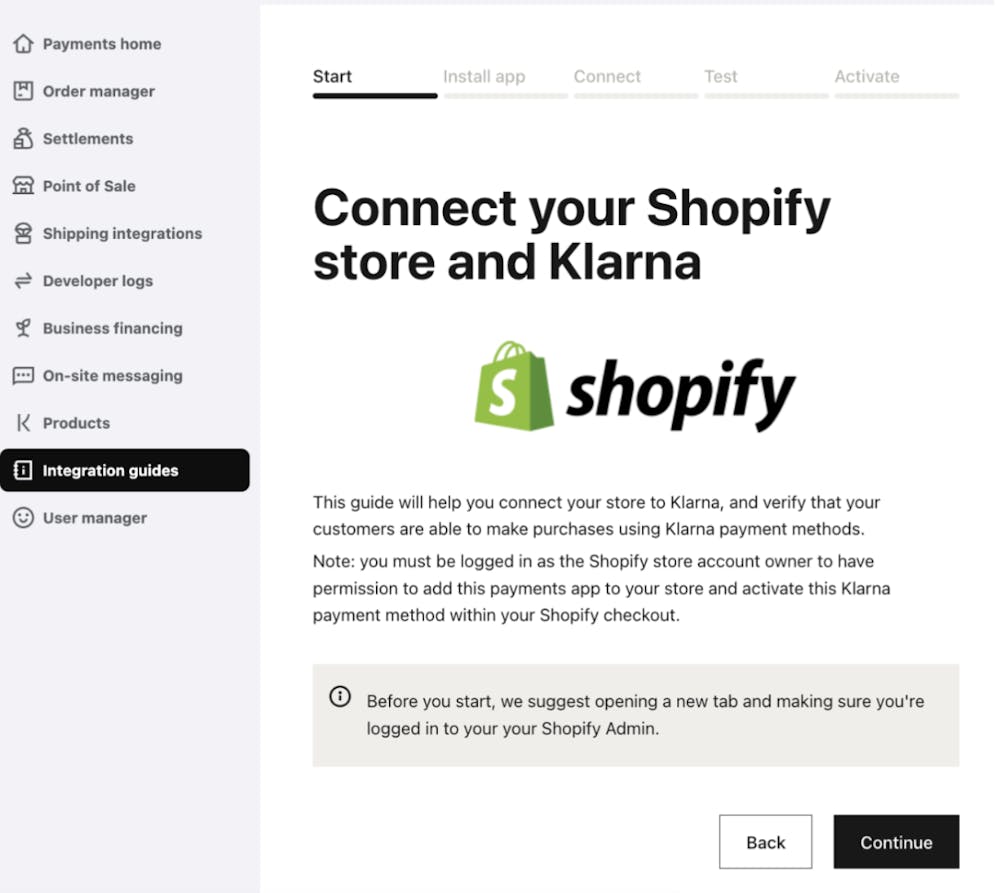
Step 1: Start the installation by choosing Shopify in the Klarna Merchant portal Integration guides.
Step 2
Install the app. Since only the full store account owner can install Shopify payments apps and activate payment methods in their store, make sure you're logged into your Shopify store as the store account owner. Click the Install Klarna Shopify Application button.
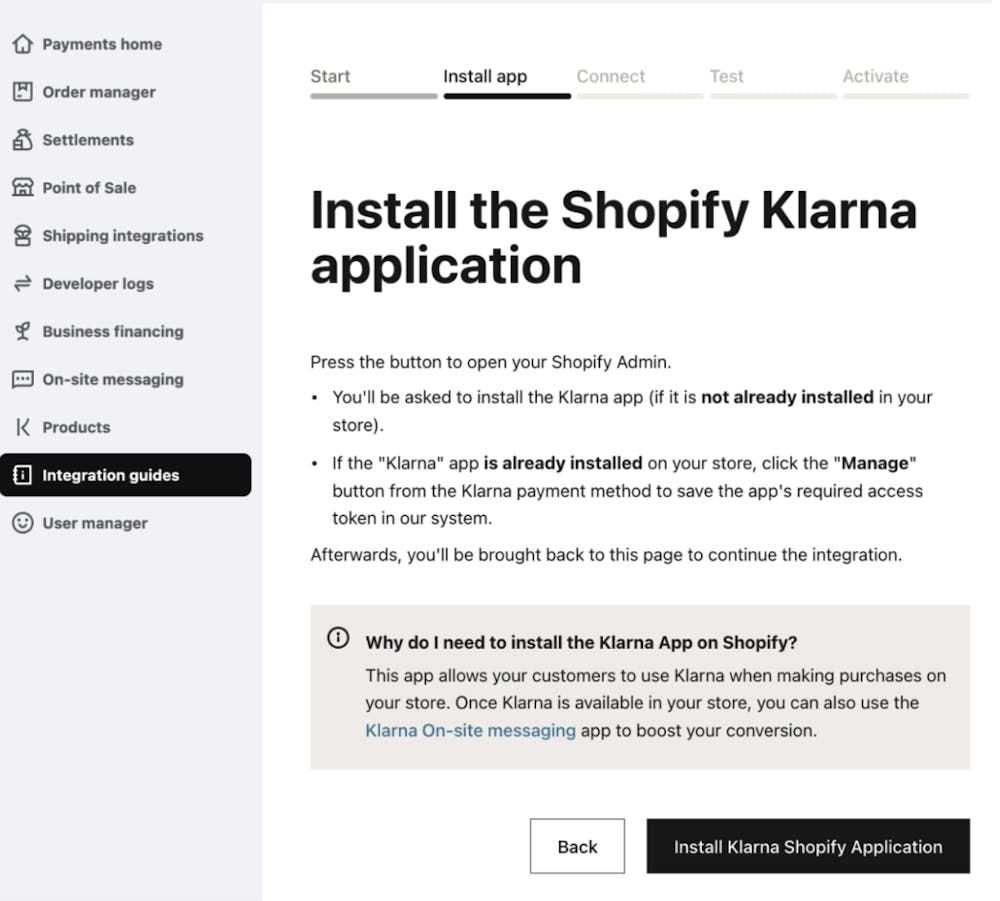
Step 2: Install the Shopify Klarna app in the Shopify store admin.
Note: while this app is a public app, it isn't listed in the Shopify app store, and won’t be displayed in your store's Apps menu like other apps, which is expected for Shopify new payments apps.
Step 3
Generate and connect new Klarna API credentials. As directed, for security purposes, download these API credentials to your local computer, even though you won't enter these credentials anywhere for this new payments integration flow, as that is done automatically for you. You can't continue past this step until you click Generate and connect credentials and save the newly generated API credentials.
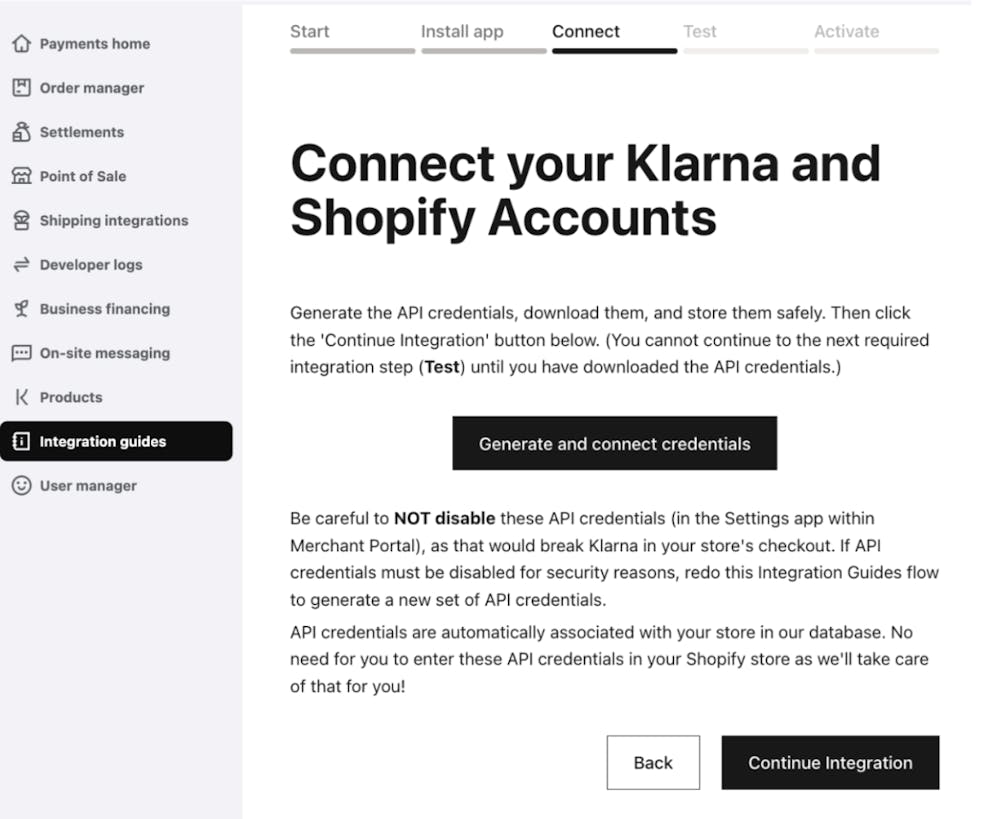
Step 3: Connect your Klarna and Shopify accounts by generating API credentials in Settings.
Step 4
In this step, the integration is verified.
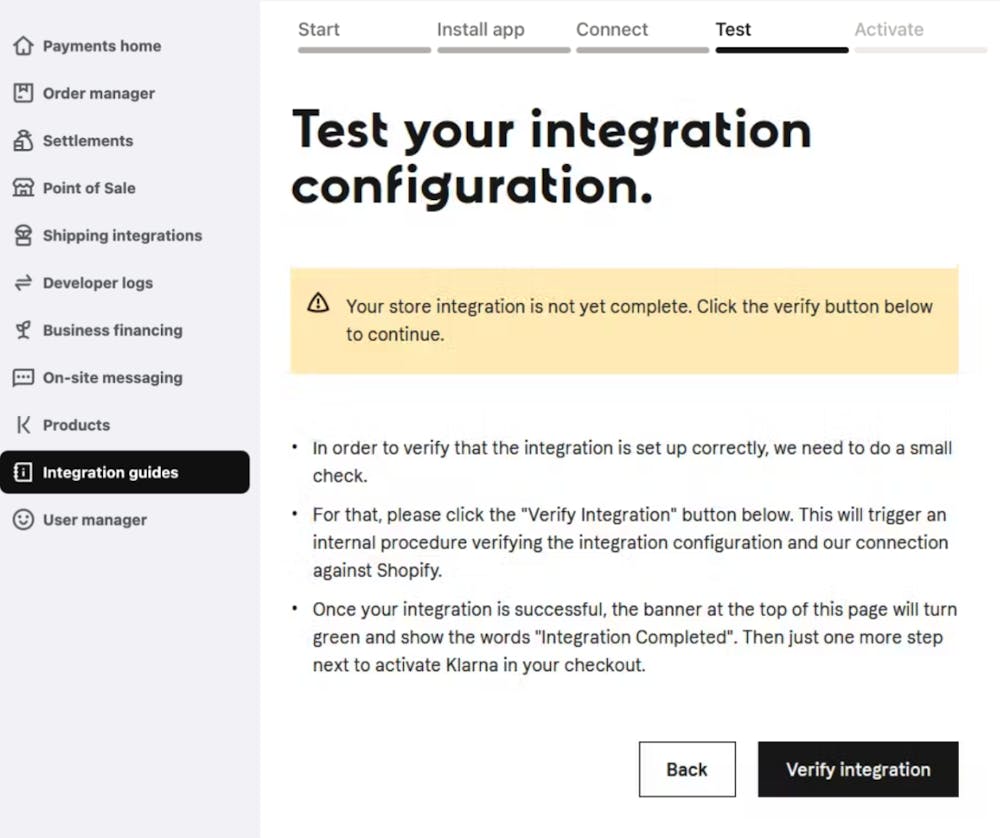
Step 4: Click Verify integration to check that your Klarna Shopify integration is set up correctly.
Step 5
Activate the new, single alternative payment method, named Klarna, in your Shopify admin (which is only available if you’re the full account owner of the store).
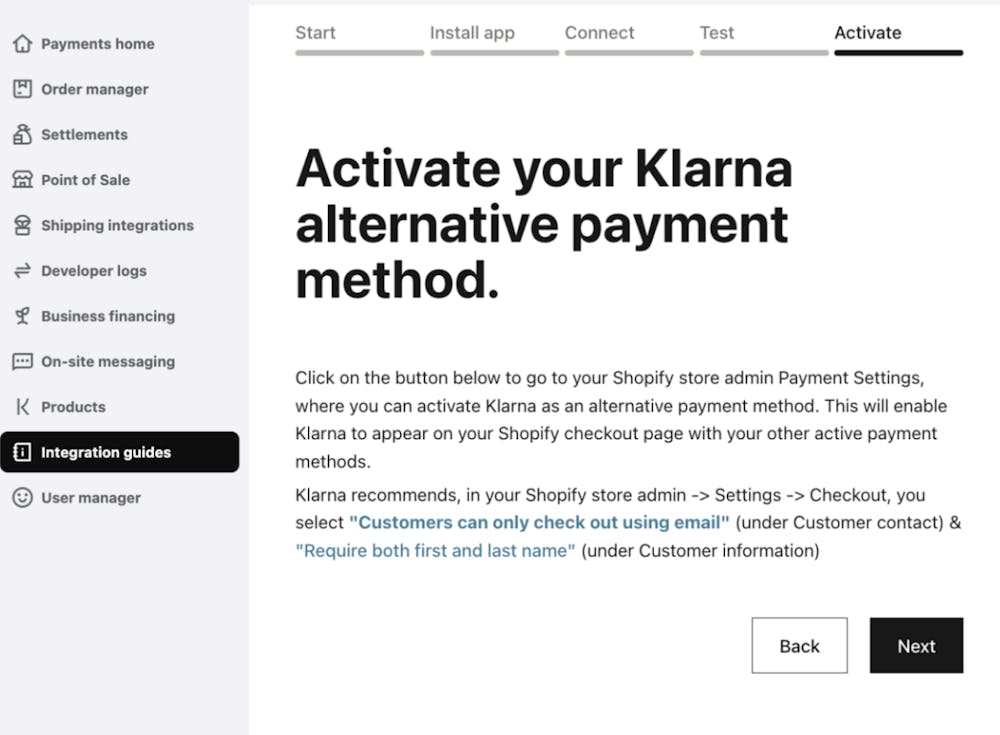
Step 5: To activate the Klarna payment method in your checkout, you’ll be redirected to your Shopify store admin.
- There may be other payment methods supporting Klarna available to activate, for example, such as Paymentwall or pay.nl, but those other payment methods require different credentials and different corresponding payments apps to work successfully.
- Activating a payment option other than the one named only Klarna will result in an error upon redirect from Shopify checkout without appropriate credentials. When the appropriate Klarna payment method is activated, Klarna will display as a payment method in your Shopify checkout.
Activating the payment method in your store enables Klarna to display in checkout. Make sure to verify that Klarna loads successfully though as this step does no validation if the integration was completed successfully.
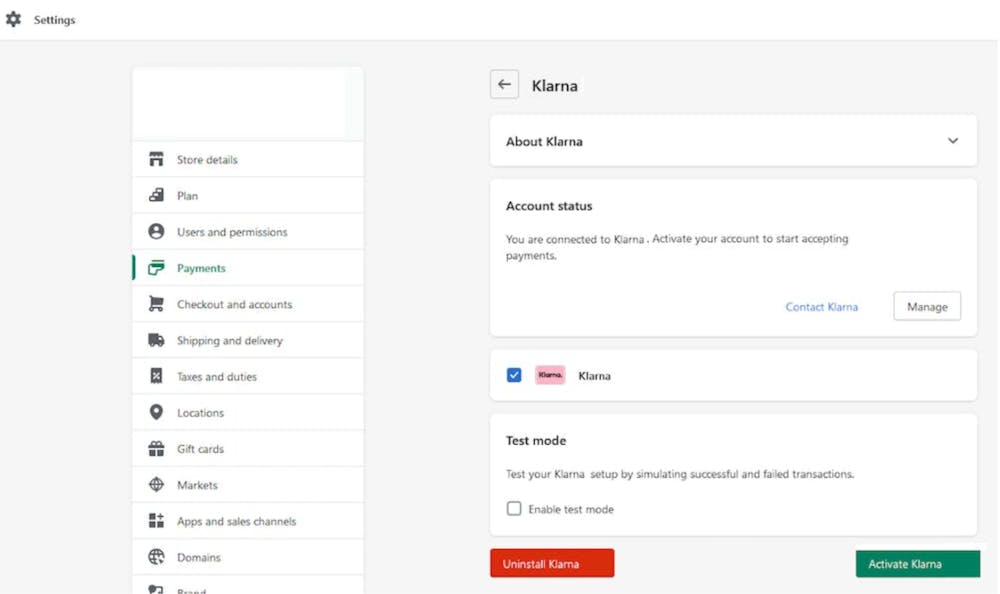
Activating Klarna in your Shopify store.
Verify the integration by adding a product to your cart. Note that Klarna won’t appear on the cart page.
◦ Go through all the pages of your Shopify checkout, select the new Klarna payment method in your store's checkout payment page, and after clicking the Pay Now or Complete button (or after the Review Order page, if enabled for your store), make sure the Klarna payment flow starts. Placing a test order isn't necessary. Be aware that fees could apply if the payment method isn't in Test mode.
Step 7
Ensure that your Customer contact method is set to only Email. If the customer's email address isn't shared with Klarna upon redirection from Shopify to the Klarna payment page, the customer will receive an error message from Klarna and will need to return to the Shopify checkout to enter their email. To avoid this error, we recommend that you choose Email for the Customer contact method, which you can configure in the store's Shopify admin > Settings > Checkout and accounts > Customer contact method section. Read more about contact options in Shopify documentation.
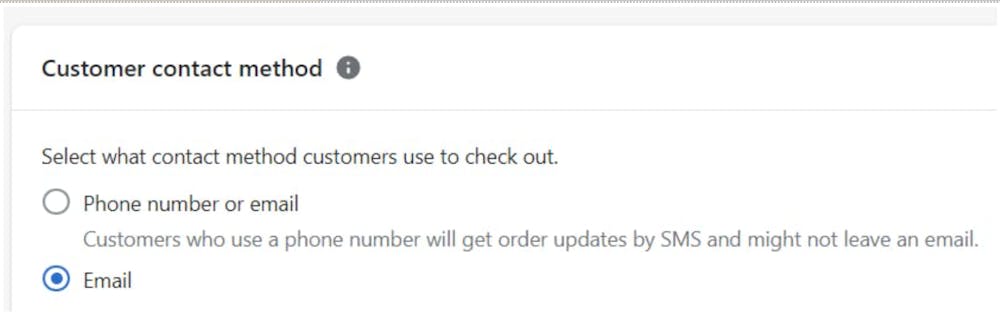
Email should be set as required in Shopify checkout
Step 8
We recommend that both email and phone number are configured in your Shopify admin as required in your store's checkout. You can set up a field for the customer to enter their phone number as a required field so that the customer’s phone number is also captured when you enable this setting.

Configure the phone number field to be a required field in the Customer information section.
When the Customer contact method (configured in Settings > Checkout > Customer contact method) is set to email only, you can configure the phone number field to be a required field further down in the checkout (configured in Settings > Checkout > Customer information > Shipping address phone number).
Step 9
Klarna requires both the first and last name of the customer, so verify that this option has been selected for the Customer information setting.
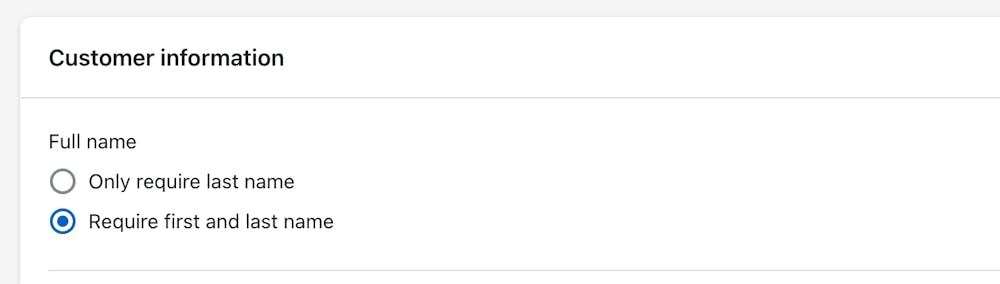
First and last name are required.
Klarna is now live in your Shopify store!
Check out the video to see the new installation in action.
Next, we recommend you to proceed with installing the Klarna On-Site Messaging app to further boost your sales through Klarna.
Shopify restricts all alternative payment methods, such as Klarna payments, to only process orders in the store’s base currency, as documented in this Shopify help center article.
As stated in the documentation, “Only Shopify Payments can process payments in a customer's local (presentment) currency. If your customer chooses a payment option from a different payment provider, then their payment is made in the currency of your store”.
This limitation is documented in the Known constraints section of this documentation.
If you’re using Shopify Plus and would like to hide Klarna payments in checkout based on certain cart data, please refer to the Shopify Plus: custom scripts documentation or use an app such as HidePay, Payfy or BeSure to hide Klarna for certain markets.
Klarna configures the translations for the Klarna payment method. For each supported language, one translation is available. Read more about it in the Shopify documentation.
Note the following rules which govern which translation is displayed in the checkout:
- The displayed translation isn't determined by the customer's country or storefront language.
- The translation used in the store's checkout is determined by the store's single checkout language, which is configured in the store’s Shopify admin under Settings > Checkout and accounts > Manage checkout language.
The following table shows translated payment method name in each language:
| Language | Translated payment method name |
|---|---|
| Czech | Klarna - Zaplať ve 3 splátkách |
| Danish | Klarna - Betal nu eller senere |
| Dutch | Klarna - Betaal nu of betaal later |
| English | Klarna - Flexible payments |
| Finnish | Klarna - Maksa heti tai myöhemmin |
| French | Klarna - Payer maintenant, ou plus tard |
| German | Klarna - Sofort oder später bezahlen |
| Greek | Klarna - 3 άτοκες δόσεις |
| Hungary | Klarna - Fizetés most vagy fizetés később |
| Italian | Klarna - Paga in 3 rate |
| Norwegian | Klarna - Betal nå eller senere |
| Polish | Klarna - Kup teraz, zapłać później |
| Portuguese | Klarna - 3 pagamentos sem juros |
| Spanish | Klarna - Paga a plazos sin intereses |
| Swedish | Klarna - Betala nu eller senare |
Currently, payment methods can’t be renamed for Shopify Plus merchants via custom scripts. This is a known constraint and you can read more about it in this Klarna.Docs article. You can, however, use third party apps such as Payfy or BSure Checkout Rules to rename the payment method.
Prior to July 2022, the payment method name was Klarna.
The locale for Klarna payments hosted payment page is set based on the store's language concatenated with the customer's billing address country. For example, the English language selected for a customer with a US billing address entered in Shopify checkout would result in a request locale of en-US when Klarna payments is loaded. If the requested locale is supported by Klarna payments, per Available purchase countries, currencies and locales, the locale will be honored. If the locale isn't supported, English is used as a fallback.
Locale isn't configurable in Klarna. You can configure your store's language in the Shopify admin under Settings > Languages.
One way to check a store's Shopify language is via the browser’s developer tools, for example, by entering Shopify.locale in your browser's developer tools’ Console, as shown on the following snippet.
Shopify.localeEnter Shopify.locale in the Developer tools' console to check a Shopify store's language.

You can check a store's Shopify language in your console.
To remove Klarna from your Shopify checkout, deactivate the alternative payment method in Shopify admin > Settings > Payments.
After deactivating a payment method, you’re given the option to remove the corresponding payments app, but we don’t recommend removing the app until all Klarna orders have been finalized. The app supports order management updates, for example refunds, from Shopify to Klarna.
In summary:
- To install Klarna payments in your Shopify store, you need to log into the Klarna Merchant portal with your Klarna Merchant account.
- To complete the installation, you need to log into Shopify admin with store owner access.
- You have to select the correct store to be associated with the desired Klarna merchant ID.
- If you‘re not contracted directly with Klarna, follow your integrator's steps for activating Klarna.
- Klarna payments requires the customer’s name, phone, and email address to place orders. To avoid errors during the payment process, ensure that the email, first name, and last name are set as required in the Shopify checkout.
- Make sure the Customer contact method is set to Email so that the customer doesn’t need to return to Shopify checkout to enter their email manually.
- Klarna provides translations for the Klarna payment method.
- For each supported language, one translation is available determined by the store's checkout language configuration.
- The locale for Klarna Payments' hosted payment page is associated with the store's language and the customer's billing address country. Locale configuration is available in the Shopify admin settings.