How to install the Klarna On-site messaging Shopify app
Read this guide to learn how to add the Klarna On-site messaging Shopify app to your Shopify store.
The installation process of the Klarna On-site messaging (OSM) Shopify app consists of three main steps:
- installing the app from the Shopify app store
- connecting your Klarna account to the app
- adding placements to the store’s layout in the Shopify admin
Note that this installation guide is applicable for stores compatible with the Klarna OSM Shopify app. If your store isn’t compatible with the app, you can install Klarna On-site messaging manually using JavaScript to have placements displayed in your store. For more details, refer to the manual OSM installation guide.
Install the Klarna On-site messaging app from the Shopify App Store.
If we find a match for your shop’s myshopify.com domain in our data, your account will be connected for you. If not, you can enter your Klarna merchant ID (MID)* in Shopify store admin > Apps > Klarna On-site Messaging > Settings and select your region manually to connect the account. If you are getting a 404 error please follow the steps outlined here to troubleshoot.
A Klarna merchant account linked to a Shopify store.
If you haven't integrated Klarna payments for Shopify yet, follow the instructions in this Klarna.Docs article.
*You can find your Klarna MID in the Klarna Merchant Portal and it starts with a K, N or A and is followed by 6-7 digits. If you are not integrating Klarna Payments directly through Klarna please reach out to your payment partner for this.
The final step is to add placements. There are two way of doing this depending on your theme:
1. If your store uses a theme that supports Online Store 2.0 app blocks, follow the App Blocks Guide.
2. If your store uses a vintage theme, follow the Vintage Ad Placements Guide.
We’re continuously developing additional features for the Klarna On-site messaging (OSM) Shopify app to help mitigate the constraints of the Klarna payments integration. The features included in the extended accesses for the Klarna OSM Shopify app allow us to gather additional information about orders placed with Klarna in your store and display it to the customer.
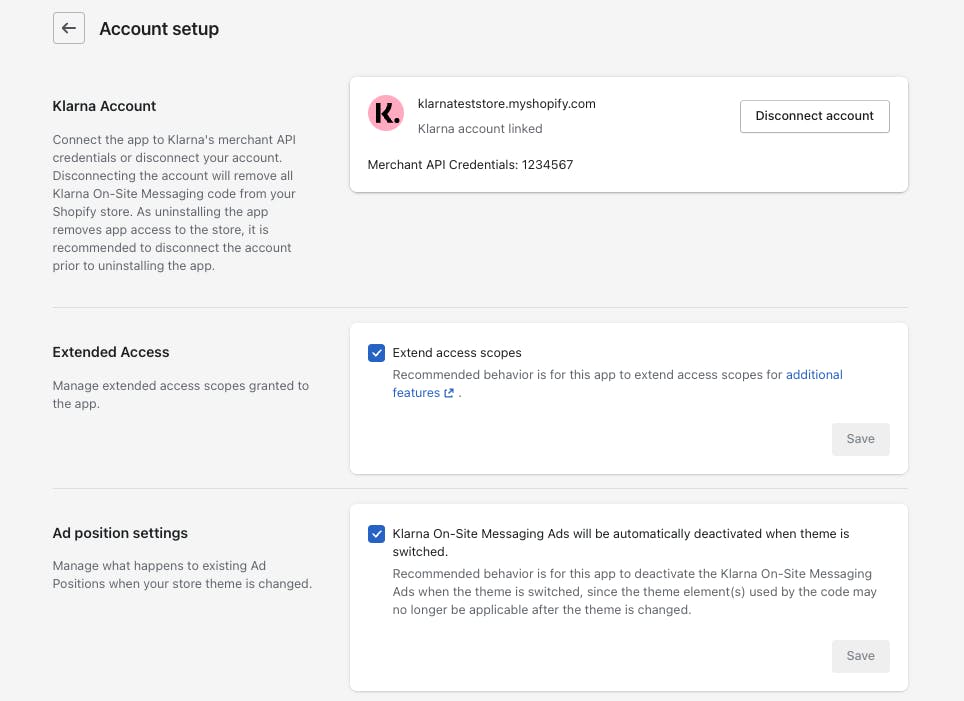
These extended access features are enabled by default when you install the On-Site messaging app, but can be disabled by deselecting the Extended Access option in the app settings.
To use Extended Access features, you need a direct Klarna integration via the Klarna app. To enable it ensure to check the box.
Extend Access is an optional configuration that provides additional permissions to enhance the Klarna On-site messaging app’s functionalities.
With Extended Access, the Klarna OSM Shopify app has access to protected customer data, such as the Shopify order details. We access minimal data as needed for the following additional features:
- As of October 11, 2022, the Klarna OSM Shopify app queries the Shopify order to update Klarna’s merchant_reference_1 field with the corresponding Shopify order name.
- As of November 3, 2022, the Klarna order ID is added as a Shopify order note on the Shopify backend.
- As of September 20, 2023, a Klarna tag is added to Shopify orders placed through Klarna.
- Additional order line data, that is, a product URL and image URL, are added to the Klarna order shortly after the order is placed.
- The inventory is checked to prevent product oversells. As of May 2023, this feature is available for selected merchants with extended access. If you want to enable this feature, contact your regional Klarna merchant support team.
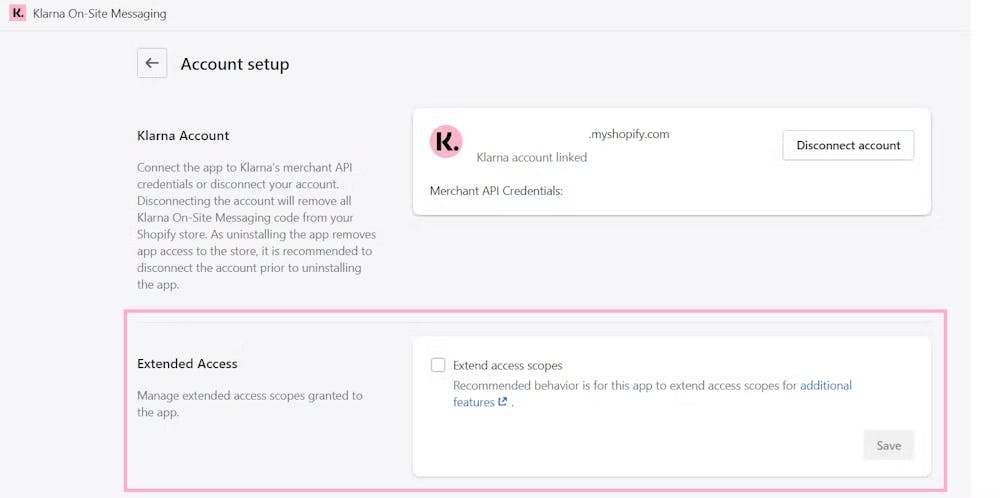
If Extended Access was granted in a Shopify store prior to release of a feature listed above, the permission scopes for the shop may be insufficient for all the features available. To grant the additional required scopes:
- Deselect the Extended access scopes checkbox and click Save.
- Reload the page.
- Select Extended access scopes again.
- Update the app to save the changes with the new scopes.
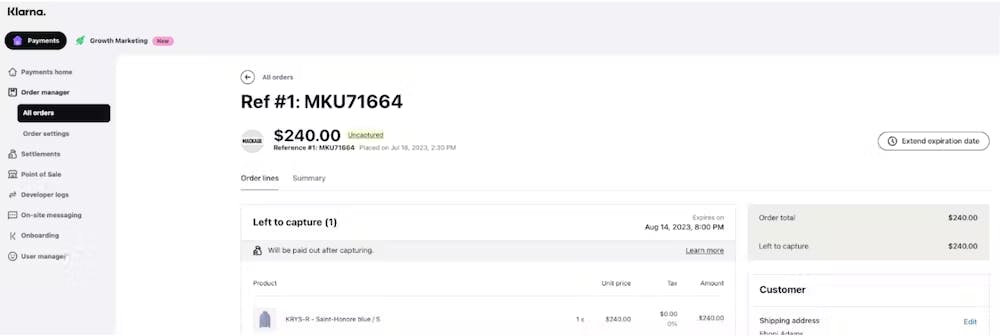
When Extended Access is enabled in a Shopify store, additional order details are visible in the Merchant portal, for example, the Shopify order ID as Reference and an image of the product.
If you no longer want to use the Klarna On-site messaging (OSM) Shopify app in your store, do the following to remove all inserted code for your store:
- Disconnect the account from the Klarna OSM Shopify app in Shopify admin > Settings > Apps.
- Delete the app from Shopify admin > Apps as shown on the screenshot below.

Uninstalling the Klarna On-site messaging app from a Shopify store.
Deleting the Klarna OSM Shopify app removes all code from your store. You can confirm the code is deleted by viewing the HTML source and searching for the following code elements:
- To check that the JavaScript libraries loaded in your store have been deleted, search for the asyncLoad function in the source code.
- To check that the placement code has been deleted, search for the klarna-placement HTML element in the source code.
If you already removed the Klarna On-site messaging Shopify app, but the KlarnaThemeGlobals code was not removed from your theme (if added to your theme prior to 2022-Dec-13), you can manually remove it from the theme.liquid file in your Shopify admin > Sales channels > Online Store > Themes > … > Edit code.
In summary:
- The installation process of the Klarna On-site messaging (OSM) Shopify app involves installing the app from the Shopify app store, connecting your Klarna account to the app, and adding placements to your store's layout in the Shopify admin. You can do this through App Blocks or Vintage Ad Placements depending on your theme.
- If your store is not compatible with the app, you can manually install Klarna On-site messaging using JavaScript.
- We recommend enabling Extended Access within the app.
- Enabling extended access grants the app permission to access protected customer data and provides enhanced functionalities for the Klarna OSM Shopify app.
- Extended access can be enabled or disabled in the app settings by selecting or deselecting the Extended Access option in the app's dashboard.