

Configure Express checkout
This page explains how to configure and style Klarna Express Checkout in your PrestaShop store. It shows how to enable the feature in the Klarna module and how to ensure the Express Checkout button appears correctly in your checkout.
Overview
Express Checkout gives customers a faster way to buy in your store by using their saved Klarna details. Customers select Express Checkout early in the purchase flow and complete the transaction quickly with pre-filled information.
Express Checkout can improve conversion by simplifying the checkout process and reducing the steps needed to complete a purchase.
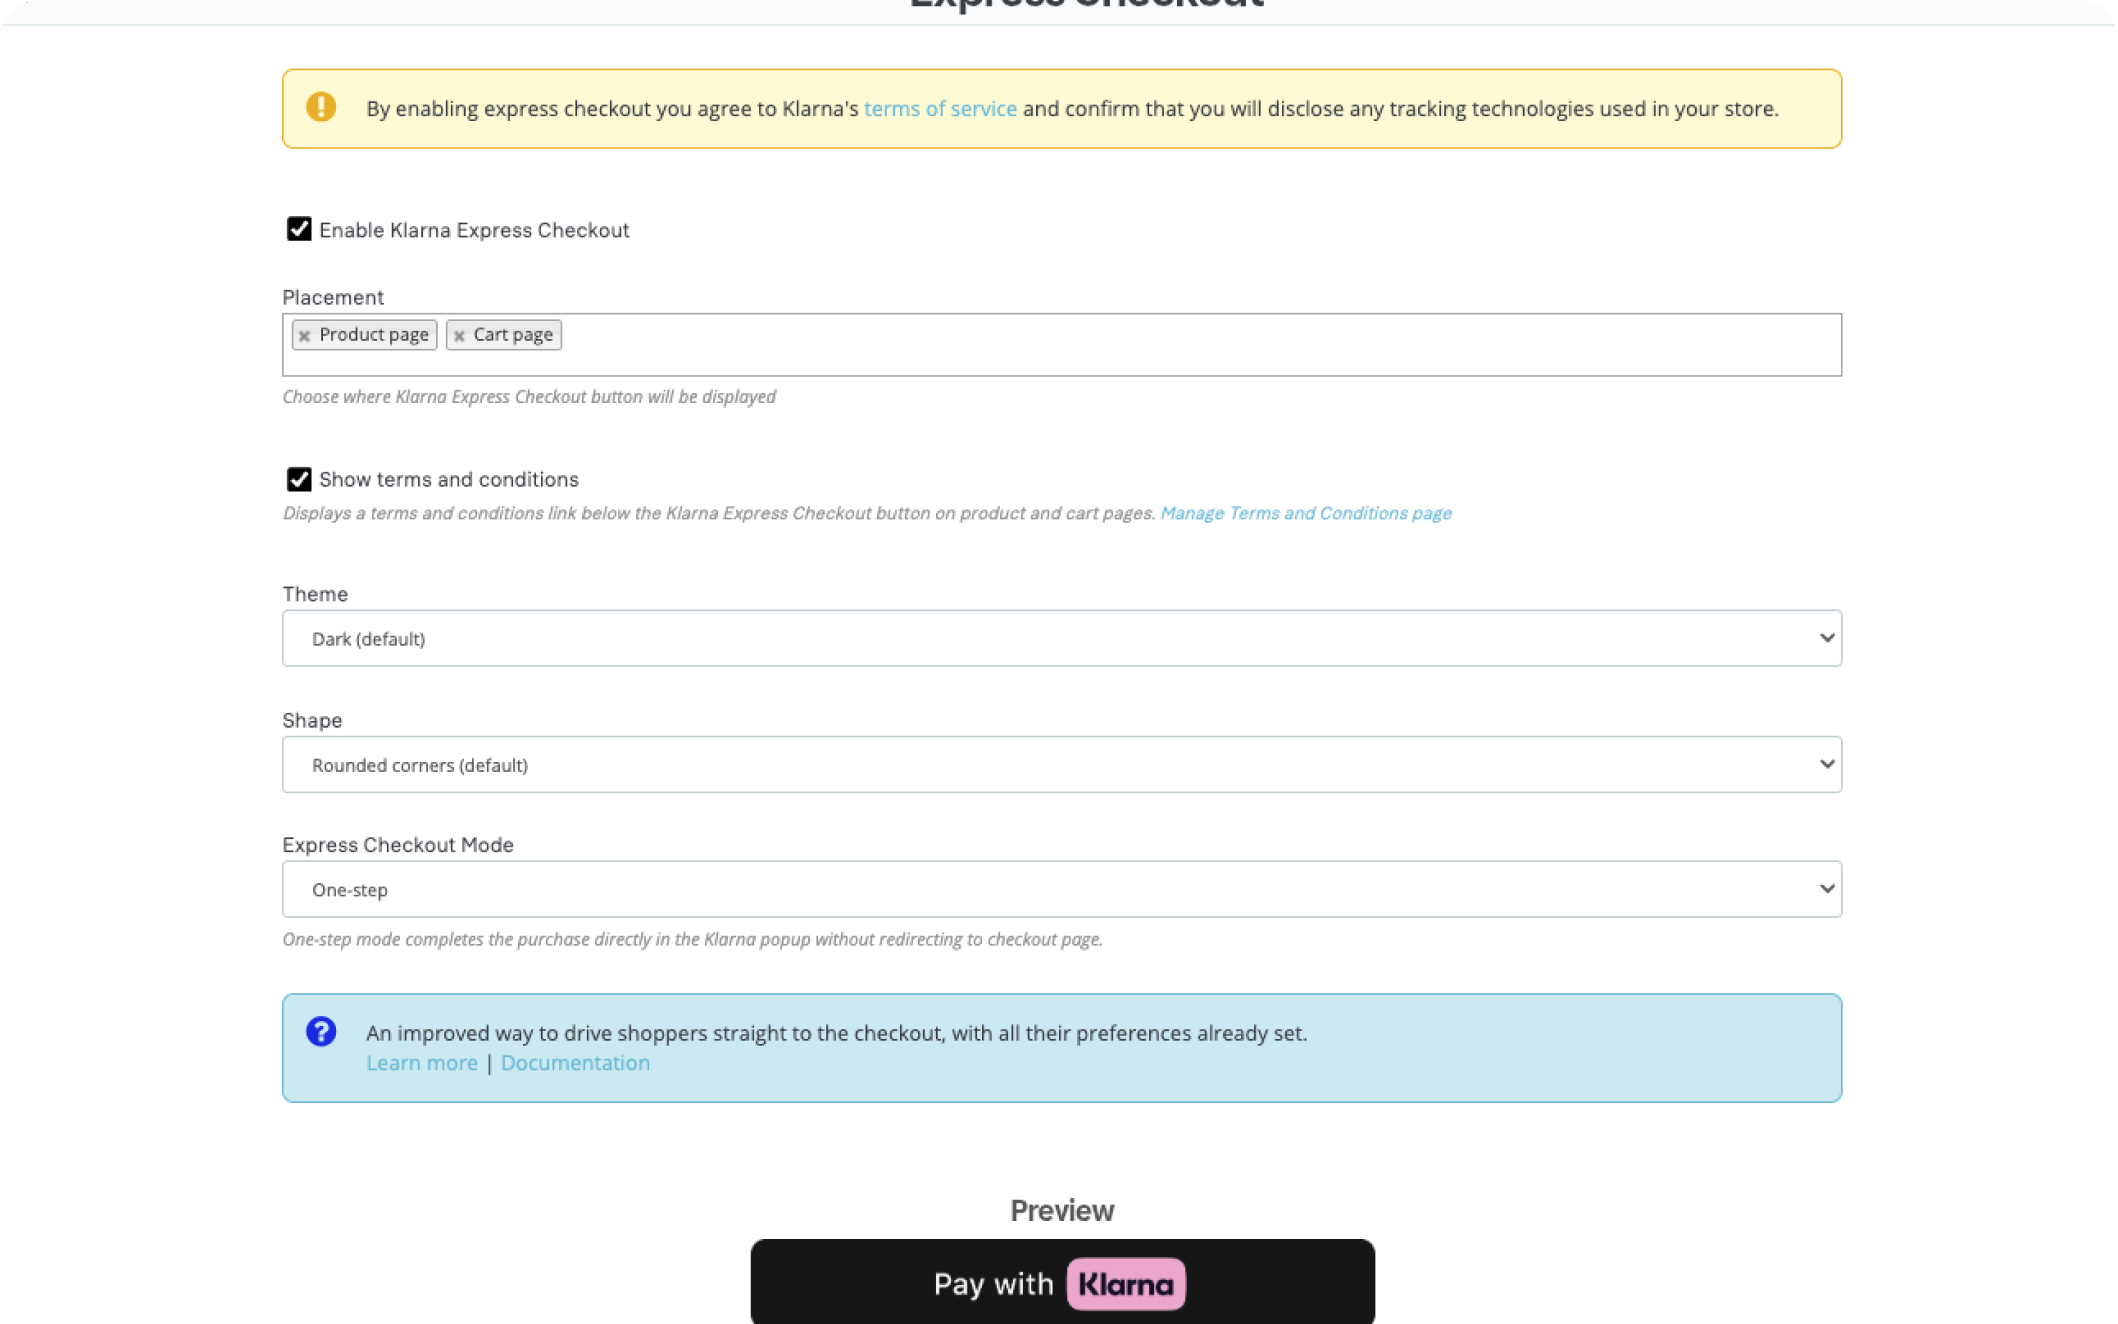
Enabling Express Checkout
To activate Express Checkout, you must enable it in the Klarna module settings.
- 1.Go to Modules > Module Manager in your PrestaShop back office.
- 2.Find Klarna Official and select Configure.
- 3.Open the Express Checkout section.
- 4.Mark the checkbox Enable Express Checkout.
- 5.Select the placements where you want the Express Checkout button to appear (Product page, Cart page).
- 6.Select the button theme (Light, Dark, or Outlined).
- 7.Select the button shape (Rounded corners, Pill, or Rectangular).
- 8.Select the Express Checkout mode:
- 8.1.One step: Klarna finalizes the order inside the Klarna modal for a single, fast checkout
- 8.2.Multistep: Klarna authorizes the customer then returns them to your checkout so you can collect shipping choices, coupons or other merchant-side options.
- 9.Select Save.
Important
- To use Express Checkout, you must register your store URL in the Klarna Merchant Portal and have a valid client ID. If you have not completed these steps, follow the instructions in the Prerequisites section before activating Klarna Express Checkout.
- When using Express Checkout One-step you must display the terms and conditions of your store below the Express Checkout button, you can do this automatically by checking the 'Show terms and conditions' box.
Button placement and behavior
After Express Checkout is enabled and configured, Klarna automatically displays the Express Checkout button in supported areas of the checkout flow.
The exact placement depends on your store’s theme and structure.
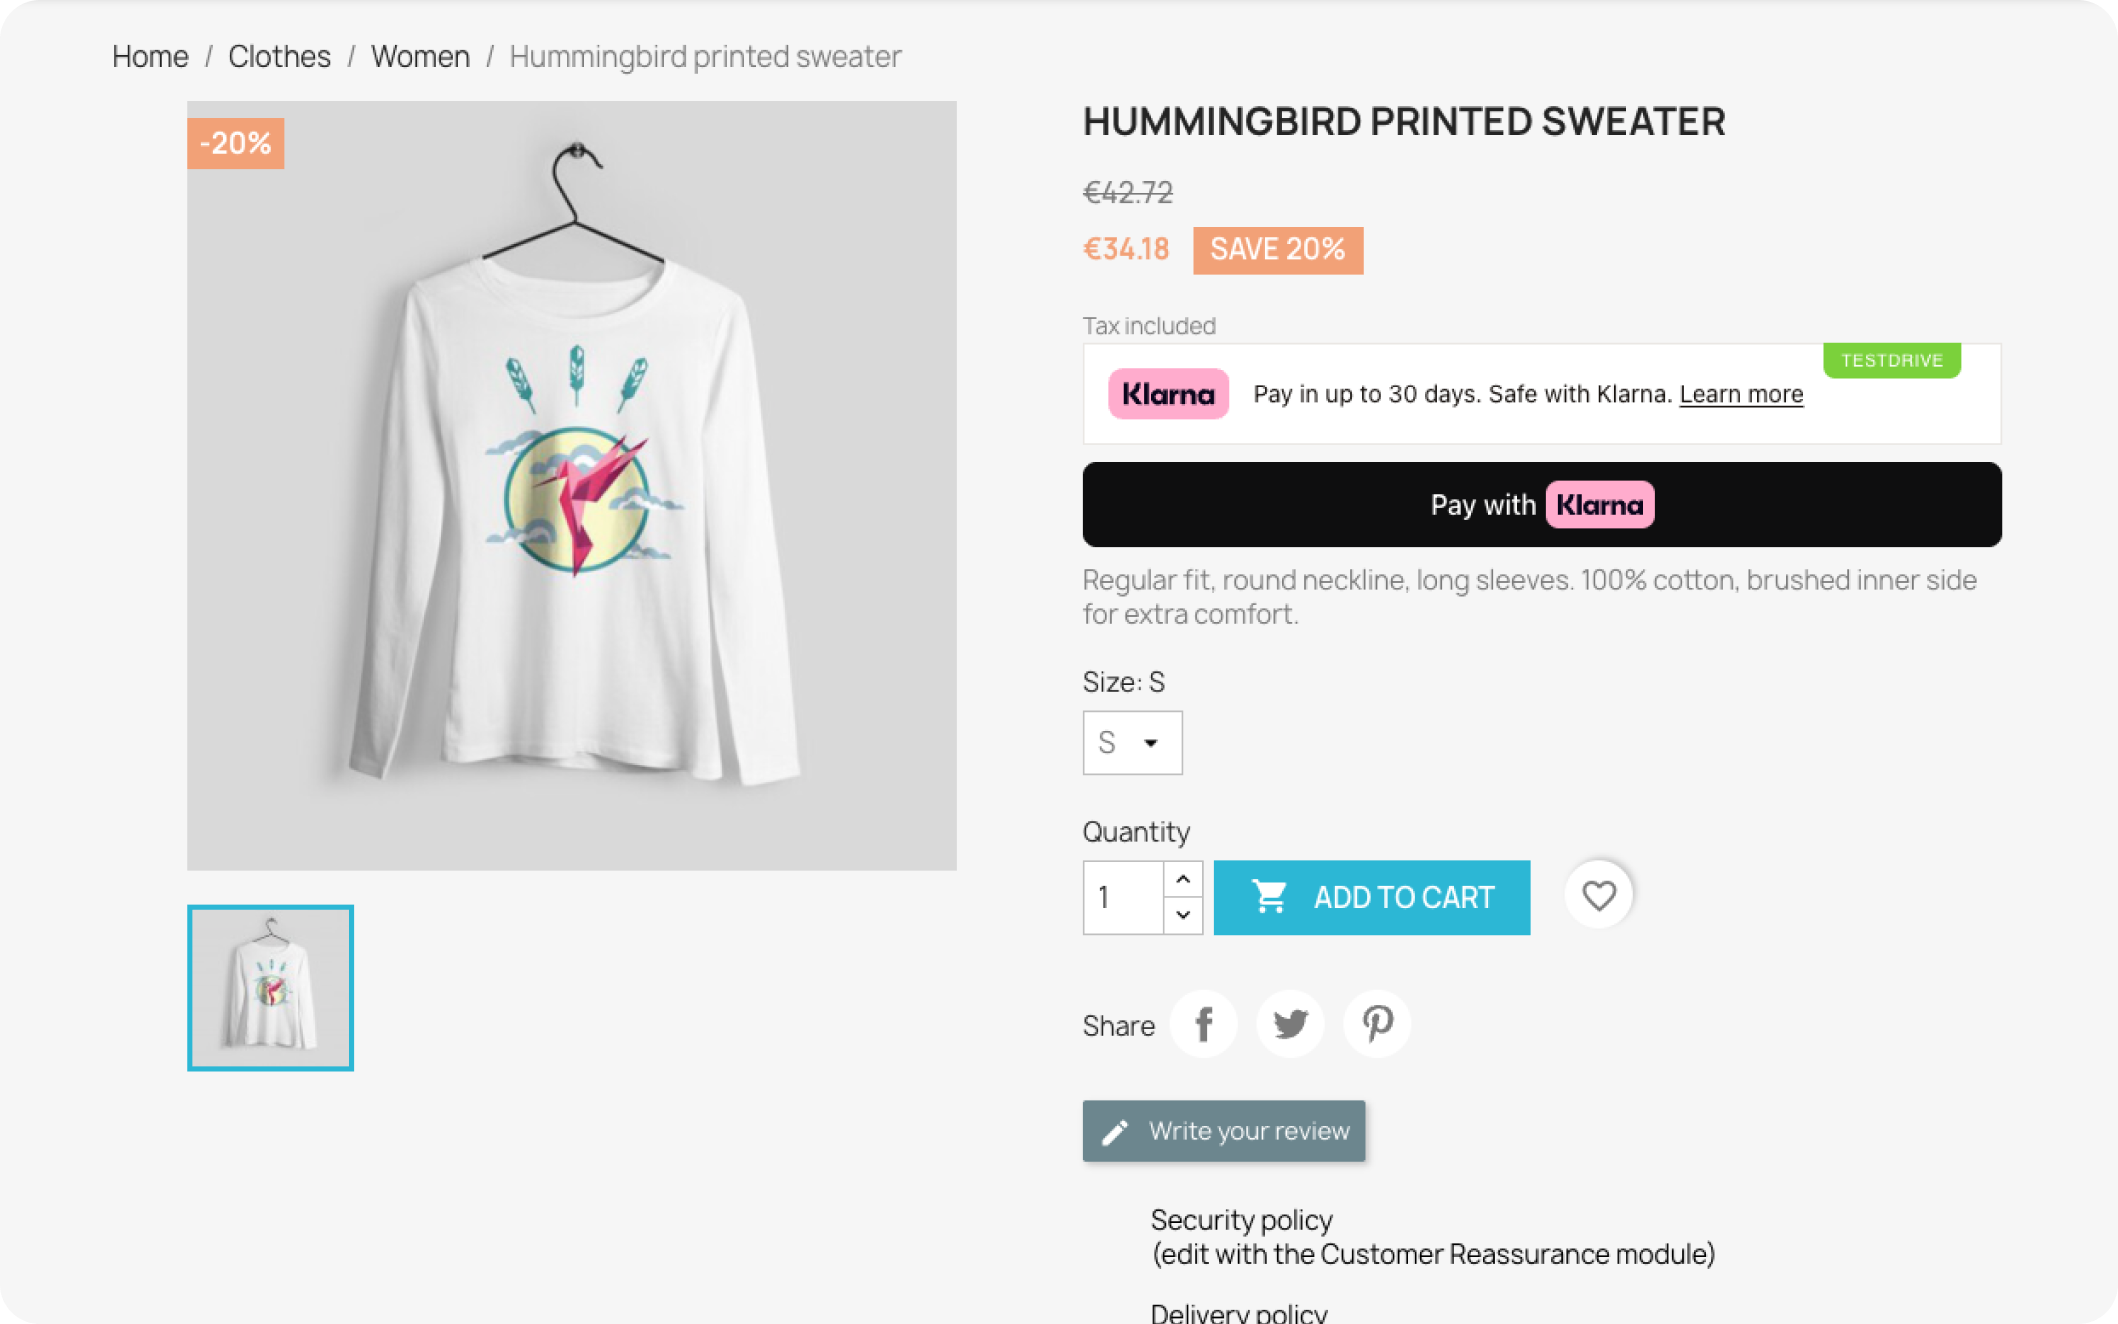
Express checkout button on product page
Styling Express Checkout
Express Checkout includes styling controls that help the button match your store’s design.
Theme options
Choose the visual style for the button:
- Light theme
- Dark theme
- Outlined theme
These apply Klarna’s predefined color and contrast styles.
Button shape options
Choose how the button is shaped:
- Rounded corners
- Pill
- Rectangular
These options let you align the Express Checkout button with your store’s branding.
Express Checkout inherits layout behavior from your theme. You may need to adjust spacing or alignment to ensure the button displays correctly.
Theme compatibility
Express Checkout works best with standard PrestaShop themes. Some custom or heavily modified checkout templates may affect how the button appears.
ImportantIf the Express Checkout button does not appear, test your checkout using the Classic theme to confirm theme compatibility.
Related articles