

Choose your integration
Integrate Klarna into your mobile app using the Klarna Mobile SDK, choosing between native or WebView options to balance seamless user experience with flexibility and security.
Overview
The Klarna Mobile SDK is the only recommended way to integrate Klarna products in mobile apps. It ensures optimal performance, security, and feature coverage across all supported platforms and regions.
To guarantee a seamless customer experience and maintain integration quality over time, consider the following for all mobile applications:
- Klarna Mobile SDK is the primary integration approach for full feature and product coverage, click here to get started on iOS, Android or React Native.
- If Mobile SDK usage is not possible, the only acceptable secondary approach is to use System WebViews (e.g.
SFSafariViewController,ASWebAuthenticationSession,Android Custom Tabs).
Embedded/Custom WebViews (e.g. WKWebView, Android WebView) are strictly prohibited.
To ensure secure, reliable, and future-proof integrations, Klarna does not support Embedded WebViews for purchase flows. Use the Klarna Mobile SDK or System WebViews as described instead.
There are different implementation approaches for checkout experience in mobile applications on top of different mobile frameworks and platforms. To address our integrators needs, Klarna Mobile SDK provides multiple alternative approaches to offer the best user experience in any kind of mobile app integration with tailored native APIs.
For Klarna products such as Sign in with Klarna and On-site Messaging you can refer to their mobile integration guidelines:
Native Integrations
You have a fully native app. You’ll likely want to add views and interact with Klarna content via APIs from your app. We call this a native integration.
For these situations, the SDK offers a fully native API towards our products. As the SDK owns these views entirely, it can provide the best experience, offer direct native API interfaces and notify you when relevant events have occurred. For Klarna Payments, Mobile SDK offers Payment View integration and this is the integration that we recommend for most mobile applications.
Native integrations are available for Klarna products in the Klarna Mobile SDK.
- Checkout Screen: Your native checkout screen and views
- Payment View: Klarna Payment View with the payment widget
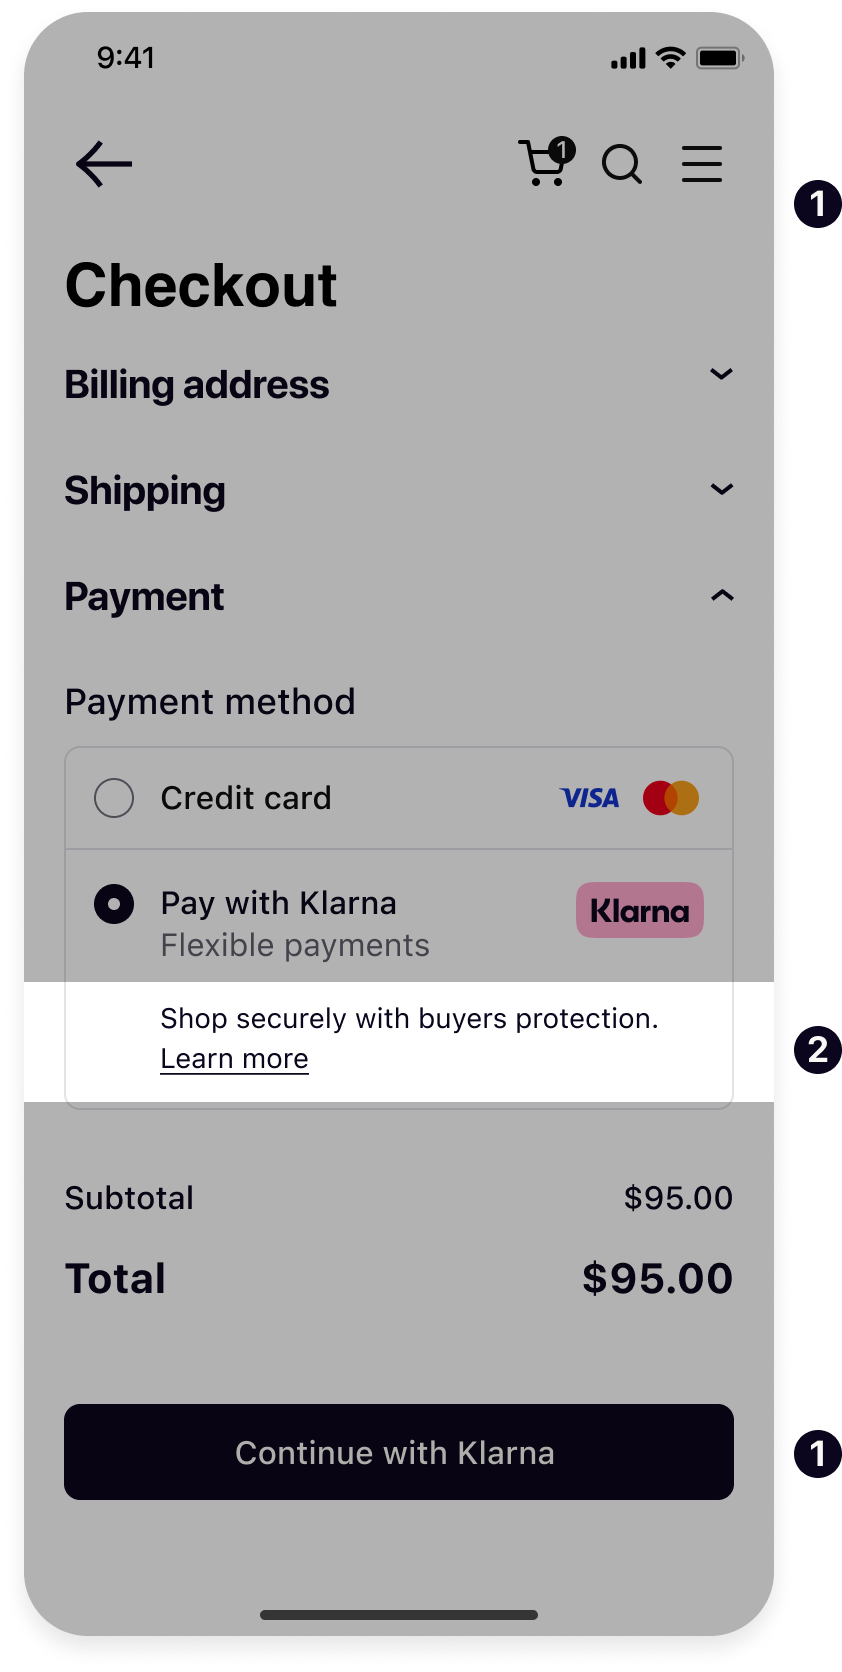
Payment View
Payment View integration of the Mobile SDK is the most straight forward solutions as it gives you native APIs to initiate a view and authorize the payment session. Upon completed authorization, it notifies you with the result in a callback and the whole flow is completed on the client side.
Integration Steps
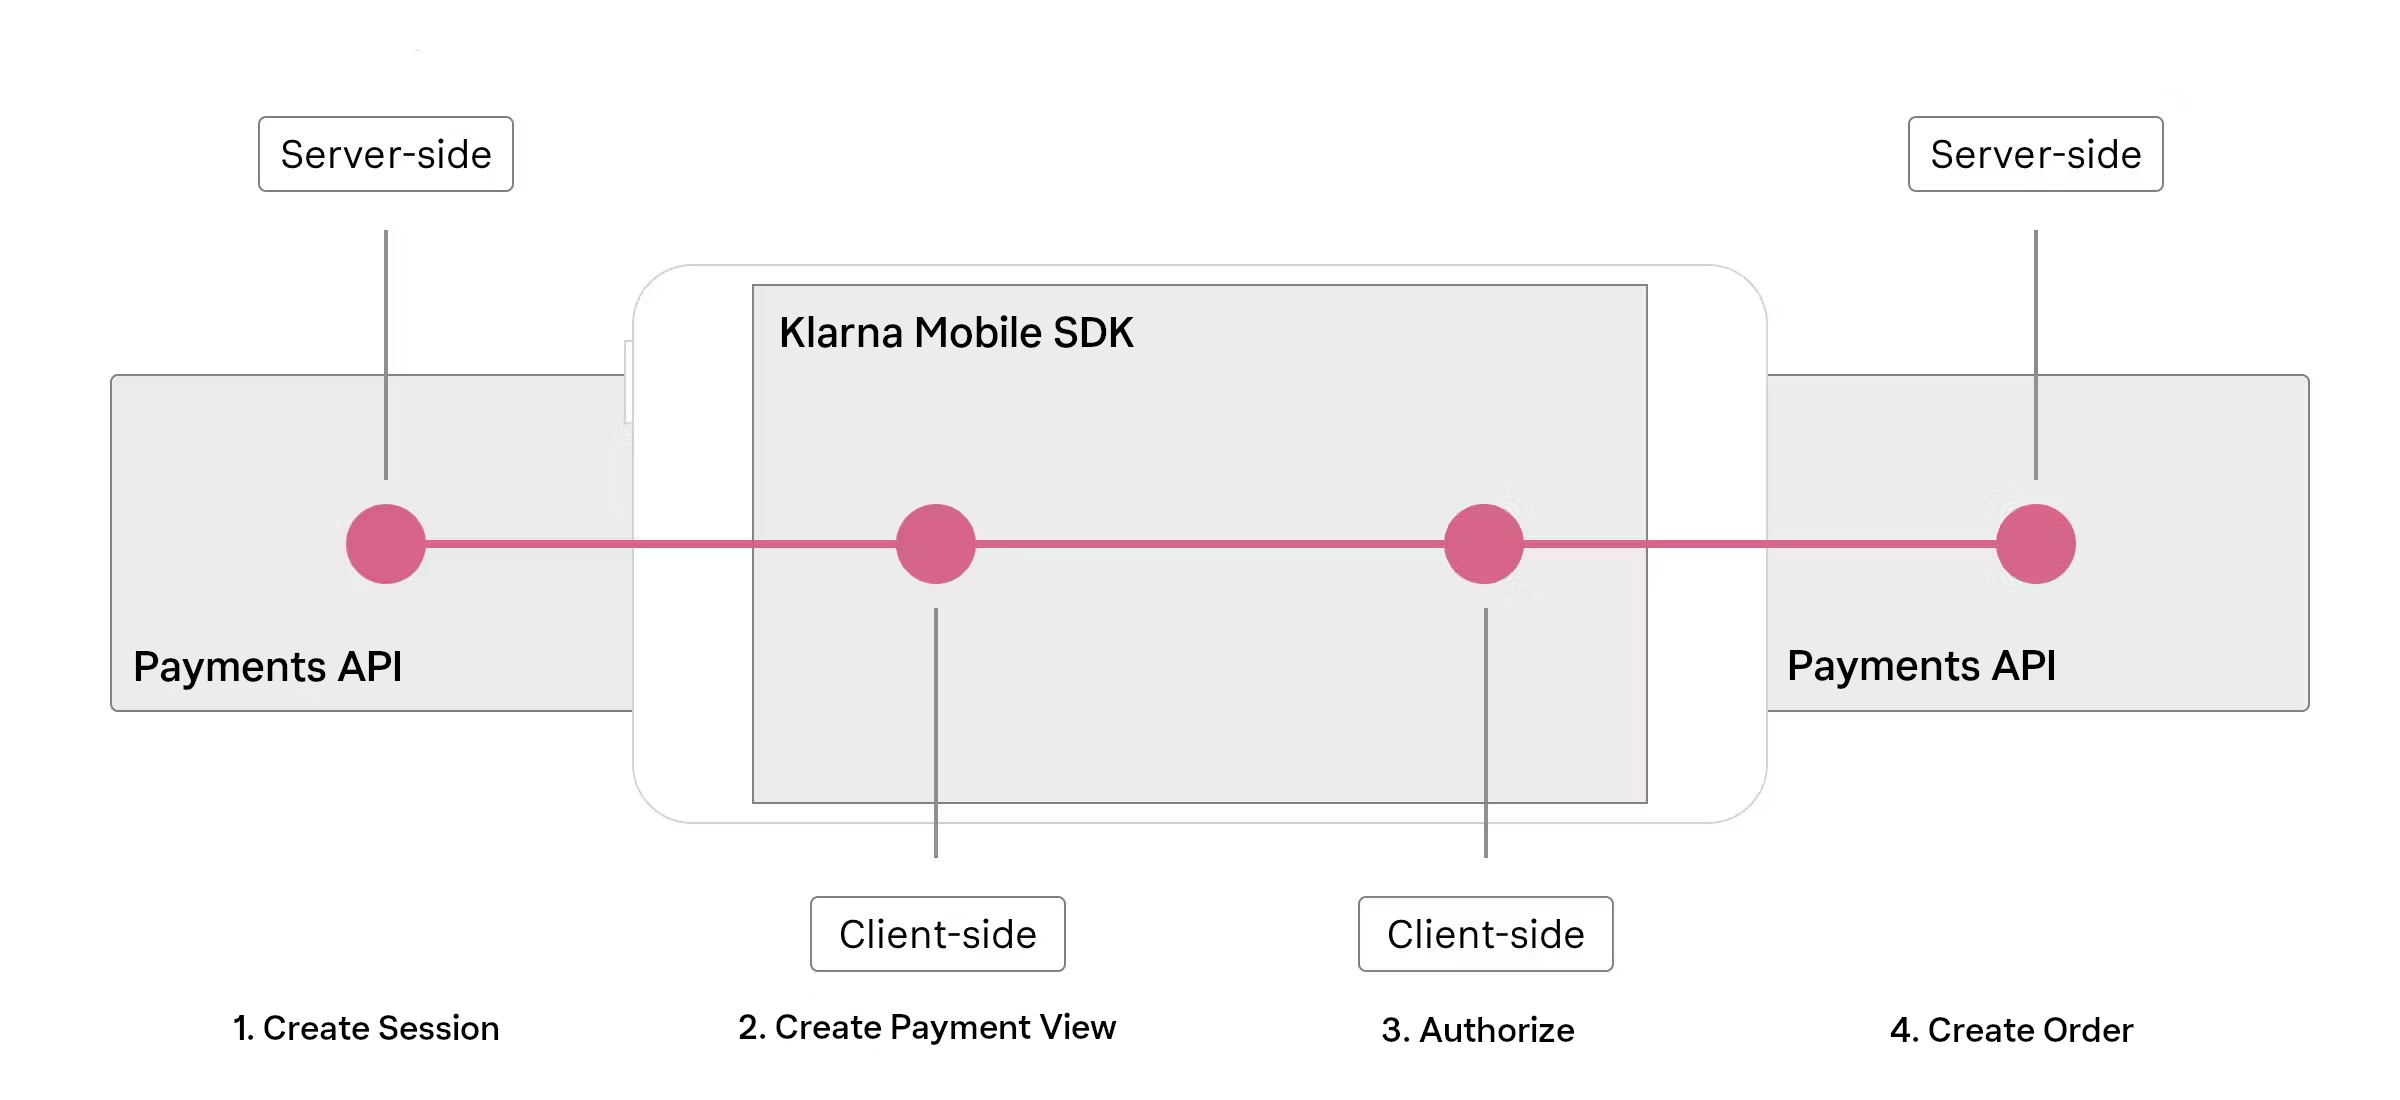
How it works: At a high level, integrating Klarna Payments in your app involves a few key steps:
- Create a Klarna session (Server-side) – Your server calls Klarna’s API to create a payment session with the customer’s order details. Klarna responds with a client_token that represents this session.
- Rendering the payment view (Client-side) – Using the client_token, your app displays Klarna’s KlarnaPaymentView (a pre-built UI component) for the available payment method(s). This view is essentially Klarna’s payment widget optimized for mobile.
- Authorizing the session (Client-side) – The customer reviews the Klarna payment option and confirms the payment. The SDK notifies your app (via callbacks) when the payment is authorized, providing an authorization_token if approval was successful.
- Creating an order (Server-side) – Your server uses the authorization token to finalize the purchase by creating an order through Klarna’s API. Upon success, you can show an order confirmation in your app.
These steps mirror Klarna’s web integration flow (session creation → render payment options → authorization → order creation), but the Mobile SDK makes it native. In the following sections, we’ll guide you through setting up the SDK on iOS, Android and React Native, implementing the payment view, handling events, and completing the end-to-end flow.
To learn more about payment flow steps and error handling, check out this section.
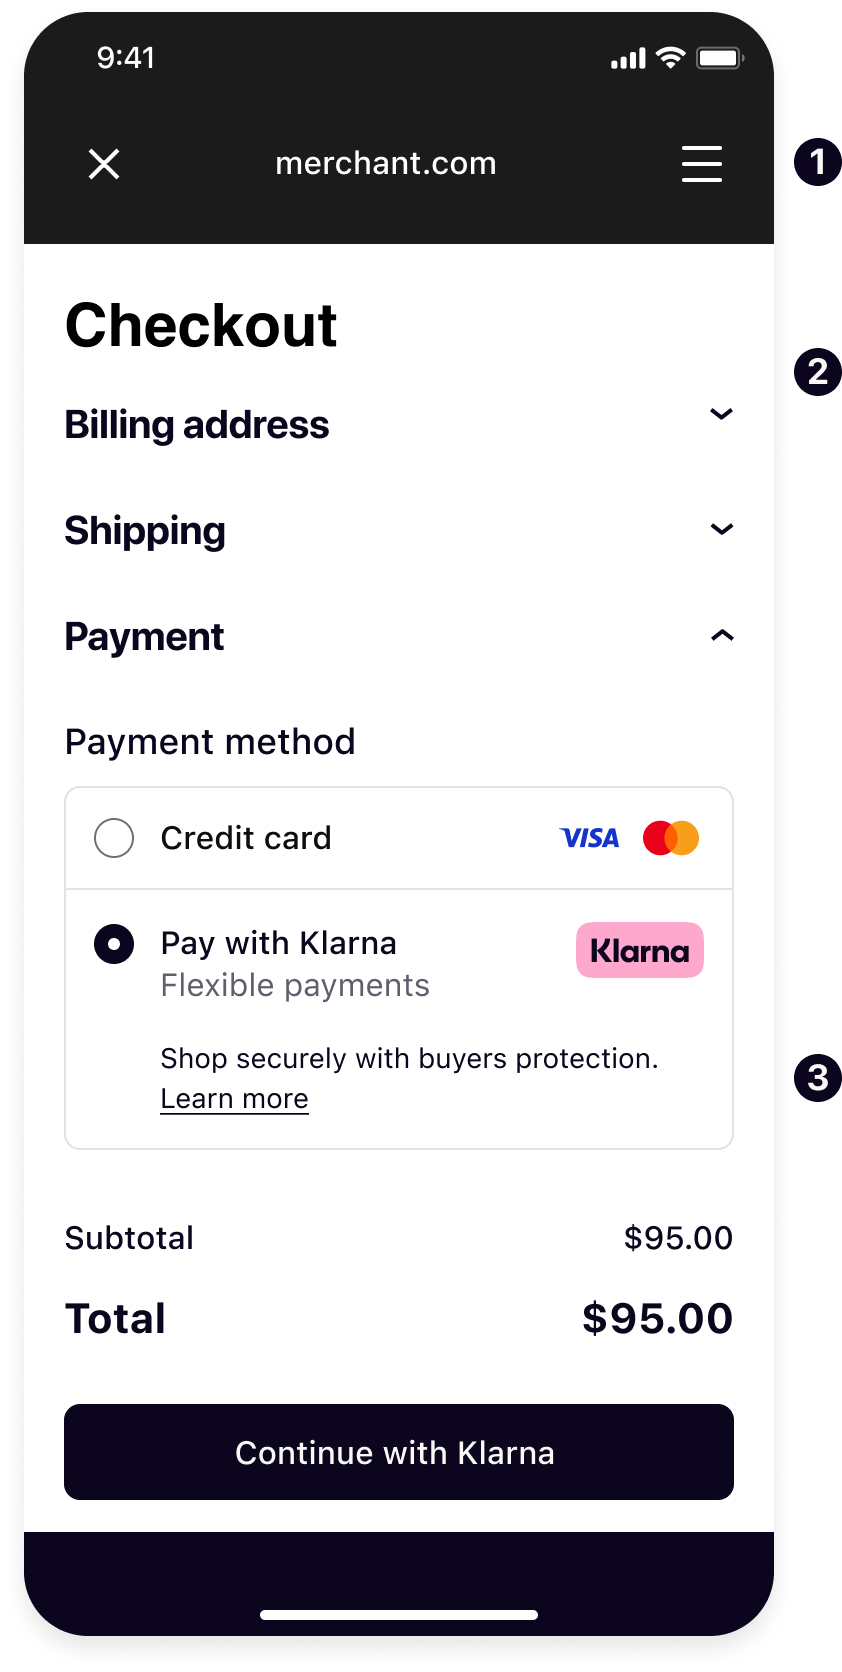
WebView Integrations
Many apps today look to reuse their web solutions and render part of their content in a web view. This allows them to update their content and change designs without re-releasing their apps. If you render Klarna content in a web view, but still want to offer your users the optimal experience, then we offer you Klarna WebView and Hybrid integrations.
- Native UI: Your application's native views
- WebView: Loading your web checkout page
- Klarna Payment Widget: Klarna payment widget from your integration with Javascript SDK
The use case for these types of integrations are limited as rely on the web integration inside the web-based checkout page loaded inside the WebViews.
WebView integrations will not notify you natively for payment authorization results or any payment events as they rely on the web integration in the checkout page loaded inside, your web integration will be notified instead.
Klarna WebView
Klarna WebView is a customized view you can add to your Android or iOS app to display any web content. Behind the scenes, it enhances a regular Embedded WebView and ensures that Klarna purchase flows are presented securely in the best way possible.
It offers a lot simpler integration compared to Hybrid and provides an interchangeable API with the regular WebViews.
Integration Steps
- Create and display Klarna WebView instance.
- Load your web checkout page in Klarna WebView.
Hybrid
Hybrid integration is tailored towards applications already using Embedded WebViews today and want to switch to a secure and optimal user experience for the Klarna Payment integrations inside the web pages loaded inside. The integration provides native APIs to enhance the capabilities of an existing WebView using Javascript communication with the Klarna components rendered inside, allowing them to use native capabilities via the Klarna Mobile SDK.
This is integration requires more effort compared to the Klarna WebView but it allows integrating application to have more control over the WebView and enhance it for just Klarna.
Integration Steps
- Initiate the Hybrid SDK instance.
- Add your WebViews to the instance.
- Notify the instance when navigations occur in the WebView.
- Load your web checkout page in the WebView.