
How to integrate Instant Shopping into a product page within your domain
Instant shopping is deprecated. Use [ Express button] instead.
You complete this step leveraging the Instant Shopping Button Keys API from your server-side
As a first step you need to obtain a Button key which you can reuse for displaying Instant Shopping buttons in multiple product pages. This key is used to identify you as a merchant and also to link to some necessary configuration options.
Since this key can be reused for displaying buttons in multiple pages, it is advised that you generate it once and then store it somewhere within your system.
To obtain a key you can use the Instant Shopping Button Keys Service. An example of a request to this service is given below. Note that you need to use your API credentials to authenticate.
You can include more setup options here, e.g. options, merchant_data, merchant_reference, etc., as shown in the API documentation.
The minimum information needed to setup a Key is the URL of an endpoint where the Instant Shopping Button’s server-side will ping you when an Order is authorized.
Read about Klarna’s API URLs to know the base URL, and about Authentication to know how to authenticate when calling our REST API. More detailed documentation on the Instant Shopping orders API is available in the API documentation.
POST /instantshopping/v1/buttons
Authorization: Basic pwhcueUff0MmwLShJiBE9JHA==
Content-Type: application/json
{
  "merchant_urls": {
    "place_order": "< mandatory, URL of an endpoint at the merchant side, which will receive a ping to place an order. (must be https, max 2000 characters) >"
  }
}
Upon success the response of this service will provide you the button key.
HTTP 201 Created
Content-Type: application/json
Location: /instantshopping/v1/buttons/123e4567-e89b-12d3-a456-426655440000
{
  "button_key": "123e4567-e89b-12d3-a456-426655440000",
  "merchant_urls": { /* ... */ }
}
You complete this step from your client-side
After successfully completing this part you should see the Instant Shopping Button like in the image below:
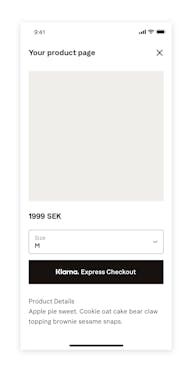
Instant Shopping within product page
You will need to make sure that the Instant Shopping Button Javascript SDK is available on the page you want to display the Instant Shopping Button.
To do this add the following script tag as soon as possible in the page (e.g. <head>).
<script>
  window.klarnaAsyncCallback = function () {

    // This is where you start calling Instant Shopping JS SDK functions
    //
    // Klarna.InstantShopping.load({....})

  };
</script>
<script src="https://x.klarnacdn.net/instantshopping/lib/v1/lib.js" async></script>At this step you decide where you want to place the Instant Shopping button within the page by positioning the HTML container element.
It is important to add a data attribute named data-instance-id to this element, which will uniquely identify this button. Note that you will refer to the value of this attribute when you use the JavaScript API and need to provide the setup.instance_id option. This is particularly necessary if you want to show multiple buttons on the same page. In that case each data-instance-id should be different and unique for this page.
<klarna-instant-shopping data-instance-id="button-123abc456" />
You will now need to provide all the information necessary to support the purchase flow. This information refers to the product(s) being sold, relevant shipping options, locale, currency, etc.
Note that you will use the button key created from the previous step.
Below you see an example of the configuration options that are necessary for the consumer flow. Please note that the order_amount and order_tax_amount will be calculated by the service.
Consult our Javascript Docs for more information.
2.c.1 Load the Instant Shopping
The klarnaAsyncCallback is executed as soon as the Instant Shopping Javascript SDK is ready.
You should define this function before the script tag for fetching lib.js (see 2.a) and as early as possible in the page, e.g. head.
If you would like for a user to be presented with product specification options (examples include choices for size, color, etc.), use theitemsobject array instead of theorder_linesobject array. If you use both, Instant Shopping will default to using theorder_linesobject array.
2.c.2. Receive the response from the load call
When the JavaScript SDK has processed the load call, the provided callback will be invoked. The callback argument will be an object containing the following properties:
- show_button:true/false indicates whether Buy button will be shown or not
- error contains details of potential error messages
Below you can read in details the cases you need to handle:
If show_button: true then the Instant Shopping Button is offered and rendered inside the <klarna-instant-shopping> container.
If show_button: false and there is an error object available, then it is advised to consult the errors and investigate if there is something you can do with calling the load to recover from this state.
Case: Instant Shopping Button not offered
If show_button: false then the button is not offered.
2.c.3 Update the Instant Shopping Button
In case you have selectors in the product page with which customers can change between product variations, you will need to keep updating Instant Shopping after it has been loaded. For example, the customer has chosen a different color or size for the product, or some shipping options have become available, etc. In such cases you can use our Javascript SDK update function to re-configure the Instant Shopping with the new options.
Example
<script>
  document.getElementById('product-color-selector')
    .addEventListener('change', function (event) {
        Klarna.InstantShopping.update({
          "setup": {
            "instance_id": "< the unique identifier of this button. Mandatory if you have multiple buttons on the same page, e.g. button-123abc456 >",
          },
          "order_lines": [{
            "type": "physical",
"reference": "19-402-W",As with the load call, when the JavaScript SDK has processed the update call, the provided callback will be invoked. The callback argument will be an object containing the following properties:
- show_button:true/false indicates whether Instant Shopping button will be shown or not
- error contains details of potential error messages
You complete this step leveraging the Instant Shopping Button Keys API from your server-side
When the consumer has chosen to finalize the purchase, our server-side will ping you at the merchant_urls.place_order, and prompt you to place the order for a specific authorization_token. Remember that the URL for this endpoint was defined in the first step when you created this button key.
You will place the order through our REST API, and will be notified immediately about the successful or failed order placement. So you are able at this point already to create the order within your system.
You can choose to deny the purchase and in this case provide a deny reason and/or a URL to redirect the consumer to.
Note:Read about Klarna’s API URLs to know the base URL, and about Authentication to know how to authenticate when calling our REST API. More detailed documentation on the Instant Shopping orders API is available in the API documentation.
During this request we make available to you both the authorization_token to use next for placing the order, but also the details of the authorized order. Below you see an example of how the Request Body looks.
The response from the place order request is not important for Klarna Instant Shopping to progress the purchase flow.
Instead you should proceed with all validations (stock, shipping capabilities, prices, etc.) on your side. Once those are done, approve or deny the order following the request guidelines below.
Deny the order
If you need to deny the purchase you need to perform a DELETE call though our API and provide some information in the request body. Note that you need to use your API credentials to authenticate.
Below you may find examples of how deny requests may look:
1. Deny order request with code:
DELETE /instantshopping/v1/authorizations/{authorization_token}
Authorization: Basic pwhcueUff0MmwLShJiBE9JHA==
Content-Type: application/json
{
  "deny_code": "address_error",
  "deny_message": "We cannot ship at this address."
}
2. Deny order request with predefined code:
DELETE /instantshopping/v1/authorizations/{authorization_token}
Authorization: Basic pwhcueUff0MmwLShJiBE9JHA==
Content-Type: application/json
{
  "deny_code": "address_error"
}
3. Deny order request with own code and message:
DELETE /instantshopping/v1/authorizations/{authorization_token}
Authorization: Basic pwhcueUff0MmwLShJiBE9JHA==
Content-Type: application/json
{
  "deny_code": "other",
  "deny_message": "Some other reason for rejecting the order"
}
You can specify a deny_redirect_url only, or a deny_code and deny_message.
- If you specify a deny_redirect_url then we will redirect the consumer to this page and do not show any information dialog within the Instant Shoppingy Button flow.
- If you specify a deny_code and deny_message we will use those to show a more detailed message to the consumer regarding the denial.
- If you do not specify a body we will show a generic message to the consumer notifying them that the purchase is denied by the merchant.
The acceptable values for deny_code are:
- address_error when there are problems with the provided address,
- item_out_of_stock when the item has gone out of stock,
- consumer_underaged when the product has limitations based on the age of the consumer,
- unsupported_shipping_address when there are problems with the shipping address. You don’t need to specify a deny_message for the above codes.
- other for which you may specify a deny_message which will be shown to the consumer. It is important that the language of the message matches the locale of the Instant Shopping flow.
The successful response look like below:
HTTP 204 No-Content
Place the order
If you accept the order, then you need to place the order with our REST API. You do so by performing an HTTP POST in our API for the specific authorization_token and passing to the request body the complete Order. Note that you need to use your API credentials to authenticate.
Place order request
This is an example of how the Request could look like. Note that potential shipping fees are included in the order_lines object.
The response of the order placement endpoint may be success or failure.
HTTP 200 Success
Content-Type: application/json
{
  "order_id": "41475c53-b38e-427e-ade1-db78e3018e19",
  "fraud_status": "ACCEPTED"
}
Instead of immediately accepting the order, it may happen that Klarna flags this transaction for additional review. This is indicated if the fraud_status is PENDING. An order marked as PENDING is subject to manual review which may result in getting rejected. Therefore we advise that you handle those orders carefully and mark them as pending within your internal systems too. Read more about what to do next in our section about pending orders. When it comes to the Instant Shopping flow, the consumer will have been informed of a successful purchase even in this case. This means that you will need to contact them only if the order fails to go through.
HTTP 400 Bad Request
Content-Type: application/json
{
  "error_code": "bad_value",
  "error_message": "bad_value:locale"
}
Other possible error statuses are:
- HTTP 400 It was not possible to create an order with the provided data because some field constraint was violated.
- HTTP 401 You were not authorized to execute this operation. Check your authentication credentials.
- HTTP 403 This order authorization token is invalid or you are not allowed to use it.
- HTTP 404 The order authorization token used does not correspondes to an authorized order.authorization token.
Get the authorized order
You can use the authorization_token to fetch the complete order authorization information before placing the order. Note that you need to use your API credentials to authenticate.
Request to GET Authorized Order
GET /instantshopping/v1/authorizations/{authorization_token}
Authorization: Basic pwhcueUff0MmwLShJiBE9JHA==
Content-Type: application/json
When the purchase is completed the consumer is notified via suitable messaging within the Instant Shopping. There, we show a call-to-action button for directing the consumer to a new location. This location is the post-purchase page you have supplied through the merchant_urls.confirmation when setting up the Instant Shopping Button.
The URL of this page has already been defined either in the first step when you created this button key or in the step when you approved the order. If you choose to do this when you approve the order, then you can customize and personalize what this page will be for the specific consumer and purchase.
Below you see how a successful purchase looks like in the Instant Shopping flow:
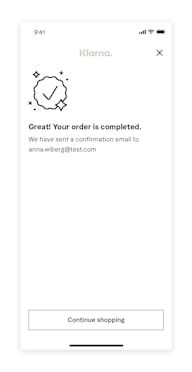
Instant Shopping confirmation view
For instance with these merchant urls:
"merchant_urls": {
  "confirmation": "http://example.com/upsell-similar-product.php"
}
the consumer after closing our dialog will land to:http://example.com/upsell-similar-product.php
After the order is created, you can manage the order either manually via our Merchant Portal or through our Order Management API.