

Step 1: Activation
Here you can find the steps, examples, and code snippets you require for On-site messaging integration using our JavaScript library.
To add On-site messaging to your website, you first need to activate the feature in the Klarna merchant portal and check that you've all prerequisites covered.
If your site's On-site Messaging was set up prior to January 2024, take a look at our guide to migrate to the new WedSDK.
1. Log in to the Merchant portal
Log in to the Merchant portal using one of the following links:
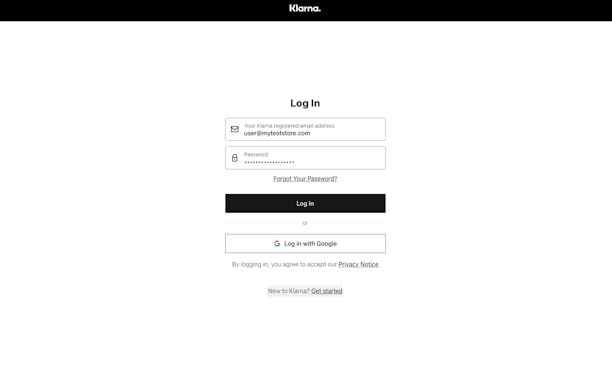
The login screen of the Merchant portal.
To try out the feature, perform a test integration in the test (playground) environment, then follow the Step 6 to complete the integration in the live (production) environment.
The changes you make in the playground environment won't impact your production integration.
2. Go to On-site messaging app
Once you're logged in, go to the Conversion boosters section on top or use the On-site messaging shortcut in the Tools section.
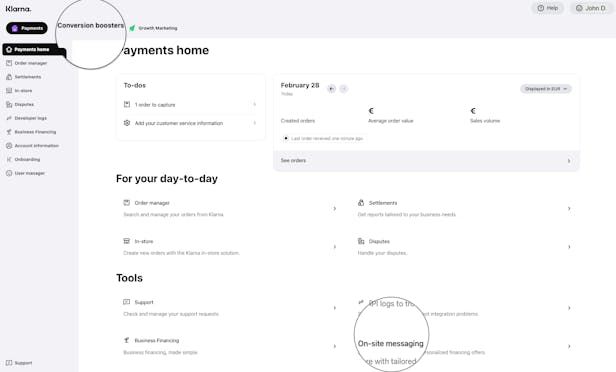
On-site messaging shortcuts in the Merchant portal.
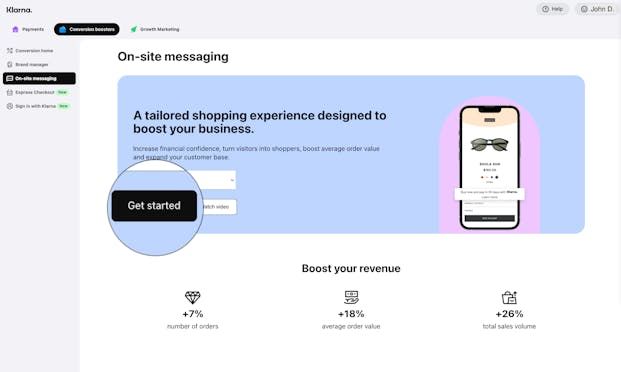
3. Select the store to be configured
Now you can see the On-site messaging app on the sidebar. If you have access to multiple entities with the same user, select the corresponding one from the dropdown selector. The selector displays Partner Accounts or Stores, depending on your setup. Then click Get started to begin the activation.
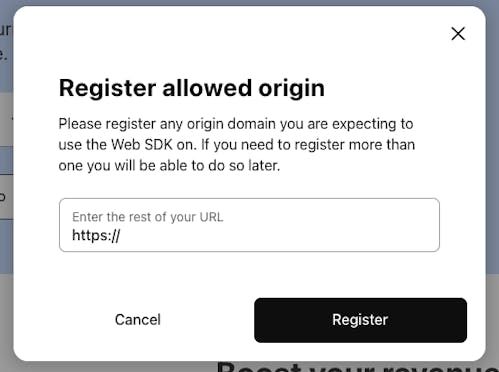
4. Allowlisting your domain
You can now allowlisting the origin domain where our Web SDK will be used.
Step 2: Install JavaScript library
1. Go to Installation
Once you've allowlisted your origin, you will have access to your client identifier and the snippets you need to implement on your website.

Click on '''Client Identifiers page''' to manage them.
2. Copy the installation snippet and add it to your website.
In Add installation code, go to Web SDK tab and click Copy to clipboard to copy the JavaScript library code snippet and insert the copied snippet in your website's source code right after the opening
<body> tag.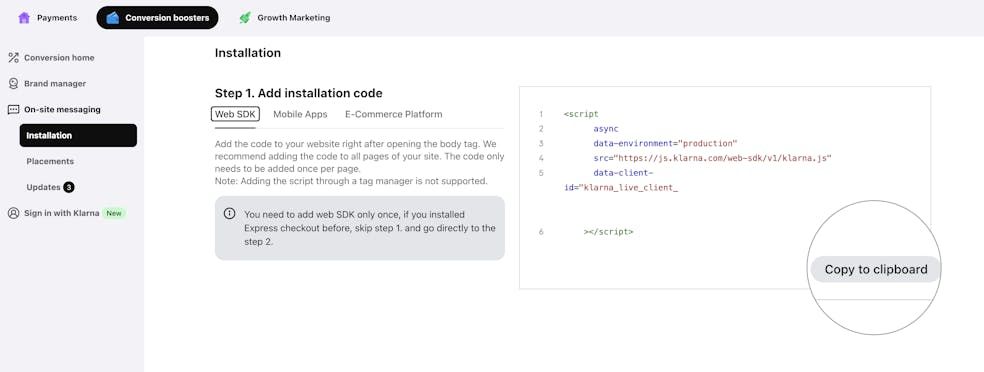
This library is the core of On-site messaging integration as it lets your website communicate with On-site messaging. The library renders the On-site messaging content in the placement tags.
An example of an HTML file with the JavaScript library snippet. You have to copy your own script from the Merchant portal.
HTML
1
2
3
4
5
6
7
8
9
10
<!DOCTYPE html>
<html>
  <head>
    <title>My store</title>
  </head>
  <body>
    <script
        async
        data-environment="playground | production"
src="https://js.klarna.com/web-sdk/v1/klarna.js"You need to add this web SDK only once, if you installed Express checkout before, skip step 2. and go directly to the step 3.
Step 3: Add dynamic placements
1. View available placements
Once you've installed the JavaScript library, it's time to add placements.
A placement is an HTML tag with all the attributes required to display messaging on your website. You can think of it as the container for the messaging that the JavaScript library delivers. Some placements require the purchase amount to display the message.
Placements are available in Merchant portal. Go to On-site messaging and click Placements. You'll see all the placements available for your configuration.
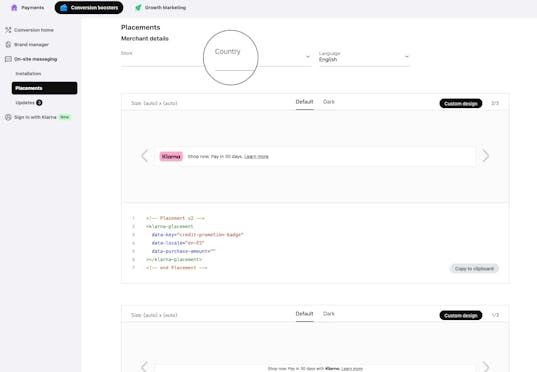
If you're promoting Klarna in multiple countries use the **Region **& **Country **dropdowns to view the relevant placement for each country.
You can also check the tags out in the Placements section of our documentation.
If you're testing your integration in the test (playground) environment, a TEST DRIVE badge appears on each placement.
2. Copy the placement code
Find the placement you want to add to your website, then click Copy to clipboard.
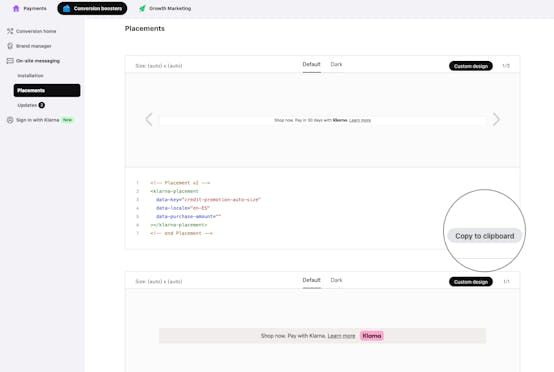
The numerical values in the placement preview are placeholders and aren't representative of the true values you see in a live integration.
3. Add the placement to your website
You can now add the copied tag to your website. Insert placement code snippets where you want the messaging to appear.
An HTML example with JavaScript library and a placement tag installed. When integrating, you have to copy your own placement tags from the Merchant portal as they're generated specifically for your configuration.
HTML
1
2
3
4
5
6
7
8
9
10
<!DOCTYPE html>
<html>
  <head>
    <title>My store</title>
  </head>
  <body>
    <script
        async
        data-environment="playground | production"
src="https://js.klarna.com/web-sdk/v1/klarna.js"You can modify the look and feel of the On-site messaging placements. Use any of the two available ways to do so: using CSS on your website or [ using Klarna's Merchant Portal].
4. Publish the changes to your website
You're now ready to publish the messaging to your site.
Before the go-live:
- You can also customize the content to match your store's look and feel.
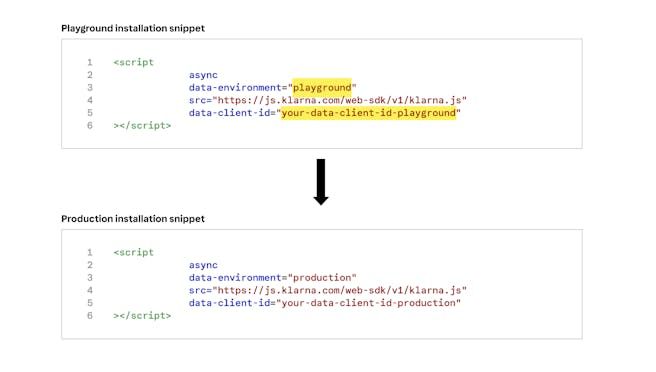
- Replace the playground JavaScript library snippet. Your client ID is different in playground and production. If you don't replace the snippet, the changes won't be visible in your production environment.
Step 4: Go live
After you complete the integration in the test (playground) environment, follow these steps to display messaging in your live store.
1. Replace the playground JavaScript library snippet
Log in to the Merchant portal (production environment) and go to On-site messaging > Installation.
Copy the installation snippet and insert it in place of the snippet you previously copied from the playground environment.
Don't skip this step as your client ID is different in playground and production. If you don't replace the snippet, the changes won't be visible in your production environment.
2. Customize styling for placements in production
If you've created any custom styles for placements in the playground environment and want to use them in production, you have to create them from scratch in the production Merchant portal. Currently, it is not possible to copy them between playground and production.
You don't have to replace the placement code snippets.

3. Disclose tracking technologies used by Klarna Web SDK
If you choose to integrate the Klarna Web SDK on your website, for example but not limited to, to enable Klarna’s conversion boosters or other similar features, you are responsible for informing your users about the tracking technologies employed. This information must be provided prior to any tracking taking place, for instance via a cookie banner or similar mechanism.
You must disclose both strictly necessary tracking technologies and any specific technologies used by the Klarna Web SDK, including details such as name, purpose, provider, use of local storage, and retention period.
You may use the below wording as is, or adapt it to align with your existing cookie banner or privacy policy, provided the information remains complete, accurate, and compliant with applicable laws:
Strictly necessary cookies are necessary for the website to function and cannot be switched off in our systems. They are usually only set in response to actions made by you which amount to a request for services, such as setting your privacy preferences, logging in or filling in forms. For the purpose of ensuring service security and prevention of fraud, we do also collect device fingerprints, including, but not limited to, your browser name, IP address, time zone and language preference and service availability.
| Name | Purpose | Supplier (first/ third) | Session/ Persistent/local | Expiry |
|---|---|---|---|---|
| __klarna_sdk_klarna-shopping-session | This cookie is used to ensure service security, service availability, and to prevent fraud. | Third party | Local storage | 48h |
| __klarna_sdk_config | This cookie is used to:
| Third party | Session | Until you close your browser |
4. Validate if the integration is working as expected
Troubleshooting integration
Something doesn't look quite right? Th the frequent integration errors and frequently ask
I'm not happy with the loading time
Take a look at our [ Best practices] for tips about improving the loading time.
On-site messaging is not loading on my page
- Check that your
<klarna-placement>and script tags are valid HTML. - Make sure you're only loading 1 instance of the JavaScript library per page.
- Check that you're using the snippet with the right
data-client-idfrom the correct environment. - On-site messaging is connected to your payment methods, so make sure everything is enabled and that Klarna payments is loaded on your checkout page.
- Often, the purchase amount isn't correct. Make sure you're sending the correct purchase amount in minor units.
- If all the above is working, check the network requests to js.klarna.com. Look for errors and 204s to find minor errors that keep On-site messaging from loading.
Links on the placements sometimes are unclickable on mobile devices
On-site messaging is rendered inside shadow DOM to improve loading times. Using the Fastclick library makes the elements unclickable inside shadow DOM. This is a known issue.
Here are some ways to fix the issue:
- Remove the FastClick library (optimal solution).
- Add the
needsclickclass to all shadowhost divs. Shadowhost divs of On-site messaging are added dynamically by the On-site messaging script while processing the placements. You have to observe the change and add theneedsclickclass only after a shadowhost div is appended. To query the elements where theneedsclickclass should be added, run the following:
Querying elements that require a
needsclick class.JAVASCRIPT
1
2
const elements = document.querySelectorAll('klarna-placement div')