Enable Klarna in payment forms presented through hosted checkout pages or embedded elements using Klarna’s SDKs. This ensures a branded, compliant, and high-conversion checkout experience.
Integration overview
With this integration path, Partners are presenting a payment form generated by the Acquiring Partners:
- Customers are either redirected to a hosted checkout page or a checkout element embedded in the Partner website via a JavaScript library.
- Acquiring Partners must use Klarna's SDK to dynamically retrieve payment presentation assets (headers, icons, subheaders, button and instructions) and build the payment form.
- Klarna’s SDK keeps all elements up-to-date and optimized for the best conversion.
The following diagram gives an overview of the customer journey and the Acquiring Partner workflow:
On a high level, building the payment form requires the following actions:
- Accept
klarna_network_session_tokenin your checkout session API and JavaScript library. - Accept
klarna_network_datain your checkout session API (server-side only). - Forward both Klarna Network data points to Klarna exactly as received — do not modify.
- If
klarna_network_session_tokenis provided, exchange it server-side for ansdk_token. - Load the Klarna SDK from the official URL — never bundle or self-host.
- Initialize the SDK with
clientId,partnerAccountId,sdkToken,productsandlocale. - Use
Klarna.Payment.presentation()SDK method to dynamically retrieve personalized assets to build the payment selector - Never hardcode Klarna logos, texts, or layout — always render via SDK components.
- Always follow the returned
instruction(e.g., show, preselect Klarna). - Mount the Payment Button only after Klarna is selected or preselected.
Integration details
Step 1: Gather and forward payment context data
Before calling the Payment Authorization API
Klarna Network parameters
klarna_network_session_token- Encodes Klarna session context, such as payment option preselection, prequalification results, or payment approval
- May be present on the initial authorization request
- Required when finalizing authorization after a step-up flow
klarna_network_data- Encodes additional Klarna Network context supplied by the Partner, including supplementary purchase data
- Must not be parsed, enriched, or transformed
Below is an example of how Acquiring Partners can accept the Klarna Network parameters in their Partner-facing APIs.
Requirements
- Accept the Klarna Network parameters in the Partner-facing APIs.
- Use the field names
klarna_network_session_token/klarna_network_data, ensuring that it’s easy for any Partner to identify and use. - Validation should be implemented, but it must not be more restrictive than what is specified in Klarna’s Payment Authorize API
- All printable UTF-8 characters must be supported
- Forward the Klarna Network parameters unmodified to Klarna.
Supplementary purchase data
Supplementary purchase data improves Klarna’s ability to assess risk, optimize approval rates, and deliver a more personalized checkout experience. It includes structured information such as line items, L2/L3 data for Card Network optimization and other transaction context.
Acquiring Partners may receive this data from the Partner in two ways:
- Embedded in
klarna_network_data- No parsing needed. Just forward it as-is.
- As individual fields in the Acquiring Partner’s API
- The Acquiring Partner is responsible for mapping existing fields in their payment API with the fields defined in the
supplementary_purchase_dataobject when calling the Payment Authorize API
- The Acquiring Partner is responsible for mapping existing fields in their payment API with the fields defined in the
Acquiring Partner must collect and forward data that aligns with Klarna’s Supplementary Purchase Data package by utilizing their existing schema.
Acquiring Partner should not add additional fields of the supplementary purchase data in their APIs to support Klarna. Instead, they must ensure that the klarna_network_data and its required structure are properly implemented.
In both cases, the Acquiring Partner is responsible for ensuring that the data provided by the Partner is accurately forwarded to Klarna. Partners should not be asked to resubmit the same information through multiple mechanisms.
Read more about Supplementary Purchase Data here.
Step 2: Fast track Klarna payment when applicable
Before presenting the payment form, if an klarna_network_session_token was shared by the Partner, the Acquiring Partner must check if Klarna payment should be fast-tracked. This typically happens when the Partner implements Klarna boost features such as Klarna Express Checkout and the customer has given the approval for payment.
Payment presentation request
/v2/accounts/{partner_account_id}/payment/presentation| Parameter | Required | Description |
|---|
Sample request =====
curl -G 'https://api-global.test.klarna.com/v2/accounts/{partner_account_id}/payment/presentation' \
     --header 'Authorization: Basic <API key>' \
     --header 'Klarna-Network-Session-Token: eyJhbGciOiJIU...' \
     --data-urlencode 'locale=en-US' \
     --data-urlencode 'amount=11836' \
     --data-urlencode 'currency=USD' \
     --data-urlencode 'intents[]=PAY'
Payment presentation response
The PaymentPresentation interface provides the full Klarna branding package and instructions tailored to the customer's purchase. However, at this step, the only relevant information is payment_status.
| Payment status | Description |
|---|---|
| Further customer interaction is required, the payment selector should be displayed. |
| The customer has approved the payment, the Acquiring Partner should proceed with payment authorization immediately – jump to the Authorize the payment section. If the authorization is successful, return to the merchant confirmation page, else continue to display the payment form. |
Sample response
{
...
"payment_status": "PENDING_PARTNER_AUTHORIZATION",
...
}
Step 3: Initialize the Klarna Web SDK
Using Klarna Web SDK, you can:
- Display Klarna dynamically alongside other payment options in your payment form.
- Embed Klarna’s UI elements directly in your frontend for a consistent and responsive design.
- Manage the interaction flow while offloading the rendering and logic to Klarna’s SDK.
Exchange the customer_token and/or klarna_network_session_token for an sdk_token
This step is only applicable if the Partner has shared an klarna_network_session_token or if the customer_token has been acquired through the tokenization process.
The Acquiring Partner must exchange the acquired customer_token for a short-lived sdk_token using the Generate SDK Tokenklarna_network_session_token was passed by the Partner in the charge call, both tokens should be used for the exchange.
/v2/interoperability/sdk-tokens| Parameter | Required | Description |
|---|---|---|
Klarna-Interoperability-Token | Yes | The interoperability token enables continuity of customer journey across domains and services. If you are an Acquiring Partner, you receive this token from your merchant. |
The sdk_token is a single-use, browser-bound credential that restores the customer’s checkout context when Klarna’s Web SDK is loaded. This token should be exchanged server-side before initializing the SDK and displaying the checkout page to the customer.
Initialize the Klarna Web SDK
The Klarna Web SDK (klarna.mjs) follows the JavaScript module approach and should be included in places where you need to have a reference to the SDK such as while rendering any components or initiating a payment flow. Here are the initialization parameters:
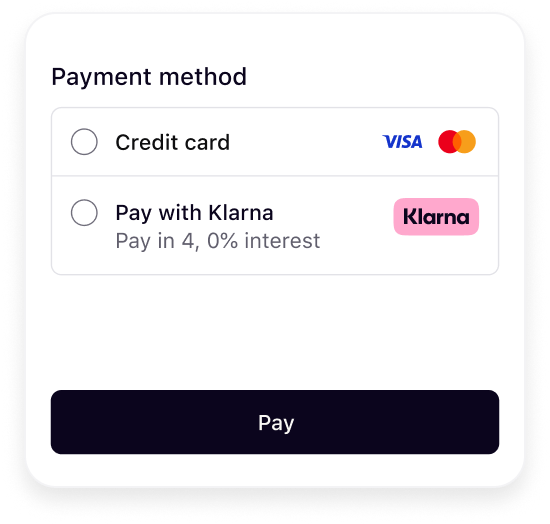 | 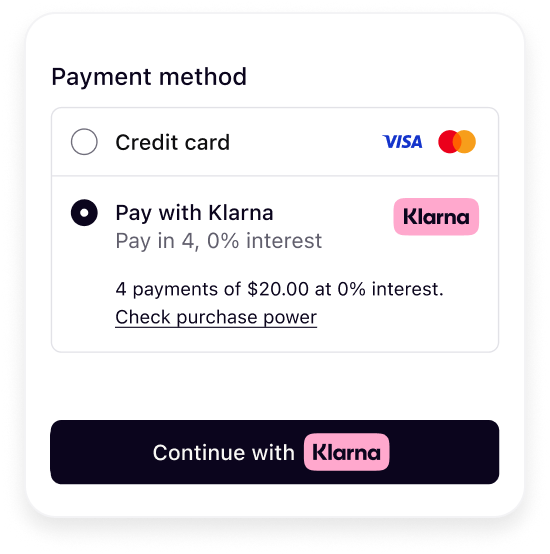 |
| Initial presentation | When Klarna is selected |
Klarna's payment presentation best practice
To ensure the best user experience and optimal conversion rates when presenting Klarna as a payment option, please apply the following recommendations:
- Display Klarna descriptor dynamically alongside other payment options in your payment form.
- Embed Klarna’s UI elements directly in your frontend for a consistent and responsive design.
The next sections in this guideline will walk through how this can be achieved using Klarna Web SDK.
Klarna payment presentation request
Sample code
const paymentPresentation = await klarna.Payment.presentation({
  amount: 11800,
  currency: "USD",
  locale: "en-US",
  intents: ["PAY"]
});
Klarna payment presentation response
The PaymentPresentation interface provides the full Klarna branding package and instructions tailored to the customer's purchase:
| Attribute | Presence | Purpose |
|---|---|---|
| required | Specifies how Klarna as a payment option(s) should be displayed (e.g., whether to show, preselect, or display as show-only). Adhering to these payment presentation instructions ensures customers have the best possible experience and optimizes conversion rates. |
| optional | Defines the default payment option applicable to all purchase types. This object includes the visual elements required to represent Klarna during checkout. |
The paymentOption object structure is as follows:
| Attribute | Presence | Purpose |
|---|---|---|
| required | The identifier of the payment option. The value is required to be sent to the Payment Authorize API or the Payment Request API when initiating the payment. |
required | Klarna badge/logo suitable for checkout forms. | |
required | The main descriptor that introduces Klarna in the payment form. The value will be dynamically adjusted based on the locale provided. | |
| required | The descriptor subheader which must be loaded inline below the main descriptor header. Short and enriched descriptive texts. Provides transparency on available options like installments, pay later, etc. |
| optional | Enriched tailored description with link. |
| optional | Badge used for saved options or promotions. |
| optional | Defines terms/disclosures potentially with links. |
| required | Payment button that starts the Klarna purchase journey. |
For the full API specifications, refer to Klarna Web SDK.
Follow Klarna payment presentation instruction
This section describes how to apply Klarna’s payment presentation instructions, which define how Klarna should appear in your checkout. Following these instructions ensures a consistent experience across payment states and is required for features like Klarna Express Checkout and Sign in with Klarna.
The instruction attribute has the following values:
| Instruction | Description |
|---|---|
| Show Klarna alongside other payment methods. |
| Show Klarna pre-selected but still alongside others. This is returned when using the customer_token issued from the Sign in with Klarna feature or the tokenization flow. |
| Show Klarna as the only payment method. This is returned when the customer has finished the first step of Klarna Express Checkout multistep. |
| Hide Klarna from the list of payment methods. This is returned when the Partner has been identified as fraudulent and terminated, meaning the Partner no longer has access to Klarna functionality. |
For the full API specifications, refer to Klarna Web SDK.
Here are example outcomes illustrating how Klarna should be displayed for each instruction:
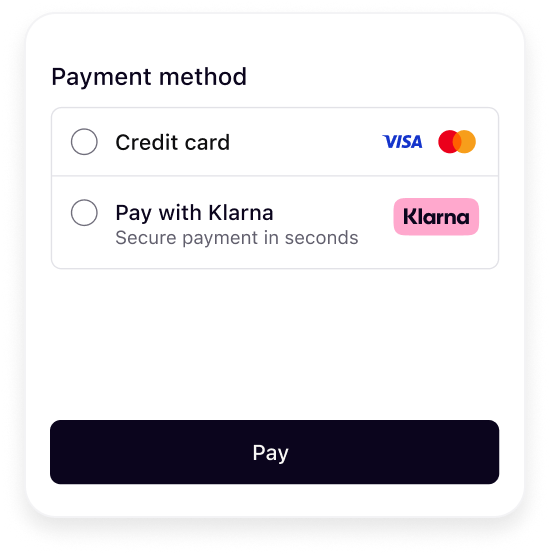 | 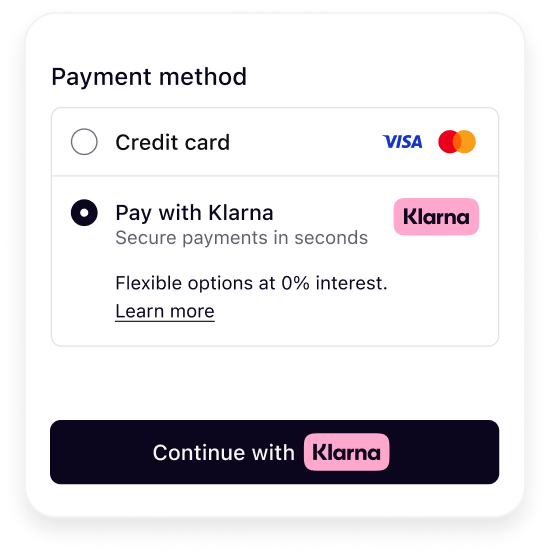 | 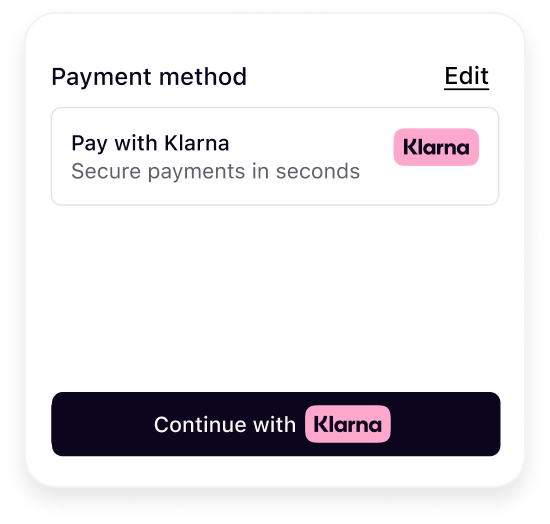 | 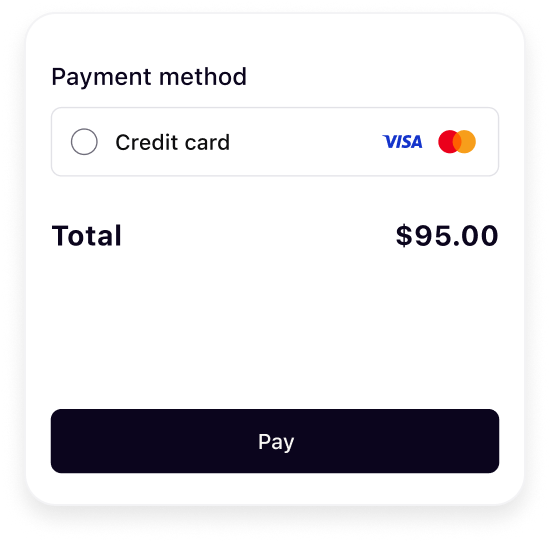 |
| Show Klarna | Preselect Klarna | Show only Klarna | Hide Klarna |
The presentation instructions are derived from possible customer purchase journeys described in the following article.
<br />Sample code:
function renderKlarna(paymentPresentation) {
  if (!paymentPresentation) return;

  const root = qs("#klarna-payment-method");
  if (!root) {
    console.error("Missing #klarna-payment-method container.");
    return;
  }

  root.innerHTML = `<div id="klarna-option-default" class="klarna-option default" style="display:none;">

</div>Mount Klarna payment option components
Once an instance of PaymentPresentation is created, the Klarna payment option(s) must be rendered dynamically in the payment selector according to Klarna’s presentation guidelines. The following diagram displays different visual components and how they are rendered in different selection states:
- Icon
- Badge
- Header
- Subheader
- Message
- Terms
- Button
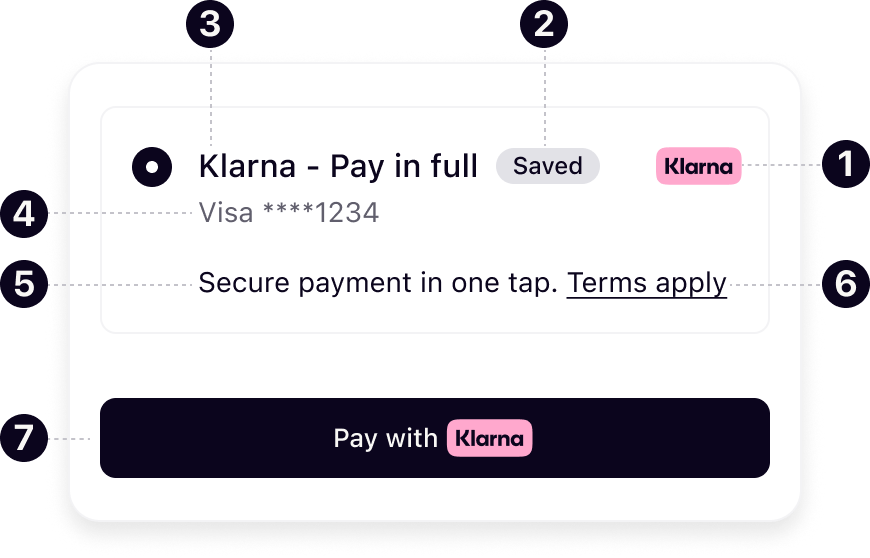
Mount the Klarna payment option components within your designated Klarna payment method container to render them dynamically in the payment form. Ensure that all components—including those not immediately visible—are mounted during initialization, and manage their visibility through your own logic or UI controls.
function renderKlarnaOption(containerId, option) {
  const container = qs(`#${containerId}`);
  if (!container) {
    console.error(`Missing #${containerId} container.`);
    return;
  }

  const ids = {
    icon:    `${containerId}-icon`,
    header:  `${containerId}-header`,
    subhdr:  `${containerId}-subheader`,
badge: `${containerId}-badge`,Handle Klarna payment option selection and deselection
When a Klarna payment option is selected/deselected, ensure the additional visual components are shown/hidden properly.
/**
 * Toggle the Klarna payment option selected state.
 * Use for both SDK preselection (PRESELECT_KLARNA) and user interactions.
 */
function toggleKlarnaPaymentOptionSelection(containerId, isSelected) {
  const container = qs(`#${containerId}`);
  if (!container) {
    console.error(`Missing container #${containerId}.`);
    return;
  }

const display = isSelected ? "block" : "none";Handle Klarna payment button styling and initiate callback
The payment presentation instance allows you to mount the prebuilt button component. The Klarna Payment Button is context-aware and dynamically adapts to your configuration.
[ Klarna payment button variants]
Choose the theme and shape of the payment button to best fit into your online store in a way that complements your brand and encourages user engagement. More details on the button styling can be found here.

[ Configure Klarna payment button]
The paymentButton.component() can be configured with the following set of parameters:
| Parameter | Description |
|---|---|
| Sets a custom DOM ID on the rendered button. Useful for testing or styling. |
| Defines the button’s shape. Possible values are:default, pill, rect |
| Sets the visual theme of the button. Possible values are: default, light, dark, outlined |
| Sets the language and region (e.g., en-US). If you don’t set this, it will automatically use the value chosen when you first set up the Web SDK. If that’s not available, it will use your browser’s settings instead. |
| Disables the button when set to true. Useful during form validation or async operations. |
| Forces the button into a loading state. Useful when awaiting async setup or validation. |
| Sets the purpose of the payment. Used to personalize the button and flow if not set when creating the PaymentPresentation instance. |
| Function that returns a Promise resolving to either a PaymentRequestData, a paymentRequestId, or a returnUrl. This will be handled differently depending on the integration path. |
| Defines how Klarna launches the purchase journey. |
For the full API specifications, refer to Klarna Web SDK.
Sample code
option
  .paymentButton
  .component({
    id: "klarna-payment-button",  // optional test hook
    shape: "pill",                // "default" | "pill" | "rect"
    theme: "default",             // "default" | "light" | "dark" | "outlined"
    intents: ["PAY"],
    initiationMode: "DEVICE_BEST", // "DEVICE_BEST" | "ON_PAGE" | "REDIRECT"
    initiate: (klarnaNetworkSesionToken, paymentOptionId) => initiateKlarnaPayment(klarnaNetworkSesionToken, paymentOptionId)
  })
  .mount(`#${containerId}-payment-button`);
The button will automatically handle customer interaction and trigger the Klarna purchase flow via the initiate function.
